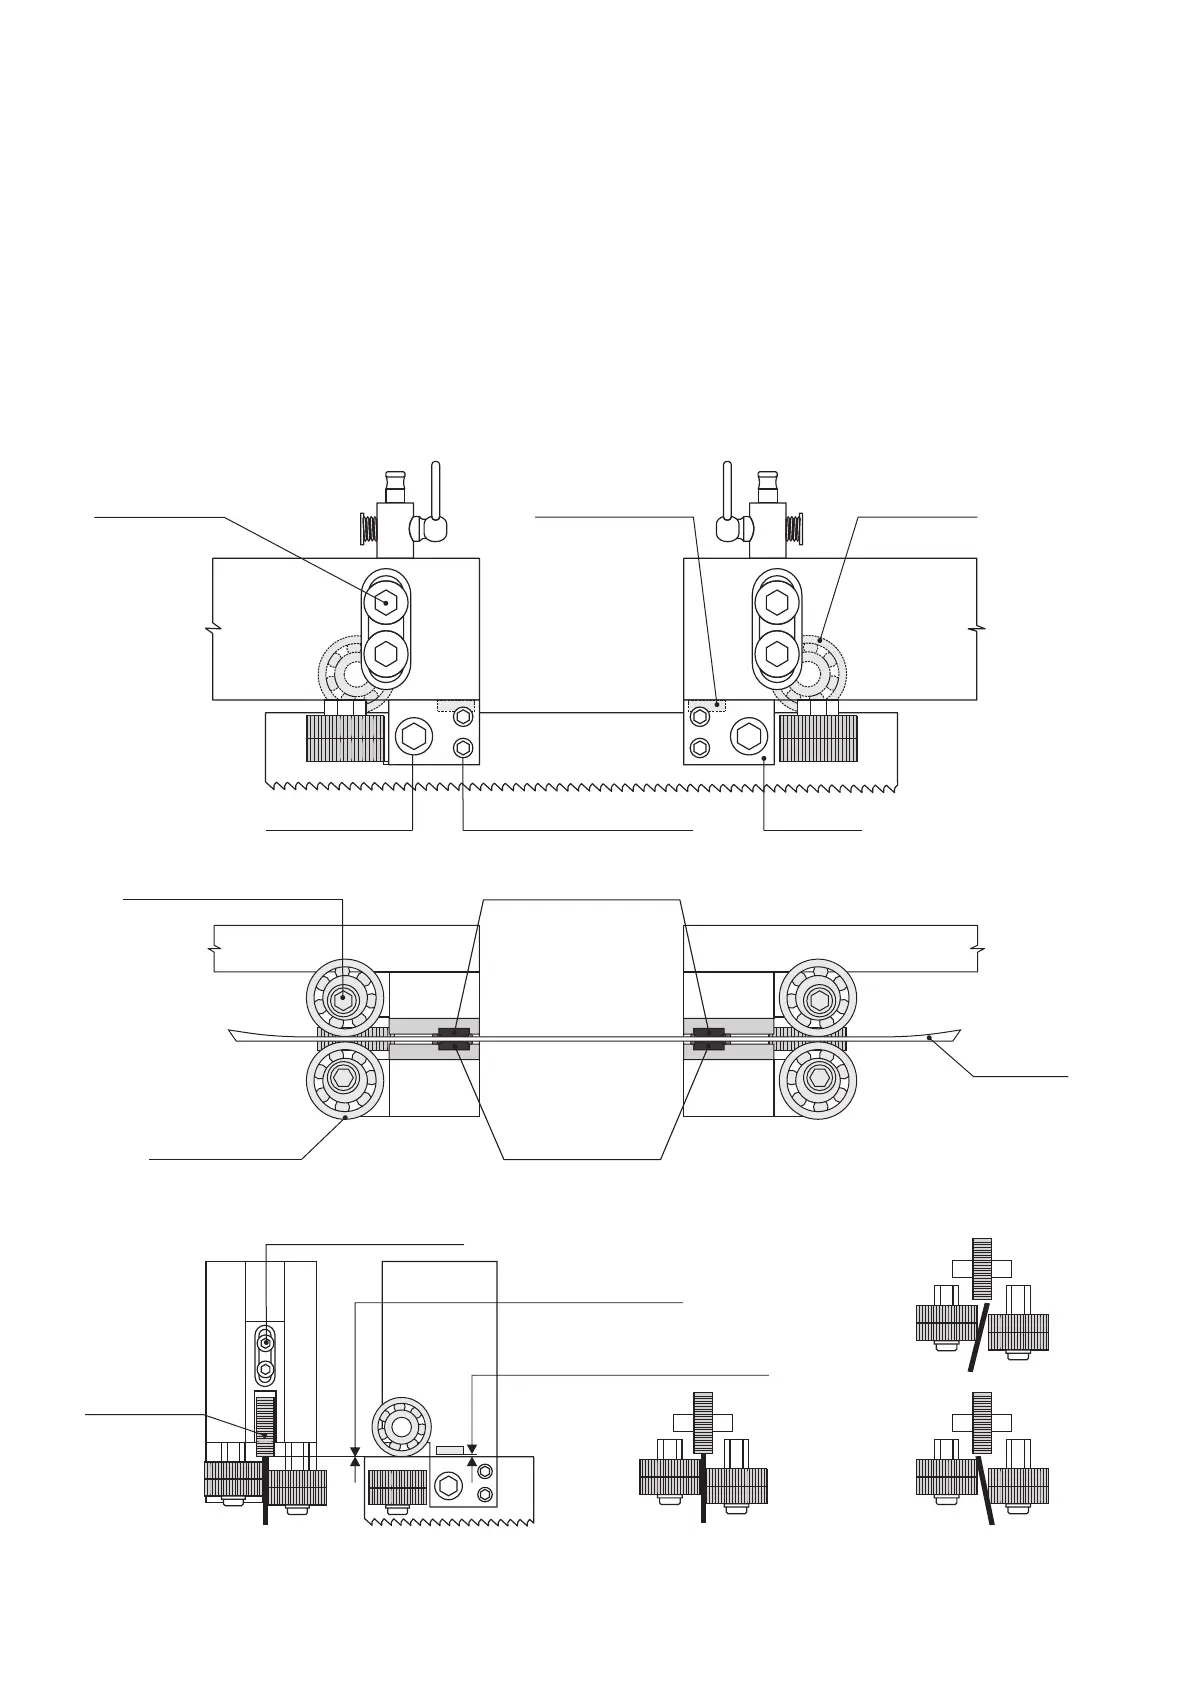
Incorrect saw blade guidance
Correct saw blade guidance
to center between guide bearings
No play between
the bearing and the blade
The play between the blade and upper
hardened steel blade guide: 0,3-1 mm
UPPER BEARING
UPPER BEARING
HEIGHT ADJUSTING SCREW
GUIDE HEAD
ECCENTRIC BEARING SCREW
ECCENTRICALLY
ARRANGED BEARINGS
SAW BLADE
FIXED HARDENED
STEEL BLADE GUIDES
GUIDE HEAD SCREW
HARDENED STEEL BLADE
GUIDES WIDTH ADJUSTING SCREW
HARDENED STEEL
BLADE GUIDE SCREW
MOVABLE HARDENED
STEEL BLADE GUIDES
FIXED HARDENED
STEEL BLADE GUIDES
UPPER BEARING
All types except for ARG 330 F
You can achieve the correct guide head height in relation to the saw blade by lifting the guide heads, so that the upper hardened steel
guide in the guide head is about 0.5-1 mm from the upper edge of the saw blade. See the picture. In this way, the correct guide head
height towards the guide bars is achieved.
ARG 330 F band saw
You can achieve the correct height of guide head in relation to the saw blade using the screws to set the upper bearing by 0.3-1 mm
closer to the saw blade than the hardened steel blade guides. In this case, there will be no clearance between the upper bearing and
the blade edge and the bearing will be carried along by the blade.
Set the guide heads perpendicular to the bars and tighten them. If you fail to achieve perpendicularity, the saw blade will either keep
sliding off or running into the wheels. Install the protective covers of the saw blade and close the back cover of the arm. Turn on the
MAIN SWITCH or connect the machine to the mains. Carry out a saw blade trial run. Switch off the MAIN SWITCH or disconnect the
machine from the mains and secure it against restarting. Remove the protective covers of the saw blade and open/remove the back
cover of the arm. Check the placement of the saw blade on the wheels and in guide heads. Make a correction, if necessary - see
section 4.7.. Install the protective covers of the blade, close the back cover of the arm and turn on the MAIN SWITCH or connect the
machine to the mains. Carry out the cutting. You can watch the video with instructions on www.pilous.cz.