Standard encrypted network
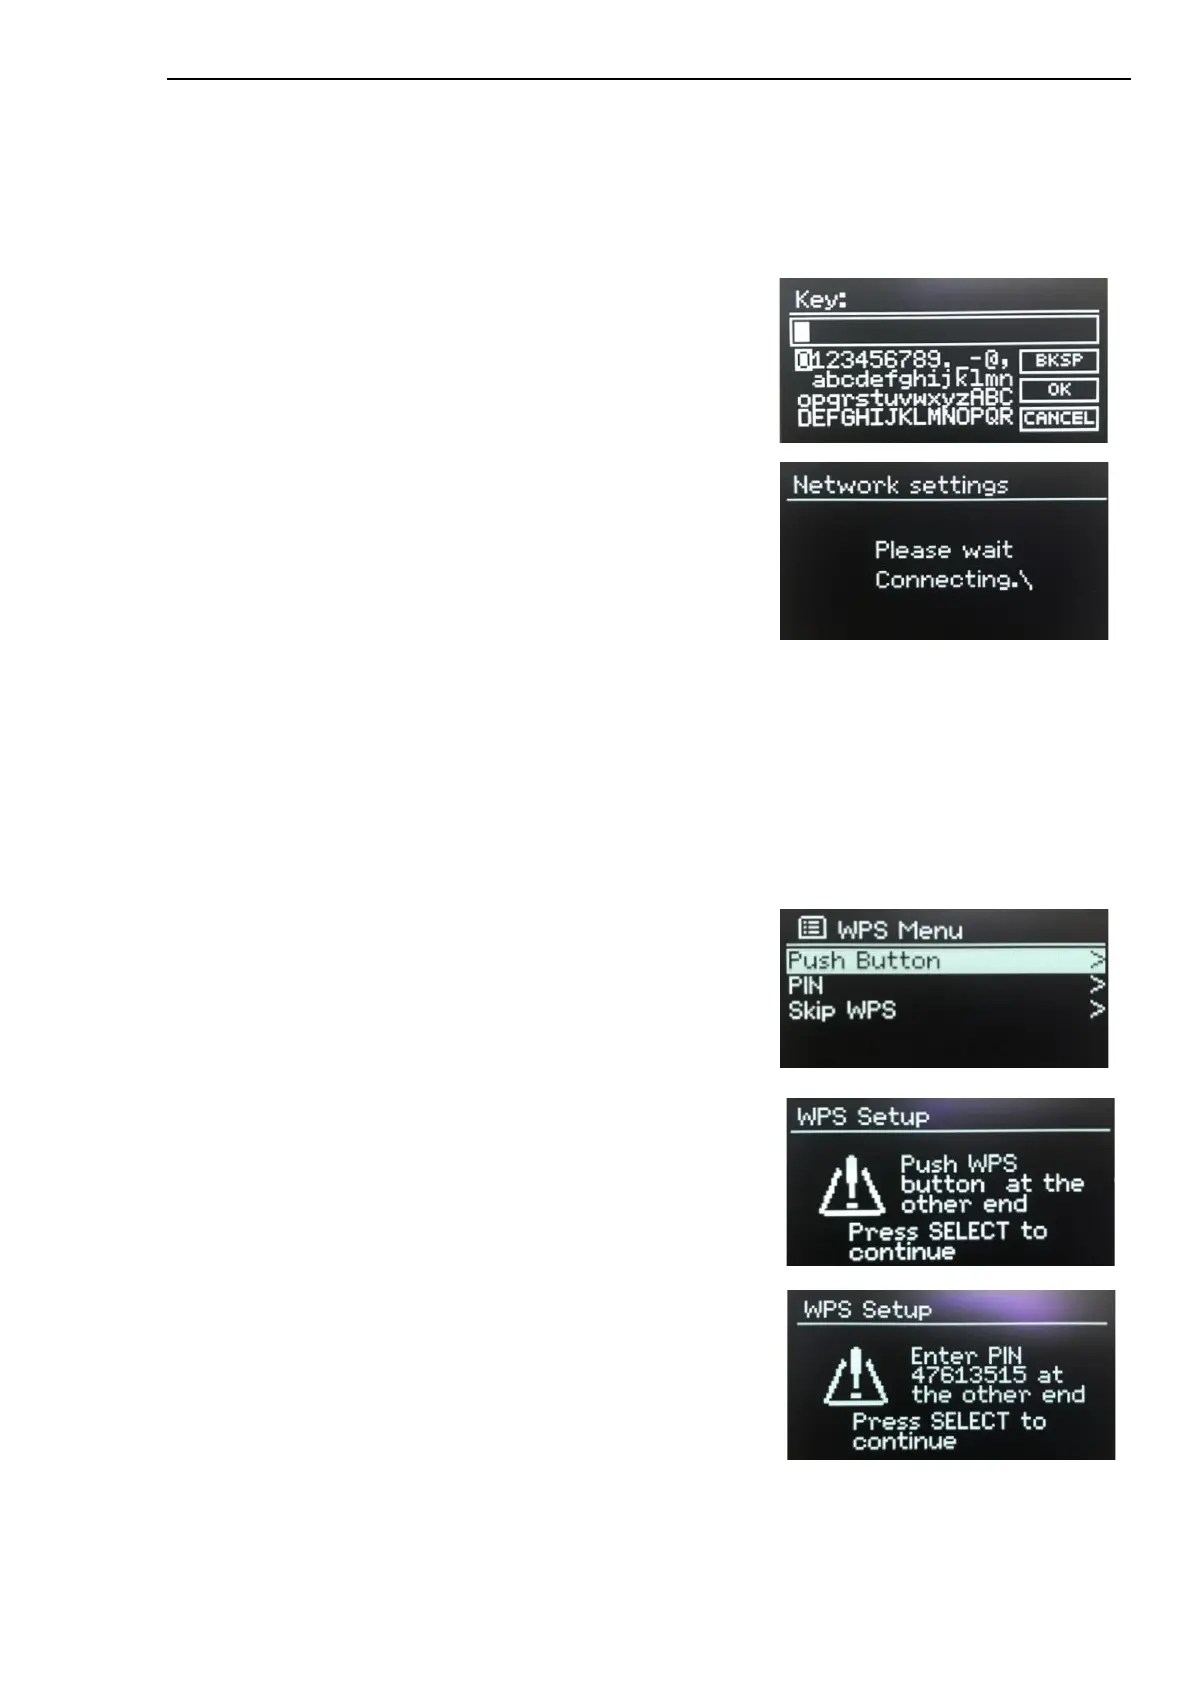
If the wireless network is protected the next screen presents options to enter the network key or
passphrase.
Note: The default passphrase for most wireless routers is printed on a label on the router.
Enter the network key (passphrase), use the SELECT control to
highlight the next relevant character and press to select each
character in turn.
On completion
Pinell north connects to the selected network.
If connecting fails, Pinell north returns to a previous screen to try
again. Press MENU to exit the process.
If the network connection is lost, Pinell north automatically
reconnects.
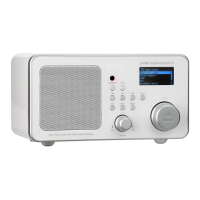
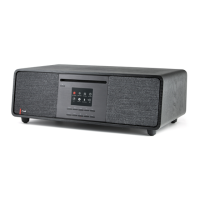
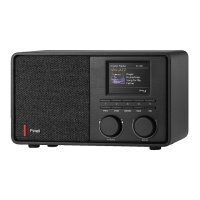
WPS setup (Wi-Fi Protected Setup)
WPS encrypted networks are identified by ‘[WPS]’ at the start of the network name and have two methods
of connection. Select one and follow the prompts. When using the network wizard an additional option to
Skip WPS is available.
•
Push Button >
Pinell north prompts you to press the connect button on
the router and then press SELECT.
•
PIN > (code number)
Pinell north generates an 8-digit code number which you
enter into the wireless router, access point.
•
Skip WPS >
Enter key as for a standard encrypted network, above.
Pinell north connects to the network, see ‘On completion’
above.
For more information on setting up a WPS encrypted
network, see your WPS router’s instructions.