MACHINE PREPARATION
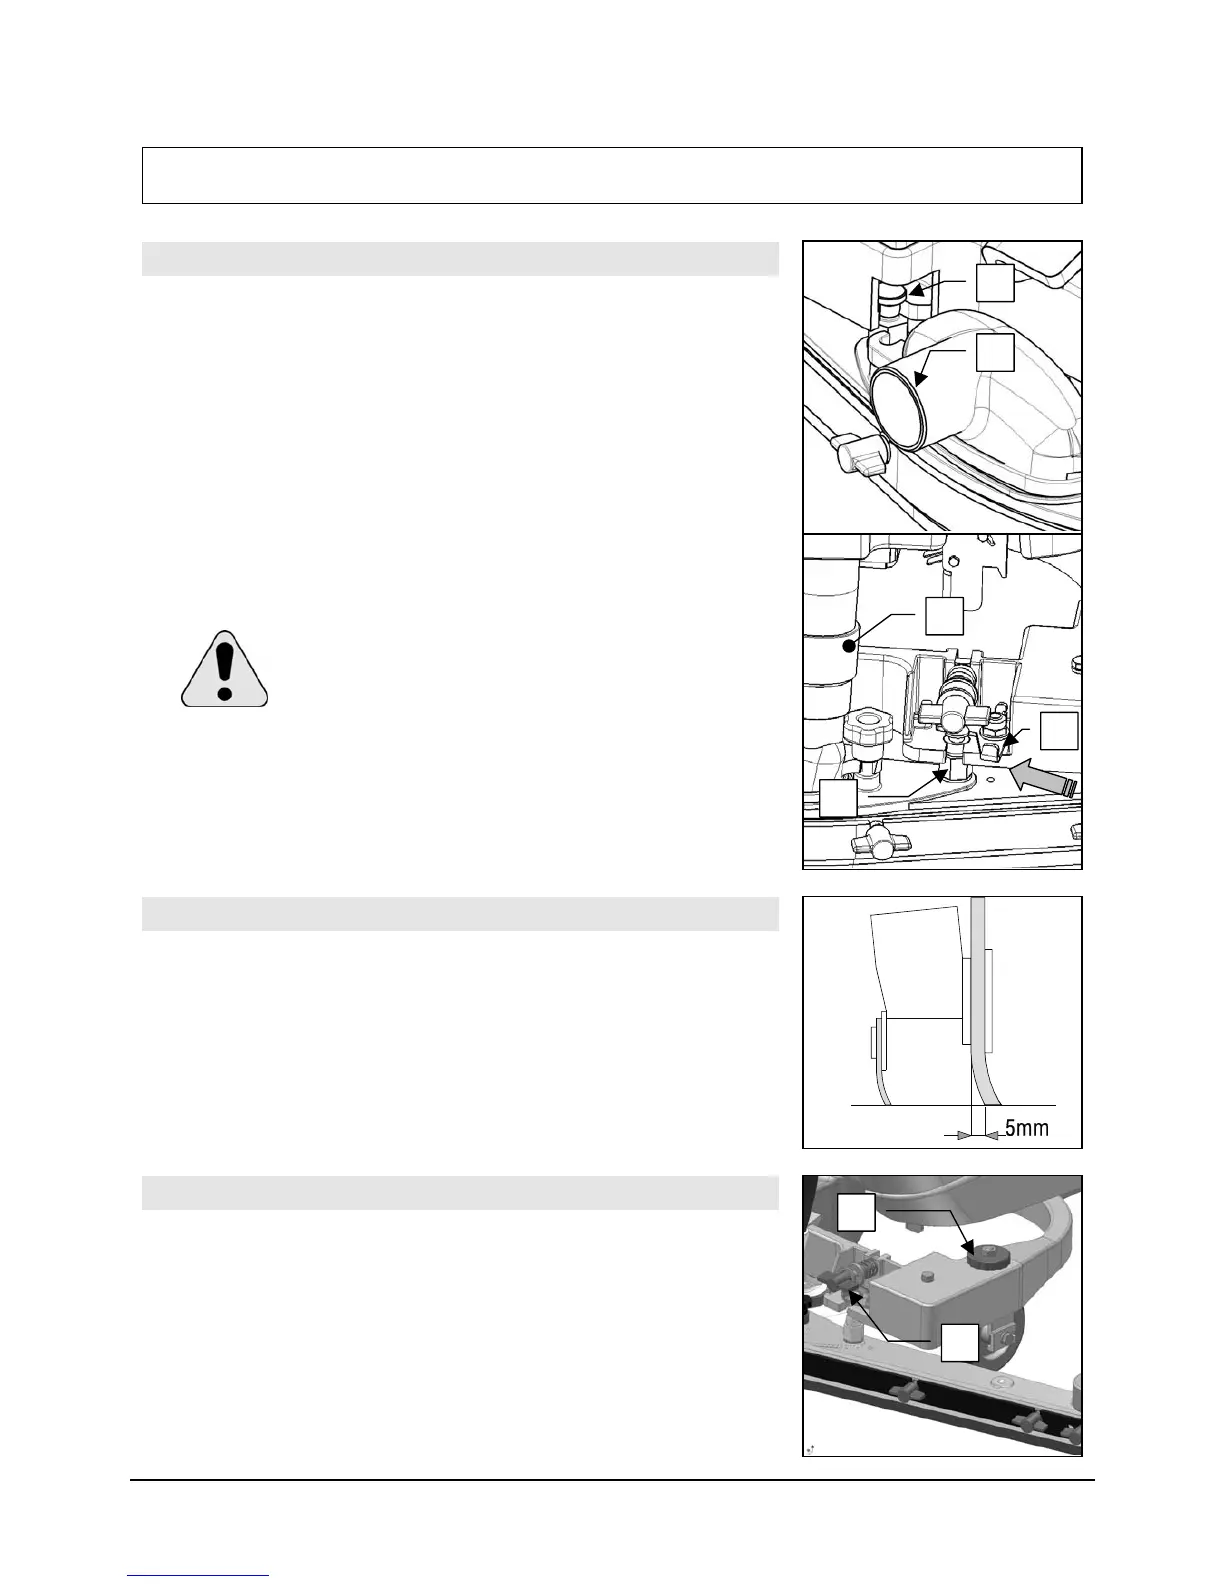
15. ASSEMBLING THE SQUEEGEE
For packaging reasons, the squeegee is supplied disassembled from the machine,
raise the squeegee
en:
lumn (1) in the connection hole.
mn (3) in the connection hole.
s blocked in the flat housing of the small column.
), ensuring that
ight of the lifting cable.
and must be assembled on the machine connection. You must
connection using the lever or key (AU version), th
1. Raise the squeegee and insert the small left-hand co
2. Push the connection lever (2) to the left.
3. Raise the squeegee and insert the small right-hand colu
4. Release the connection lever (2) so it i
5. Insert the suction tube (4) in the appropriate squeegee sleeve (5
the tube lies to the r
protective gloves to avoid any
ATTENTION: These operations must be carried out using
possible contact with the edges or
tips of metal objects.
16. ADJUSTING THE SQUEEGEE INCLINATION
tly backwards (by about 5mm)
y for its whole length. If it is necessary to increase the bend of the
ou must tilt the squeegee backwards, rotating the
o increase the bend of the rubber at the sides of the
squeegee, rotate the set screw clockwise.
During working operation, the rear rubber is tilted sligh
in a uniform wa
rubber in the central part, y
adjuster (1) anticlockwise. T
17. ADJUSTING THE SQUEEGEE HEIGHT
The height of the squeegee must be adjusted on the basis of the state of wear and
e knob (2) anticlockwise to raise the squeegee,
Remarks: The right and left wheels must be adjusted to the same level, so the
squeegee can work parallel to the floor.
tear of the rubber. To do this, turn th
and clockwise to lower it.
2
1
1
5
2
3
4
12