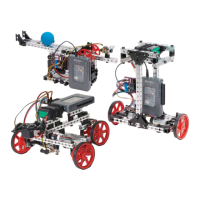
Step 2: Insert the motor board into myRIO MXP A, plug the battery cable into the battery, and plug the DC connector into
the myRIO power port to power it on. Allow myRIO about 30 seconds to boot.
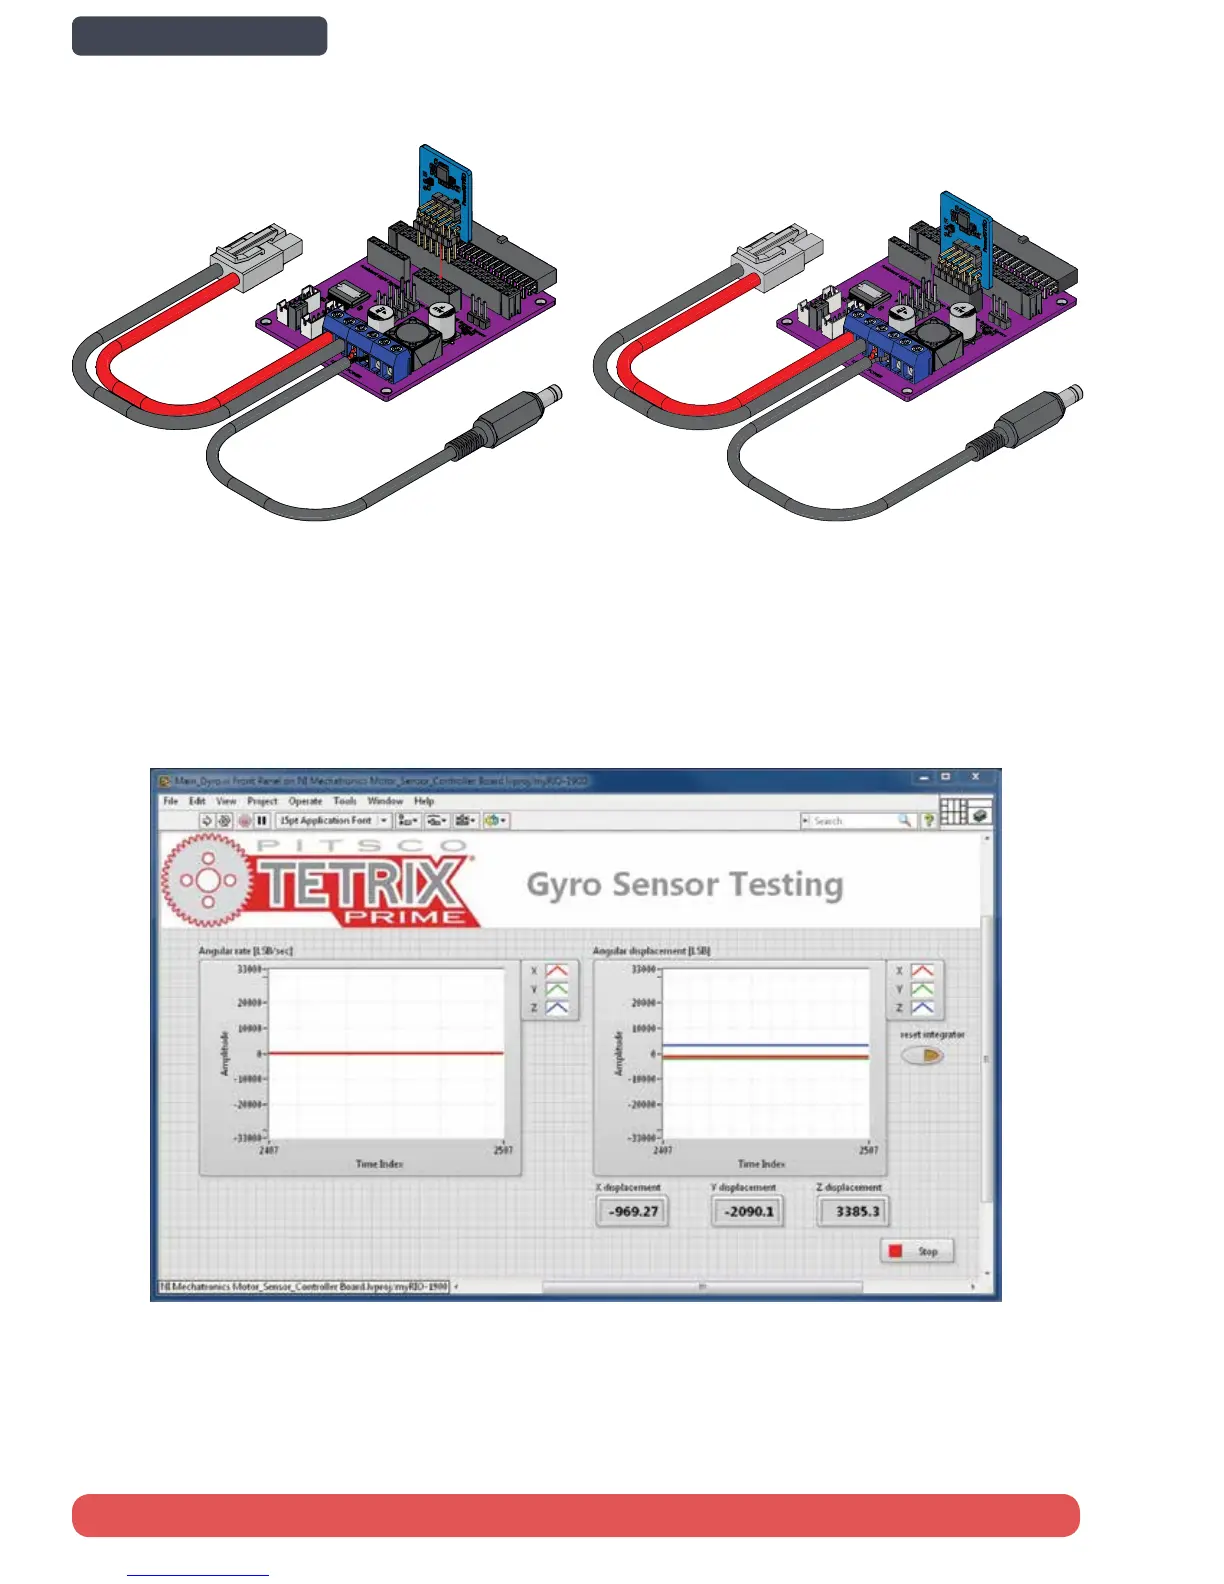
Step 3: After completing the LabVIEW and myRIO Setup instructions, navigate to “…\Desktop\National Instruments\Pitsco
Tetrix Prime for NI myRIO\Test Code” and open “Control System Test Project.” Connect to myRIO by right clicking myRIO-
1900 and clicking connect. Allow a few moments to connect. Expand the myRIO dropdown, and navigate to “Testing Your
System > Main_Gyro.vi.” Feel free to explore the code on the block diagram by pressing Ctrl + E, and then press Ctrl + E
again to return to the front panel.
Step 4: Run the VI by pressing the arrow in the left hand corner. Move the hardware in all different directions to confirm
that the angular rates for each axis change depending on the direction of motion. Continue moving the hardware to
confirm that the angular displacement for each axis changes depending on the orientation of the hardware. Stop moving
the hardware to confirm that the angular rates return to zero and that the angular displacement values stop changing.
Stop the VI using the stop button, and close the VI.
Set Up and Test the Gyroscope Sensor
Step 1: Connect the ambient light sensor to the motor controller board
48 Control System Set Up and Testing
Back to Contents page