Section 2. Installing the PX-230A Internal ATAPI Drive
28 PX-230A Installation and Users Manual
6. Locate a free connector on your computer’s IDE ribbon cable, and
plug it into the IDE connector on the rear panel of the Plextor drive.
If possible, plug the ribbon cable into the drive before you insert the
drive into your computer. Then thread the cable through the front of
the open bay and back toward the motherboard. The drive should
slide smoothly into the bay. If it does not, check for obstructions in
the bay and ensure the side rails are attached properly.
7. If not already connected, attach the other end of the IDE ribbon cable
to the connector on the motherboard.
Figure 15: Connect one end of the IDE cable to the motherboard and
the other end to the drive. If your Plextor drive is the only device on
the cable, attach it at the end of the cable, leaving the
center connector free.
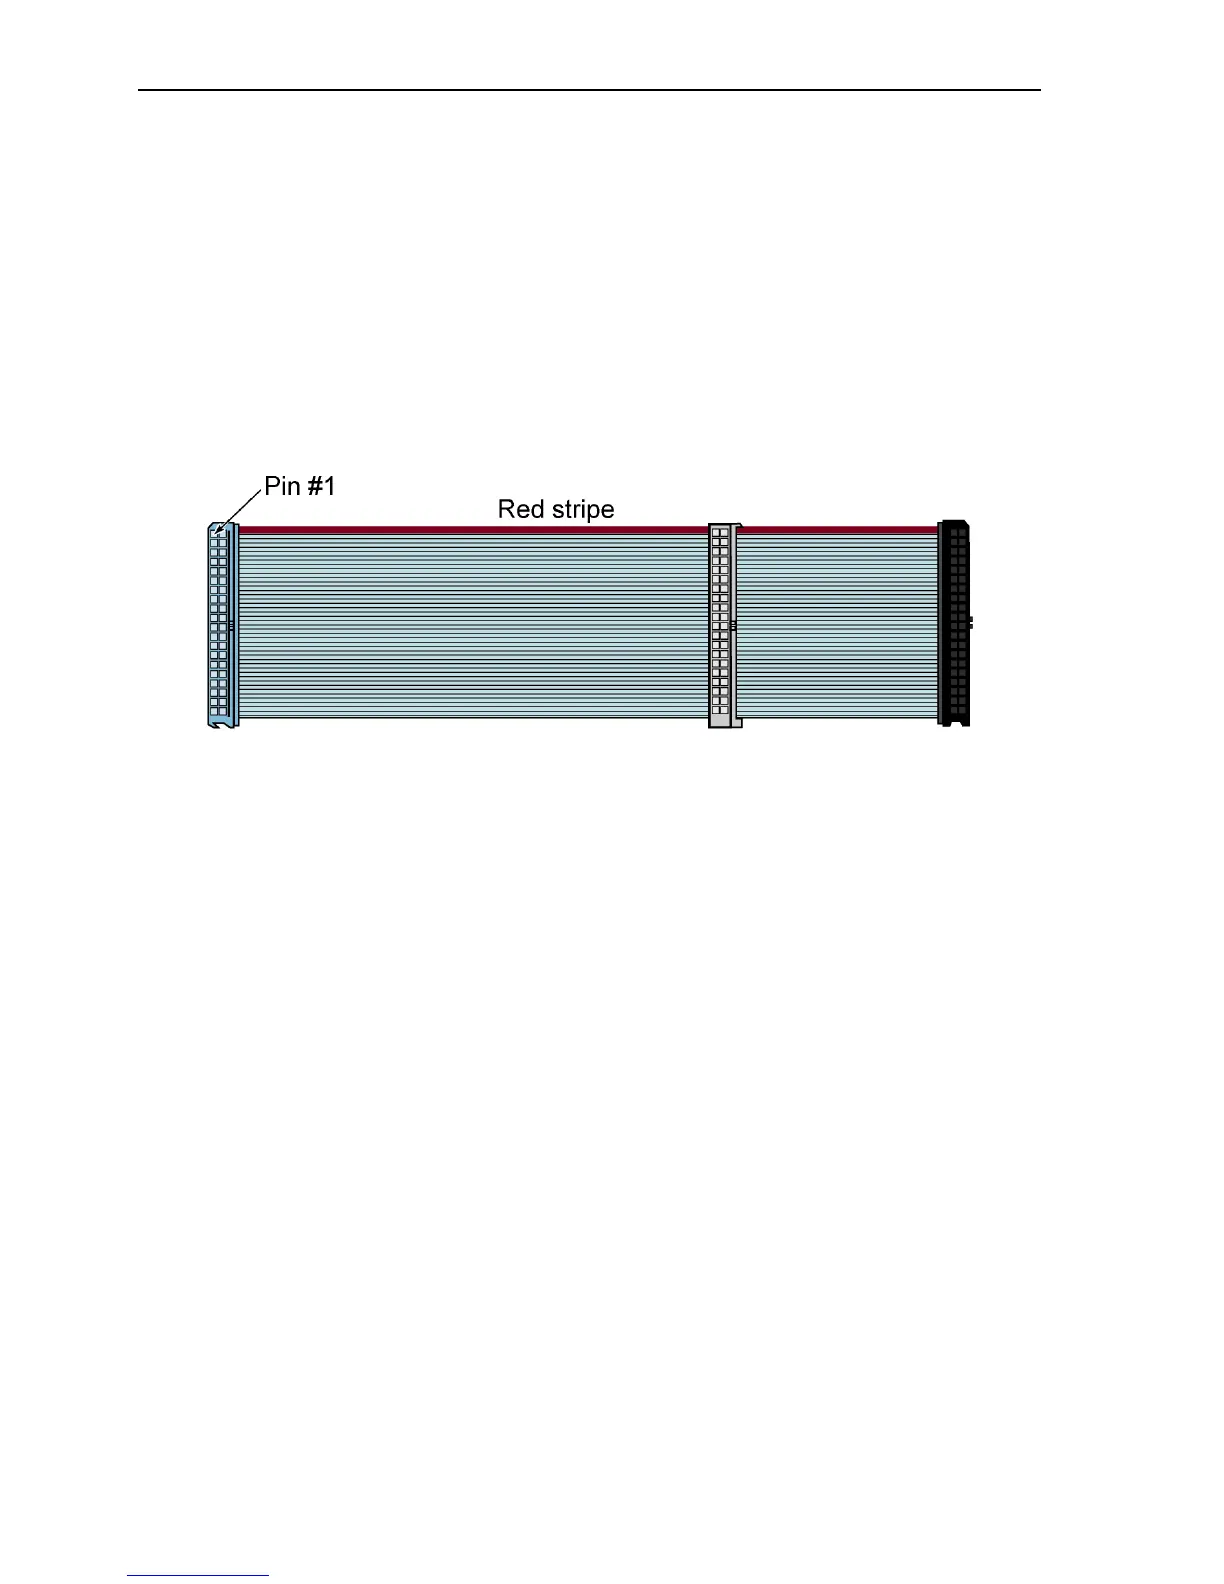
CAUTION: With some IDE ribbon cables, it is easy to accidentally
plug your IDE cable upside down into both your drive and the
motherboard. Be sure you match the red stripe along one side of the
IDE cable to Pin 1 on the motherboard and Pin 1 on the drive. (Pin 1
on the drive is closest to the power connector.) Note that each
connector on most ribbon cables also has a “key” in the middle. This
key should fit into a slot in the middle of each connector of the
motherboard, your PX-230A drive, and any other internal IDE
peripherals.
8. Double-check your work. You must ensure the side of the IDE cable
with the red stripe is matched to Pin 1 on the interface board and on
the drive.