22 23
EN – Installation and operation guide SIMPLE MOVE 102
EN – Installation and operation guide SIMPLE MOVE 102
EN
EN
1.5 Drive wiring
For safety reasons, these activities must be carried out only with the power supply disconnected.
By default, the drive is wired for installation on the leſt -hand side of the gate (looking from inside).
In order to install the drive on right hand side of the gate, interchange the cables connected to terminals
9 and 10 of the electronic control system (green label M1).
Brown
Blue
Drive on leſt hand side
View from inside
Drive on right hand side
View from inside
Do not connect any cable to terminal M2.
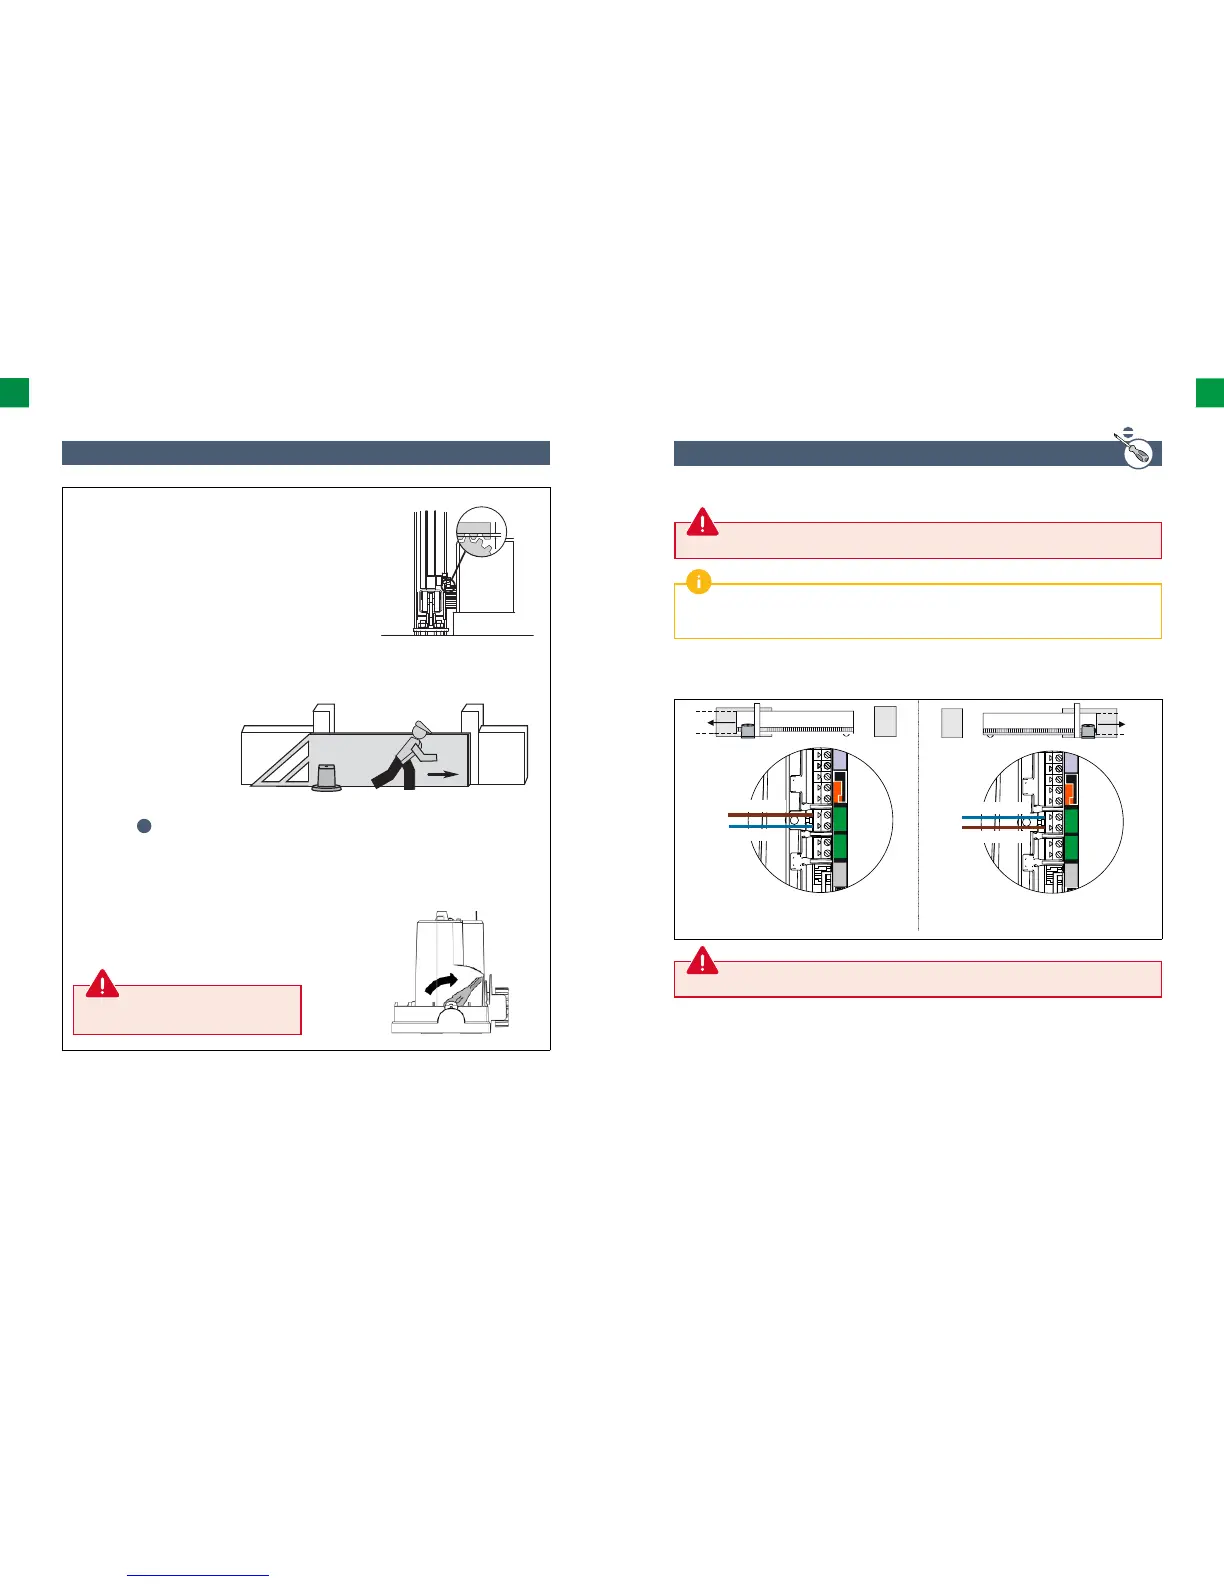
1.4 Mechanical adjustment
Never lock the drive when the gate is in motion.
2 mm
Adjust the height of the drive and/or the toothed
bar in order to obtain a clearance of approx. 2 mm
between the bar and the gear wheel. This setting
is important because it helps to avoid premature
wear of the gear wheel and the toothed bar; the
gear wheel should not bear the weight of the gate.
Check whether:
• the drive unit is located at the correct height;
• the gate moves properly: the gate should
move without diffi culty along its track;
• the gear wheel is driven all the time
when the gate moves along its track;
• the set consisting of the
toothed bar and the gear
wheel does not change its
position substantially along
the entire length of the gate
track.
If these conditions are not met:
1. Adjust the height and set the
drive at a suitable level using
the 4 nuts
n
located under the drive.
2. If necessary, adjust the position of the toothed
bar and tighten up the drive nuts.
3. Close the gate.
4. Lock the drive.