6.21
Drive and Brake Systems
6
9923396 - 2007-2012 EDGE/Widetrak LX Service Manual
©2011 Polaris Sales Inc.
Brake Hose Replacement
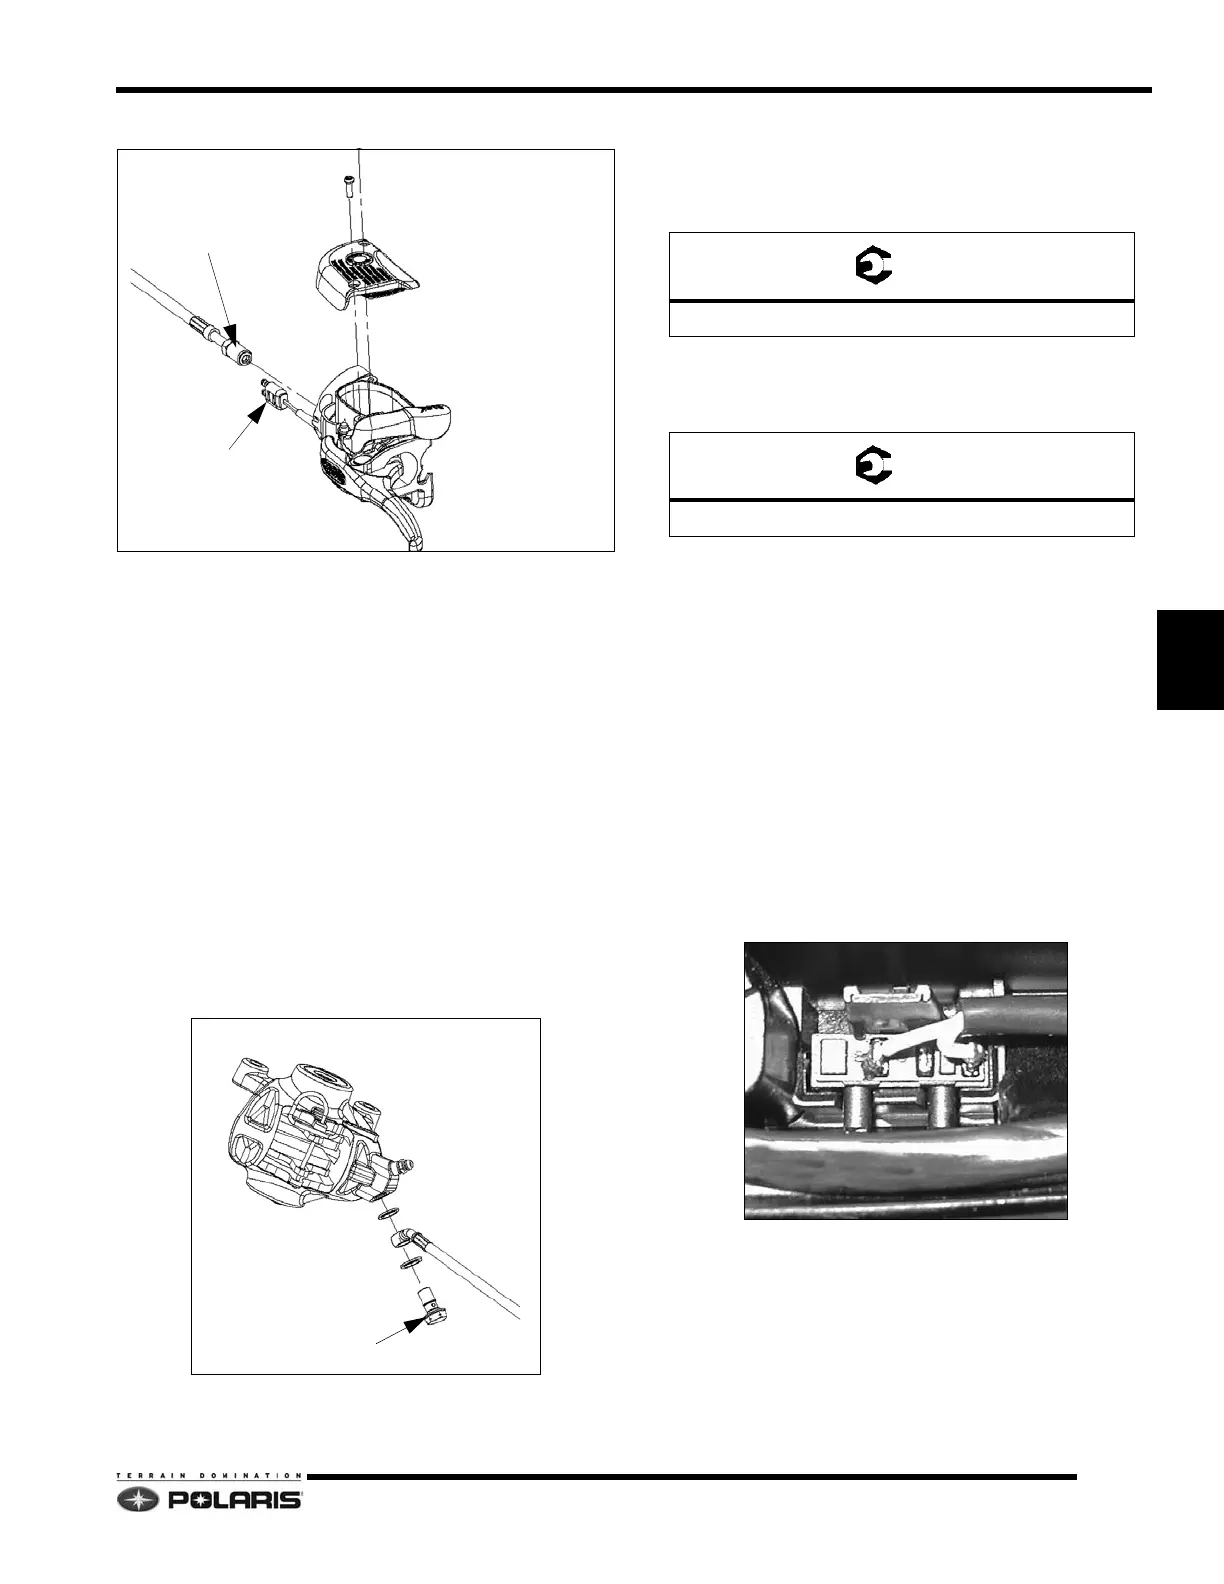
1. Attach a clear flexible hose to the caliper bleeder
screw. Place the other end of the hose in a jar or
suitable container.
2. Clean any dirt from the master cylinder cover.
Remove the cover from the master cylinder.
3. Open the caliper bleeder screw. Actuate the brake
lever and pump the brake fluid into the jar.
4. Note the orientation and routing of the brake hose.
The brake hose must be replaced following the same
routing and in the same orientation.
5. Remove the brake hose from the caliper. Cap or cover
the end to catch any brake fluid that may still be in the
line.
6. Loosen the brake line from the master cylinder 1/4 to
1/2 turn.
7. Remove the 4 screws that hold the master cylinder to
the handlebar. This will separate the master cylinder
from the switch pack.
8. Unplug the brake light switch harness from the master
cylinder.
9. Remove the brake hose from the master cylinder.
10. Install new brake hose on caliper and route/orientate
it as noted in step 4.
11. Torque the caliper banjo bolt to 168-216 in-lb (19-24
N-m).
12. Insert the new brake hose and install into the master
cylinder. Torque the brake line to 144-192 in-lb
(16-21 N-m).
13. Tighten the brake line into the master cylinder in an
orientation so that the line does not have any sharp
bends when it is installed on the handlebar.
14. Route the brake light switch in the harness correctly.
15. Place the switch pack with the master cylinder onto
the handle bar. Two smaller screws should be placed
on the top and the longest screw is placed on the lower
right.
16. Follow the bleeding procedure. See “Brake Fluid
Replacement & Bleeding” on page 6.20.
Brake Light Switch Replacement
1. Remove the 4 screws that hold the master cylinder to
the handlebar. This will separate the master cylinder
from the switch pack.
2. Unplug the brake light switch harness from the master
cylinder.
3. Unplug the brake light switch from the master cylinder.
4. Replace faulty brake light switch into the master
cylinder and route wires correctly.
5. Plug the brake switch back into the harness.
6. Replace the master cylinder to the switch pack and
insert the smaller screws on the top, the longest one
goes into the lower right side.
144-192 in-lb (16-22\N-m)
brake light switch
168-216in-lb (18.9-24.4 N-m)
Caliper Banjo Bolt: 168-216 in-lb (18-24 N-m)
Brake Line: 144-192 in-lb (16-22 N-m)

 Loading...