Do you have a question about the Polycom VVX 600 series and is the answer not in the manual?
Steps to access and use the phone's local directory to find and call contacts.
Explains how to place an active call on hold and then resume it.
Guide on how to adjust ringer, speaker, and handset volumes using the phone controls.
Method for transferring calls without checking the availability of the recipient.
How to separate an active conference call into individual calls.
How to use the intercom feature to make quick calls to other users.
Details on managing call history within the recent calls list.
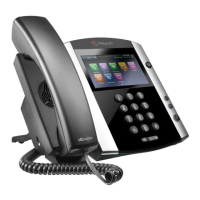
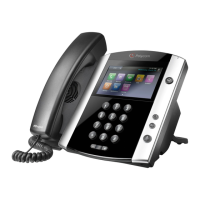
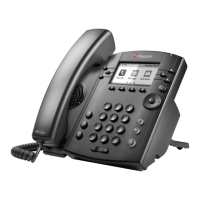
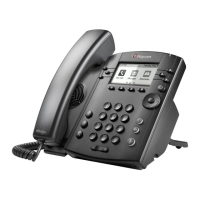
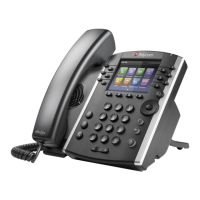
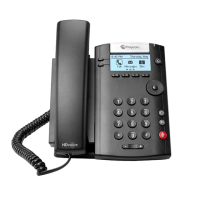
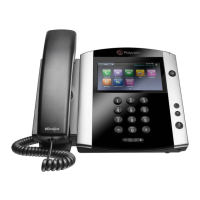
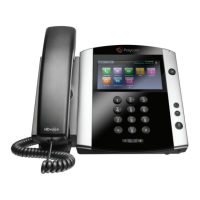
The Polycom VVX 600 Series is a sophisticated IP phone designed for business use, offering a range of features to enhance communication and productivity. This phone is characterized by its large, intuitive touch screen, which serves as the primary interface for accessing most functions. Unlike traditional phones with numerous physical buttons, the VVX 600 Series relies on on-screen icons, making navigation streamlined and user-friendly.
The core function of the Polycom VVX 600 Series is to facilitate voice communication over an internet protocol network. It supports standard calling features, including placing and ending calls, managing a local directory, and handling missed or received calls. Beyond basic telephony, the device integrates advanced communication tools such as call holding, resuming calls, answering incoming calls, and adjusting call volume. For more complex call management, it offers Do Not Disturb (DND) functionality, blind (unattended) and warm (attended) transfers, 3-way conferencing, and the ability to split a 3-way conference call. Call waiting, voicemail access, and intercom features further expand its communication capabilities. The phone also supports enhanced call park, USB call recording, and the customization of USB background images, adding layers of utility and personalization.
Main Screen Views: When the phone is in a ready state, the touch screen displays essential information such as the Message Center button, Bluetooth radio status (if enabled), Recent Calls button, current date and time, and your telephone number. All features are accessed by pressing icons directly on the screen. The Home button provides access to additional screen options.
Placing a Call: Calls can be placed by picking up the handset and dialing a number on the keypad, or by using the headset or speakerphone buttons. Alternatively, users can select a number from a displayed list, scroll through older numbers, and then press the green button to initiate the call. The red button returns the user to the home screen. Numbers can also be chosen from the Dialpad, Directory, Recent, or Favorites lists.
Placing and Ending a Call: From the home screen, pressing the Home hard button displays the main interface. Users then select the "New Call" icon. A number can be dialed on the keypad or chosen from a list, followed by pressing the green phone button to start the call. To end a call, simply tap the "End Call" button on the screen.
Local Directory: Accessing the local directory involves selecting the "Home" key from the home screen, then choosing the "Directory" menu. Users can select any contact from the directory or use a search filter. Once a contact entry is on the screen, selecting the extension connects the call. To end the call, press the "End Call" key.
Missed Call/Last Call Received: A balloon icon indicates missed calls. Tapping the lists button brings up the recent call list. Tapping the LCR (Last Call Received) button provides an automated call response describing the last received call and an option to return it. The shortcut *69 can also be used. Tapping the first number on the list returns the missed call.
Hold and Resume: During an active call, tapping the "Hold" soft key places the call on hold, indicated by a red "H" on the screen. To return to the caller, tap the "Resume" soft key.
Answering an Incoming Call: Users have multiple options: lift the handset, tap the "Answer" soft key, press the Headset button, or press the Speaker Phone button. Additional actions include rejecting the call, forwarding it, or ignoring it.
Adjusting Volume: Ringer volume can be adjusted when the phone is on hook. Speaker volume is adjusted after activating the speaker button. Handset volume is adjusted when the handset is off hook. The Mute button silences the phone during a call.
Do Not Disturb (DND): Tapping the "DND" soft key or the DND icon from the Home screen enables this feature. When DND is active, callers receive a message stating that the person is not accepting calls and are disconnected. The DND icon appears at the top left of the screen. Tapping the DND soft key a second time removes DND.
Blind (Unattended) Transfer: To perform a blind transfer during a live call, press and hold the "Transfer" soft key. In the Blind Transfer screen, type the extension or full 10-digit number, then select "Send" or wait 5 seconds for automatic dialing. If the transfer recipient doesn't answer, users can select "Cancel" to retrieve the call.
Warm (Attended) Transfer: This allows confirmation of the recipient's availability before transferring. During a live call, press and hold the "Transfer" soft key. Select "Consultative" from the transfer options. Enter the extension or 10-digit number, or use the directory, recent, or favorites lists. Once the recipient confirms availability, press the "Transfer" soft key to complete. If the recipient is unavailable, select "Cancel" to get the call back.
3 Way Conferencing: While on a call, tap the "Confrnc" soft key, which places the current caller on hold. Type the extension or 10-digit number of the person to add, or scroll to their number and tap the green phone icon to connect. Tap the "Send" soft key again to connect. Once the second person answers, press the "Confrnc" key a second time to bring all callers into the conference. The screen will show an active conference.
Split a 3 Way Conference Call: Tap the "Split" soft key during an active conference call. Both lines will go on hold. Choose which line to talk to by tapping the number on the screen, then press "Resume." The other line remains on hold until hung up or brought back into a single call.
Call Waiting: When on a call and a second call comes in, tap the "Answer" soft key to place the first call on hold and answer the new one. The new caller can then be placed on hold by pressing the "Hold" soft key. To return to the original call, tap its number on the list and press "Resume." To end the current call, press "End Call."
Accessing Voicemail: Press the Messaging icon on the main screen or Home screen (a bubble with a number indicates new messages). Select "Message Center." Press the message type (urgent, new, or old) and then the "Connect" soft key. Follow the prompts, which include options for recording names, personal greetings, sending messages, accessing settings, and retrieving deleted messages.
Intercom: After pressing the home button, tap the "Intercom" soft key. Choose the number or enter it on the keypad, then press the green phone icon. A quick beep indicates connection, allowing two-way speakerphone communication. Tap "End Call" to finish.
Call List: Press the "Call List" key and select the desired option. The Call List offers Dialpad (to dial a selected entry), Directory (for more contact info), Recent (shows missed, received, and placed calls), and Favorites (frequently called contacts).
Call List - Recent: In the Recent list, call history can be managed. Calls can be sorted by time or name, ascending or descending. Calls can also be sorted by type (All Calls, Missed Calls, Received Calls, Placed Calls). There is also an option to clear calls from the list.
Enhanced Call Park: First, identify the Call Park key and its assigned orbit. While on a call, press the "Home" key, then select the "Park" key to place the caller on Park. When a Park orbit is not in use, the key will not display light, and a user icon will be shown. Once a call is parked, all phones subscribed to the same Park orbit will update with an off-hook icon and a flashing green light on the key. To retrieve the parked call, simply select the "Park" soft key.
USB Call Recording: USB flash drives with less than 32GB are compatible (due to FAT32 partition format). Recordings are saved as .wav files, with a bit rate of 256 kbps and a file size of 1.8MB per minute. USB memory sticks must be formatted to FAT32. To format, navigate to the USB drive in Windows (My Computer), right-click, select "Format," confirm "FAT32 (Default)" as the file system, and click "Start."
To activate call recording, log in to the Business Comm Portal, go to Settings, then "Device Settings," and change "Local USB Call Recording" from "No" to "Yes." The VVX 600 series phones have two USB ports, but the USB flash drive must be placed in the "rear back" port. Once detected, a USB icon appears on the phone, which, when selected, shows storage size. Storage can also be viewed by navigating to HOME-SETTINGS-FEATURES-STORAGE MEDIA PROPERTIES. During an active call, a "Record" soft key appears. In the "Record" menu, users can start recording or return to the normal call menu. While recording, options include "Stop," "Pause," and "Back" to the previous menu.
USB Background Images: USB flash drives with less than 32GB are compatible (due to FAT32 partition format). The optimal background image size for VVX600/601 is 480 x 272 pixels. Compatible file extensions are JPEG, BMP, and PNG. Images larger than the optimal size will be cropped, while smaller images will be centered with black space. It's recommended to resize images to the correct pixel size for optimal display. To resize an image using Windows, open it in MS Paint, click "resize," uncheck "Maintain aspect ratio," select "Pixels," and set dimensions to "480x272." Save the edited file to the USB stick.
To locate the "Background image" setting, navigate to Home-Settings-Basic-Preferences-Background. From the "Background" menu, select "Local File" from the USB stick. To remove a custom background image, select "Default."
USB Background Images (Picture Frame): To access this feature, navigate to Home-Settings-Features-Removable Storage Media-Picture Frame. This view provides a "Picture Gallery." Buttons allow users to "Play/Pause" a slideshow of images from the USB stick. This menu also allows closing the "Picture Frame" and setting the current image as the "Background" image.
| Audio | HD Voice |
|---|---|
| HD Audio | Yes |
| Wireless | No |
| Video Support | No |
| SIP Compliance | Yes |
| Connectivity | USB |
| Power | Power over Ethernet (PoE) or AC adapter |
| Audio Codecs | G.711, G.729A, G.722, iLBC |
| Speakerphone | Yes |
| Supported Codecs | G.711, G.722, iLBC |
| Network Interfaces | 10/100/1000 Ethernet |
| Power over Ethernet | IEEE 802.3af Class 4 |
| Headset Port | Yes |
| Security | 802.1X |
| Weight | 0.9 kg |
| Headset Connectivity | Dedicated RJ-9 headset port, Bluetooth headset support |
| Dimensions | 19 x 15 x 18 cm |