13
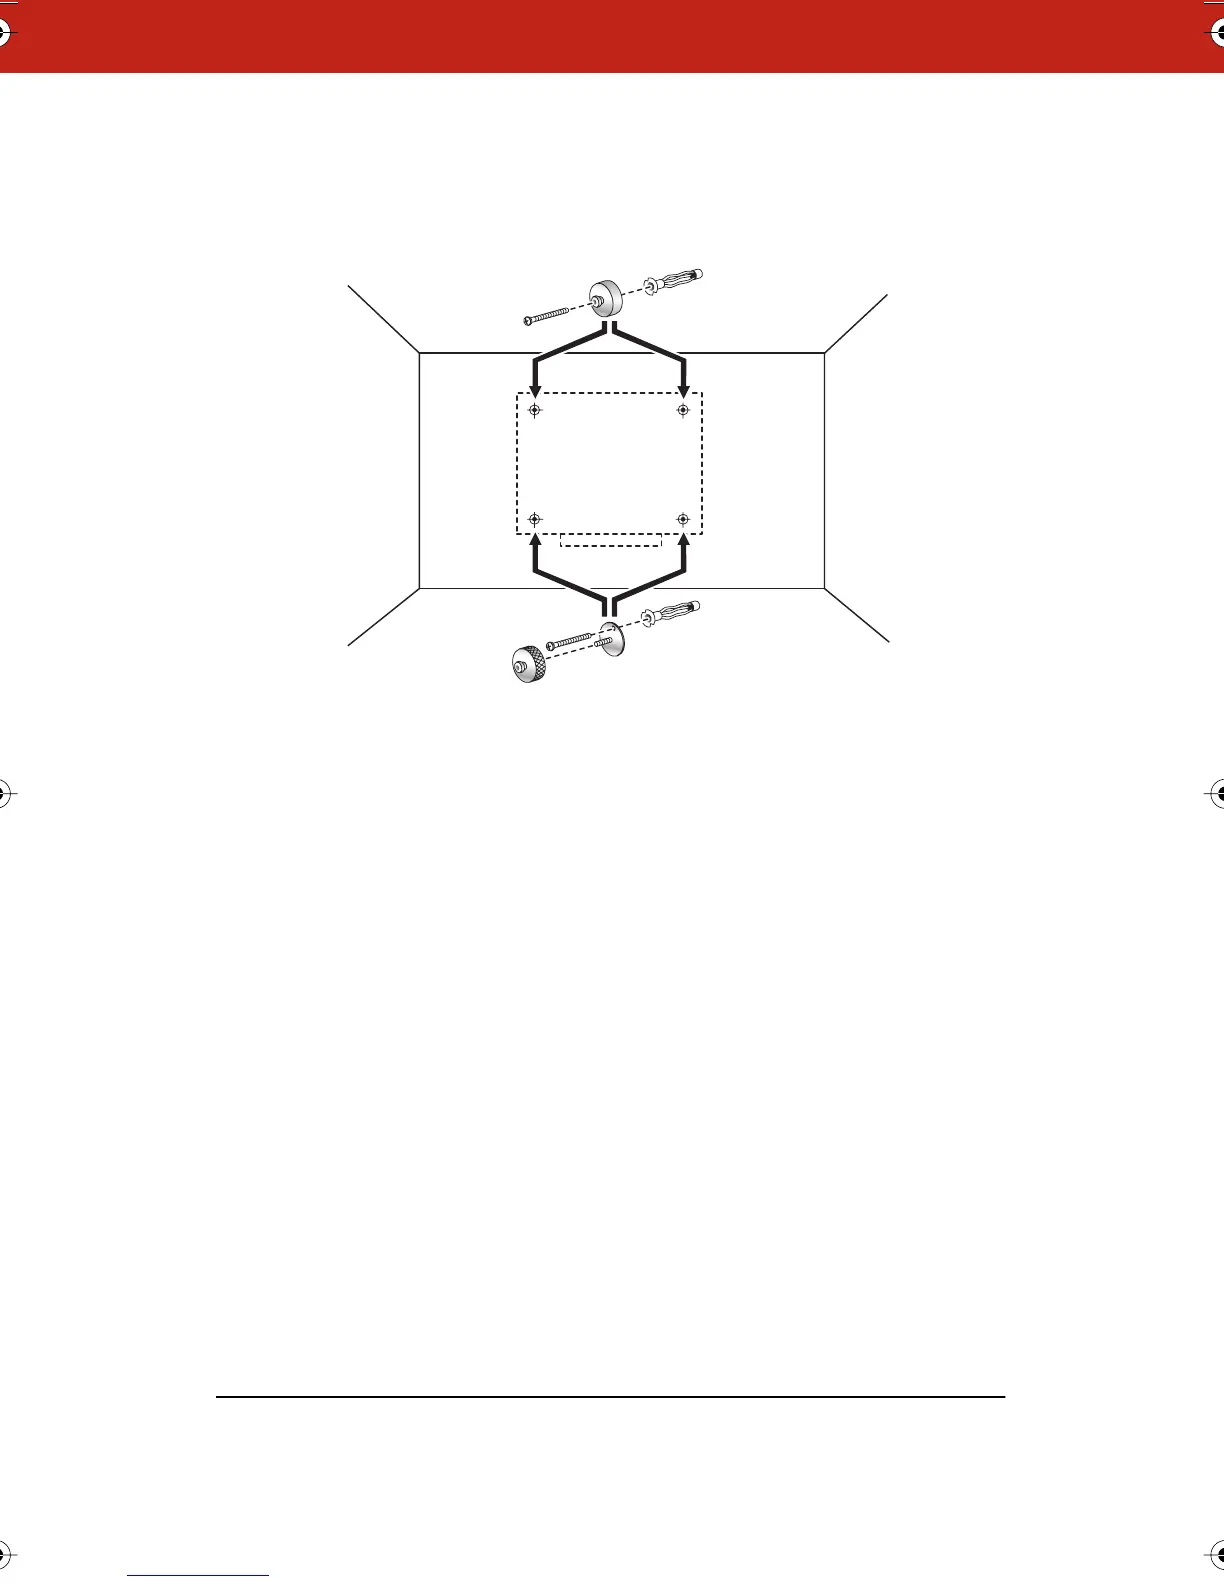
6 Insert two screws through the two upper mounting spindles and
into the upper holes in the wall. Tighten the screws to the wall.
7 Insert the remaining two screws through the two studded
mounting brackets and into the lower holes in the wall. Tighten
the screws to the wall.
8 Thread the two lower mounting spindles onto the studded
mounting brackets and tighten until 1/2
"
(12 mm) of thread
shows between the mounting brackets and the spindles.
9 By sight, or by using a carpenter’s level or plumb line, vertically
align the upper and lower spindles.
Webster_draft2.book.mif Page 13 Friday, October 11, 2002 10:07 AM