30 | EN
5. MAINTENANCE
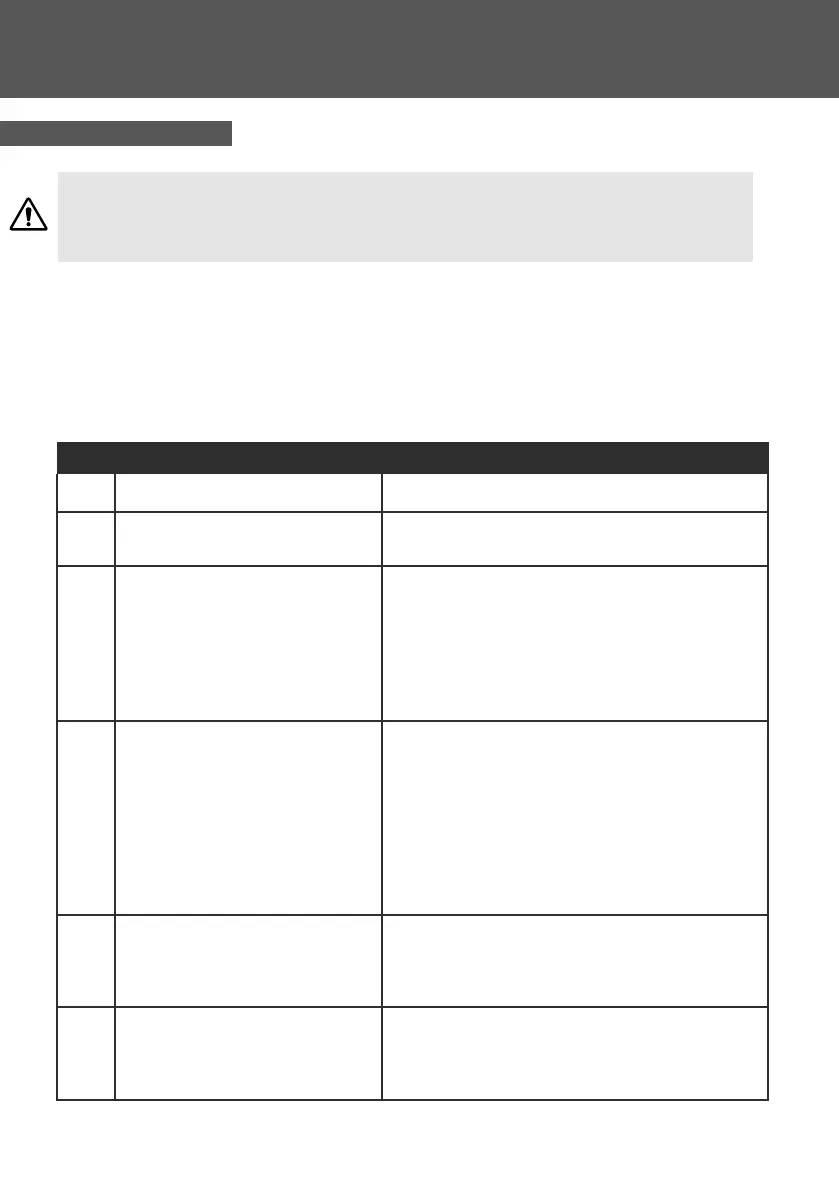
In the event of a problem, the heat pump’s screen displays an error code instead of temperature
indicaons. Please consult the table below to nd the possible causes of a fault and the acons
to be taken.
In case of malfuncon or a fault code is displayed, restart the heat pump. If the problem persists,
please contact a professional.
WARNING: Under normal condions, a suitable heat pump can heat up the tub water
by 1 °C to 2°C per hour. It is therefore normal that you do not feel any dierence in
temperature at the outlet level when the heat pump is on.
Code Descripon Soluon
E03 Water ow protecon Check water ow switch, change the switch if necessary
E04 Winter an-freezing
Water pump will run automacally for rst grade
anfreeze
E05 High pressure protecon
Measure the pressure value when heat pump is heang
(cooling), if it’s higher than 44.0 bar, it means heat pump
has got really higher pressure protecon:
1. Detect EEV step, low pressure and sucon temp;
2. Detect the inlet/outlet water temp.;
3. Maybe there is some air in the refrigeraon system;
4. Clean the water exchanger or water lter
E06 Low pressure protecon
(According to actual model) Measure the pressure value
when heat pump is heang(cooling), if it’s lower than 6
bar, it means heat pump has got really lower pressure
protecon:
1. Maybe there is some leakage in the refrigeraon
system.
2. Ambient temp. is too low.
3. There is some blockages on the refrigerant system.
4. Clean the n heat exchanger.
E09
Communicaon fault between display
and PCB
1.Check if the communicaon connecon wire between
display and PCB is well. Change or mend the wire if
necessary. Check the PCB or display. If damaged, Change
the corresponding part.
E10
Communicaon fault of frequency
conversion module (alarm when
communicaon between display and
PCB is disconnected)
Change PCB.
5.3 Repairs
5. MAINTENANCE