18
2.9 Printer Operations
2.9.1 Connect / Disconnect
You can connect the 3D printer to Powerprint software via a USB cable or WIFI (if equipped). The machine
icon in the bottom right corner of the software interface displays a broken chain pattern means disconnected,
while displaying an unbroken one means connected.
2.9.1.1 Connecting
A. USB cable connection
a. Find the USB ports on the right-side of machine and on your computer and connect them.
b. Open Powerprint software and turn on the printer.
c. Click the Print -> Connect Machine menu, then select USB in the Connection Mode options
and then select the machine you want to connect to in the Select Machine option. If you
cannot find your machine, click the Rescan button to scan your machine and then select it.
Finally click the Connect button to connect to the printer. If you still cannot find your machine
after rescanning you haven’t installed the driver software. You will need to install the driver
manually, please refer to the Chapter 2.8.3.1. Nor mally, the driver will be installed
automatically along with the software install.
B. WIFI connection
a. Via a wireless network
1. Switch on the printer, and verify the WIFI is available by clicking Tools ->Set
up->WIFI->WIFI ON.
2. Open the wireless network connection in your computer, and choose PS_3D_Ultra_Printer
Wireless network. It is the default network of the printer, and no password is needed if you
haven’t changed it in the settings.
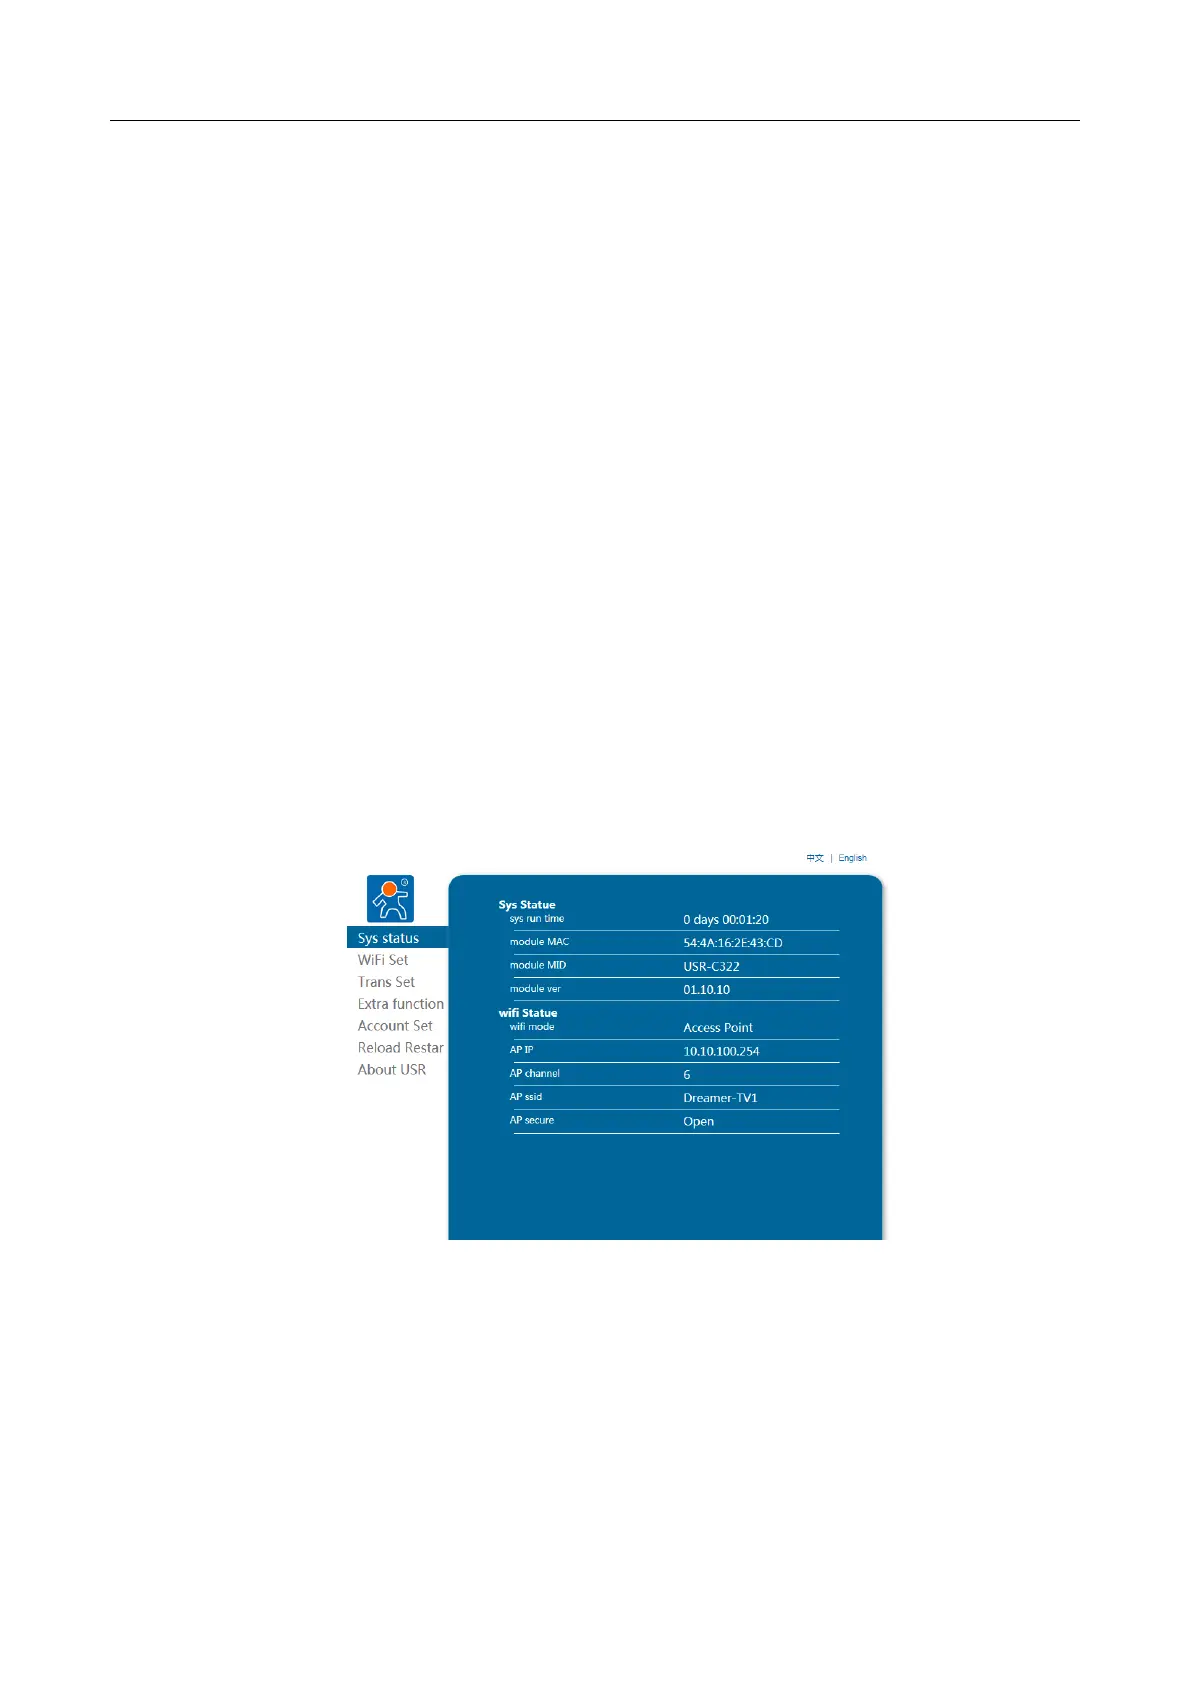
3. Open your browser and enter the IP address 10.10.100.254 in the Address Bar. Then
enter admin as the account and password . (The above IP address
/Account /Password are default if setting haven’t been changed)
4. Click WIFI Set and you can check and set the WIFI Operating Mode, as shown in the
picture below: