21
D. Stepper Motor Control
To control the stepper motor click the Open button to lock the stepper motor to prevent adjusting the
position of the extruder and platform manually and the Close button will unlock it so manual adjustment of
the extruder and platform can be made.
E. LED Color
The printer has a built-in LED, Click LED Color button to change its color.
F. Extruder Setting
In the extruder setting interface, you can feed in or withdraw the filament from the left/right extruder. By
changing the value of the “Motor Speed (RPM)”, you can control the speed of feeding in and withdrawing
filament. In addition, you can control the time of these actions by changing the value of “Extrude duration”.
Generally, we suggest you set the extrude duration in the 60s.
Before feeding in or withdrawing the filament, the extruder should reach target temperature to melt the
filament before you click the Forward / Reverse button to start these operations. For ABS filament, target
temperature of extruder is 220°; for PLA filament, target temperature of extruder is 200°. Click the Stop
button to stop feeding in or withdrawing filaments.
G. Temperature Control
Type in the target temperature in the left blank and click the Apply button to heat the extruder or platform.
The printer starts to heat the extruder or the platform, and you will see the actual temperature the extruder or
platform has reached on the right in a temperature changing table with 3 different color curve lines below.
Note: The printer will heat the platform first to reach the target temperature and then heat extruders when
both are needed to be heated.
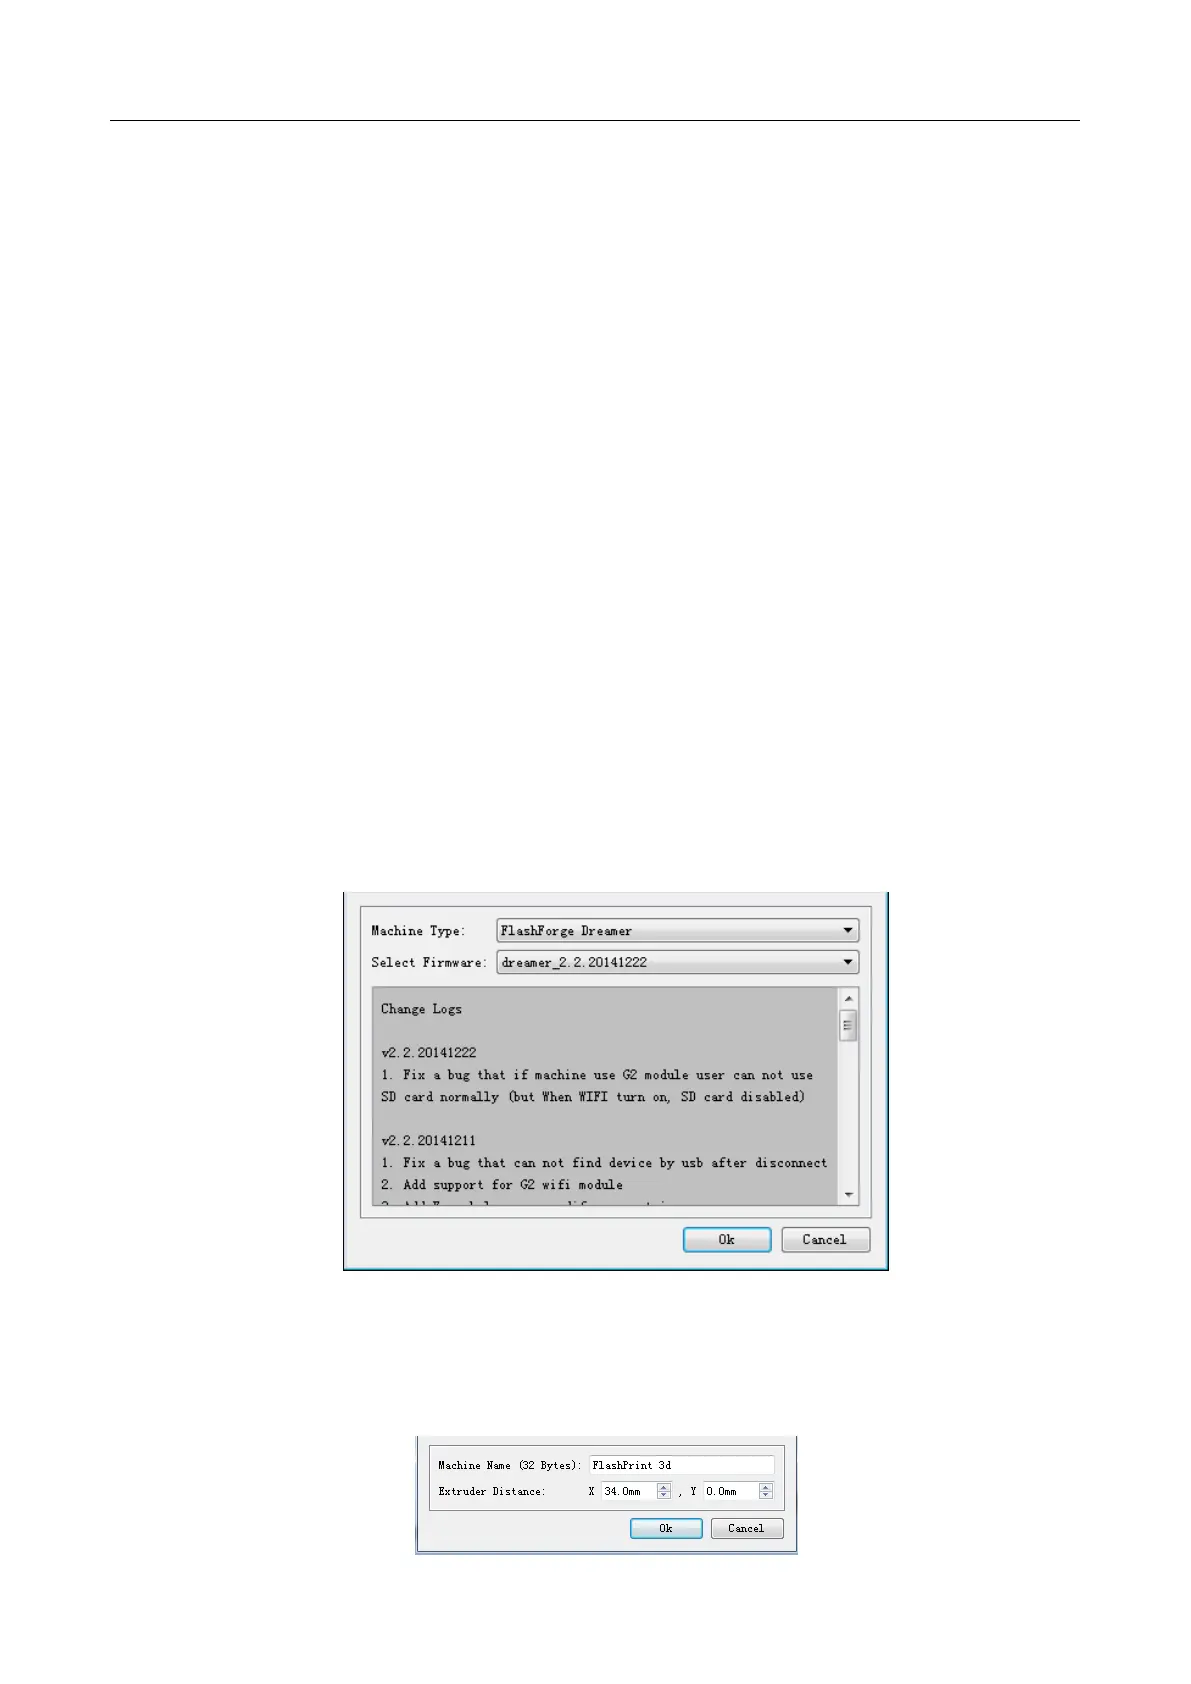
2.9.3 Firmware Upgrade
The software will check and download updates automatically when opened, and remind you to upgrade to
new version if available. To install firmware:
A. Follow the software tips, Click Tools -> Update Firmware menu and select connect option,
B. Select your machine type and corresponding firmware in the pop up dialog and then click Ok to upgrade.
If the machine is idle, it will start to upgrade to new firmware.
2.9.4 On Board Preferences
When the printer has been connected, click Tools-> On Board Preferences menu to review the configuration
of mother board including Machine Name, and Extruder count etc. When choosing extruder count as 2,
Extruders Distance option is available. Users can modify the X/Y distance between the extruders as needed.
The X/Y distance refers to the distance of X or Y directions between the two extruders.