17
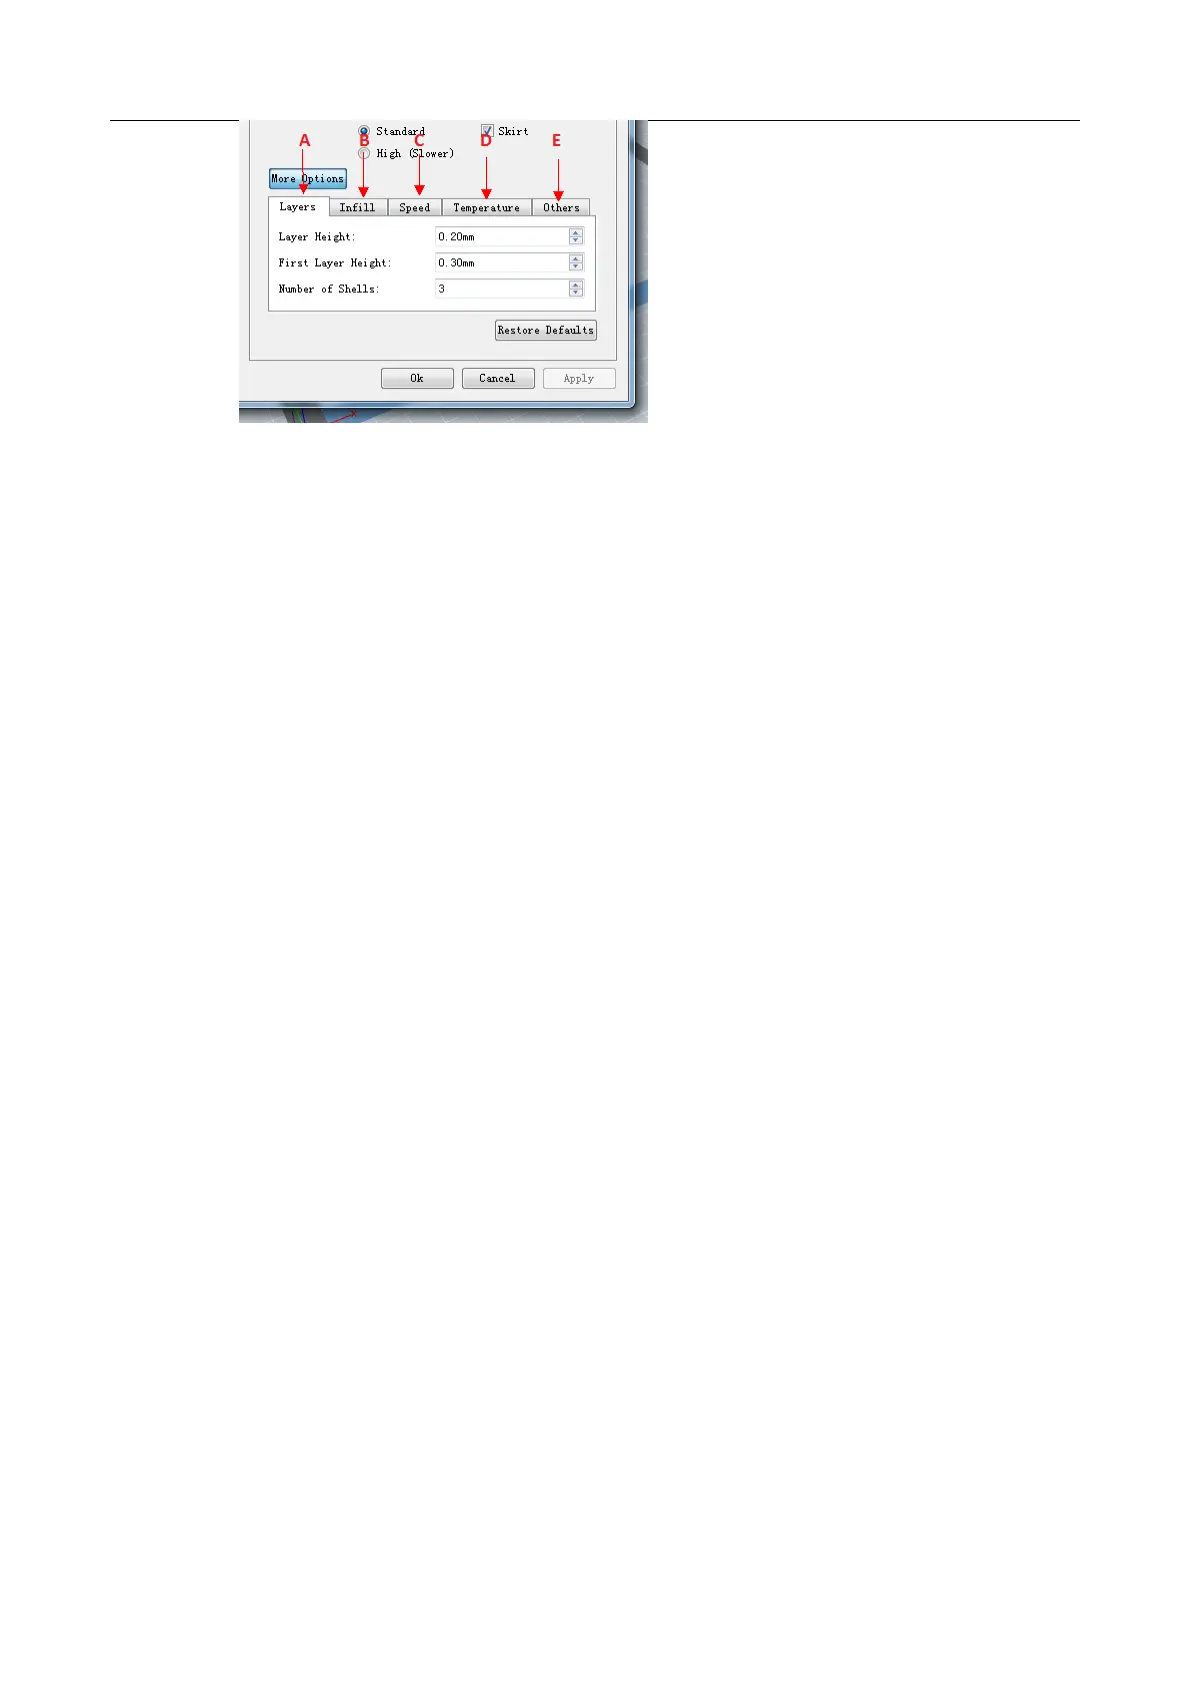
A. Layers
a. Layer Height is the height of each layer. The lower the value of layer height is, the finer the
surface of the model will be .
b. First Layer Height exists when users choose Slic3r as the slice engine, and it affects
the adhesion degree between model and platform. The max value is 0.4mm. Normally we
recommend you to use the default value.
c. Number of Shells is the quantity of shells of each layer. The max value is 10.
B. Infill
a. Fill Density means fill rate.
b. Fill Pattern is the pattern of filling shape which effects printing duration.
C. Speed
a. Print Speed is the moving speed of the extruder. Generally, the lower the speed is, the better the
final print will be. For ABS printing, 60 is recommended; for PLA printing, 80 is
recommended.
b. Support Print Speed is needed to set when choosing Slic3r as the slice engine which
can control the moving speed of the extruder when printing the supports.
c. Travel Speed is to control the moving speed of the extruder under non-printing status
during work. For ABS printing, 80 is recommended; for PLA printing, 100 is recommended.
Note: Modify parameters settings to get better prints as different models need different
parameters.
D. Temp. Set the temperature for left or right extruder and platform. Set 220 to the extruder
temp for ABS and PLA printing. Set 110 to the platform temp for ABS printing while 50 for
PLA printing. Adjust the temperature according to the condition in order to get a good print.
E. Other Functions
a. Turn Fan On to turn on the back fans to cool the chamber if printing PLA .
b. Overhang Threshold helps to measure whether a support structure is needed or not. If the
intersection angle between model surface and horizontal line is within the overhang
threshold value, then this surface will need a support.
2.8.2.3 Print Gcode File
After finishing slicing, it will load into the generated Gcode file automatically if you select the Preview
option when slicing, or you can manually load into it and then go to the Preview interface. In the
preview interface, there is a vertical scroll bar which shows each layer of the model and you can find
the Estimated Material Right and Estimated Print Time it will take located in the top right corner. Then
you can click the Print button in the same location, the machine will start to print. Click the Back button to
exit from the Preview mode.
2.8.2.4 Pause or Terminate Printing
Once printing starts, click the machine icon in the bottom right corner of the software interface
and it will show the process status in a frame. Click the Pause button to pause printing and then click
the Continue button to resume. Click the Stop button to cancel the printing task but you will need to restart
the print task if you want to print it again.
Note: Please DO NOT click the Pause button unless necessary because it will affect the overall printing
result.