POWERVAR Security Plus UPS
55
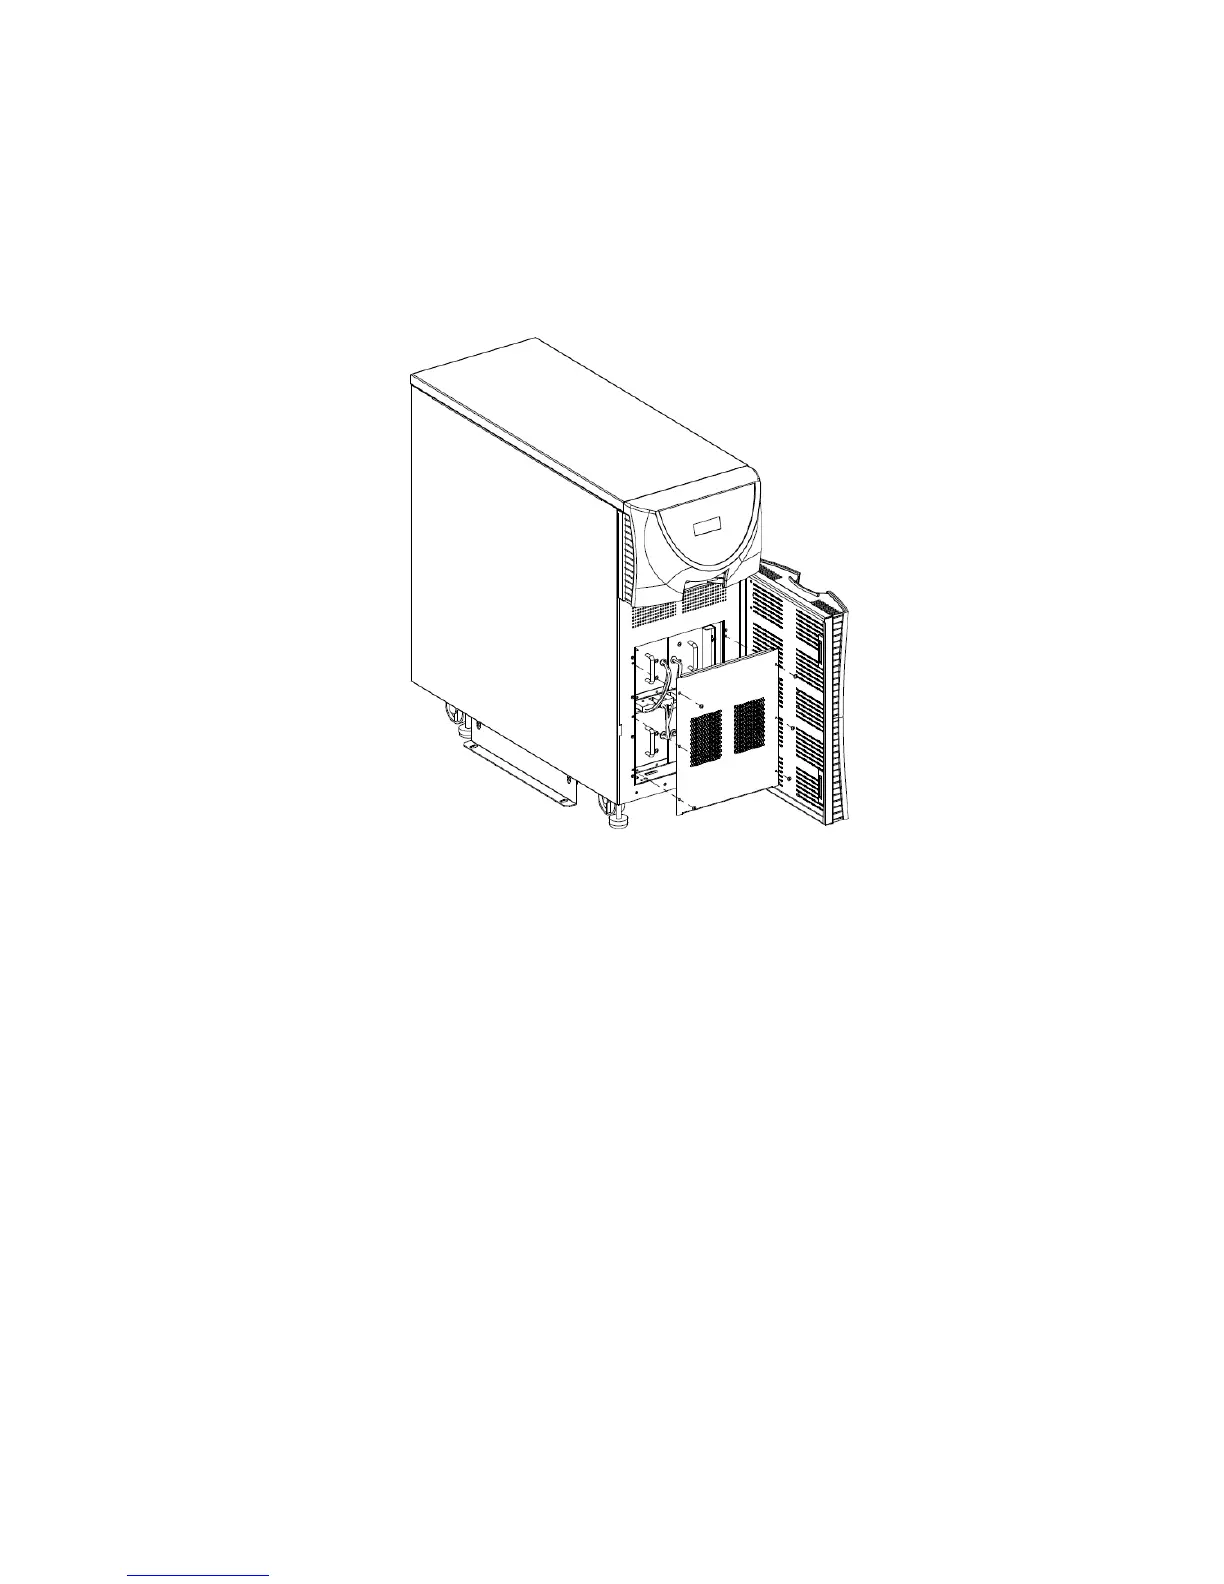
5.1.3 Battery Tray Replacement (8-15kVA)
Reference Fig. 5-4 for the following steps:
1. Flip the DC circuit breaker on the rear panel of the UPS to the OFF position.
2. Open the lower front door of the UPS.
3. With a screwdriver, remove the metal front panel.
Fig. 5-4
CAUTION: Battery connectors extend past the front of the battery trays. Examine all battery
connections prior to removing the front cover panel.
1. Remove the battery retaining brackets.
2. Unplug the desired battery tray connector from the front of the unit.
3. Lift the front of the tray and pull the tray out straight.
4. Lift the rear of the tray to remove the tray from the battery compartment.
5. Repeat steps 2-4 for additional battery trays.
6. Slide the new POWERVAR battery trays into the empty slots.
7. Make sure the trays are secure and re-connect the battery tray connectors in the front
of the unit.
8. Replace the metal bars on the unit.
9. Secure these components back in place with appropriate hardware.
10. Flip the DC circuit breaker on the rear panel of the UPS to the ON position.
CAUTION: Battery cables are located in between the battery trays. Examine all battery
connections to ensure that there are no loose or damaged connections prior to connecting
battery trays.
CAUTION: Battery connectors extend past the front of the battery trays. Examine all battery
connectors to ensure that there is clearance between the connections and the cover plate
before installing cover panels.