C546i Self Powered Elliptical Fitness Crosstrainer
Page 46
Procedure 7.6 - Replacing a Crankarm Assembly
Removing a Crankarm Assembly
WARNING
Before continuing with this procedure, review the Warning and Caution statements listed in
Section One, Things You Should Know.
1. It is only necessary to remove the right or left side of the rear cover to access the crankarm
being replaced. Remove the necessary side(s) of the rear cover.
2. Remove the stairarm assembly as described in Procedure 7.14.
Note:
Notice the position of the two crank arms. When the crankarms are replaced, they must be
positioned so that they are 180 degrees opposing.
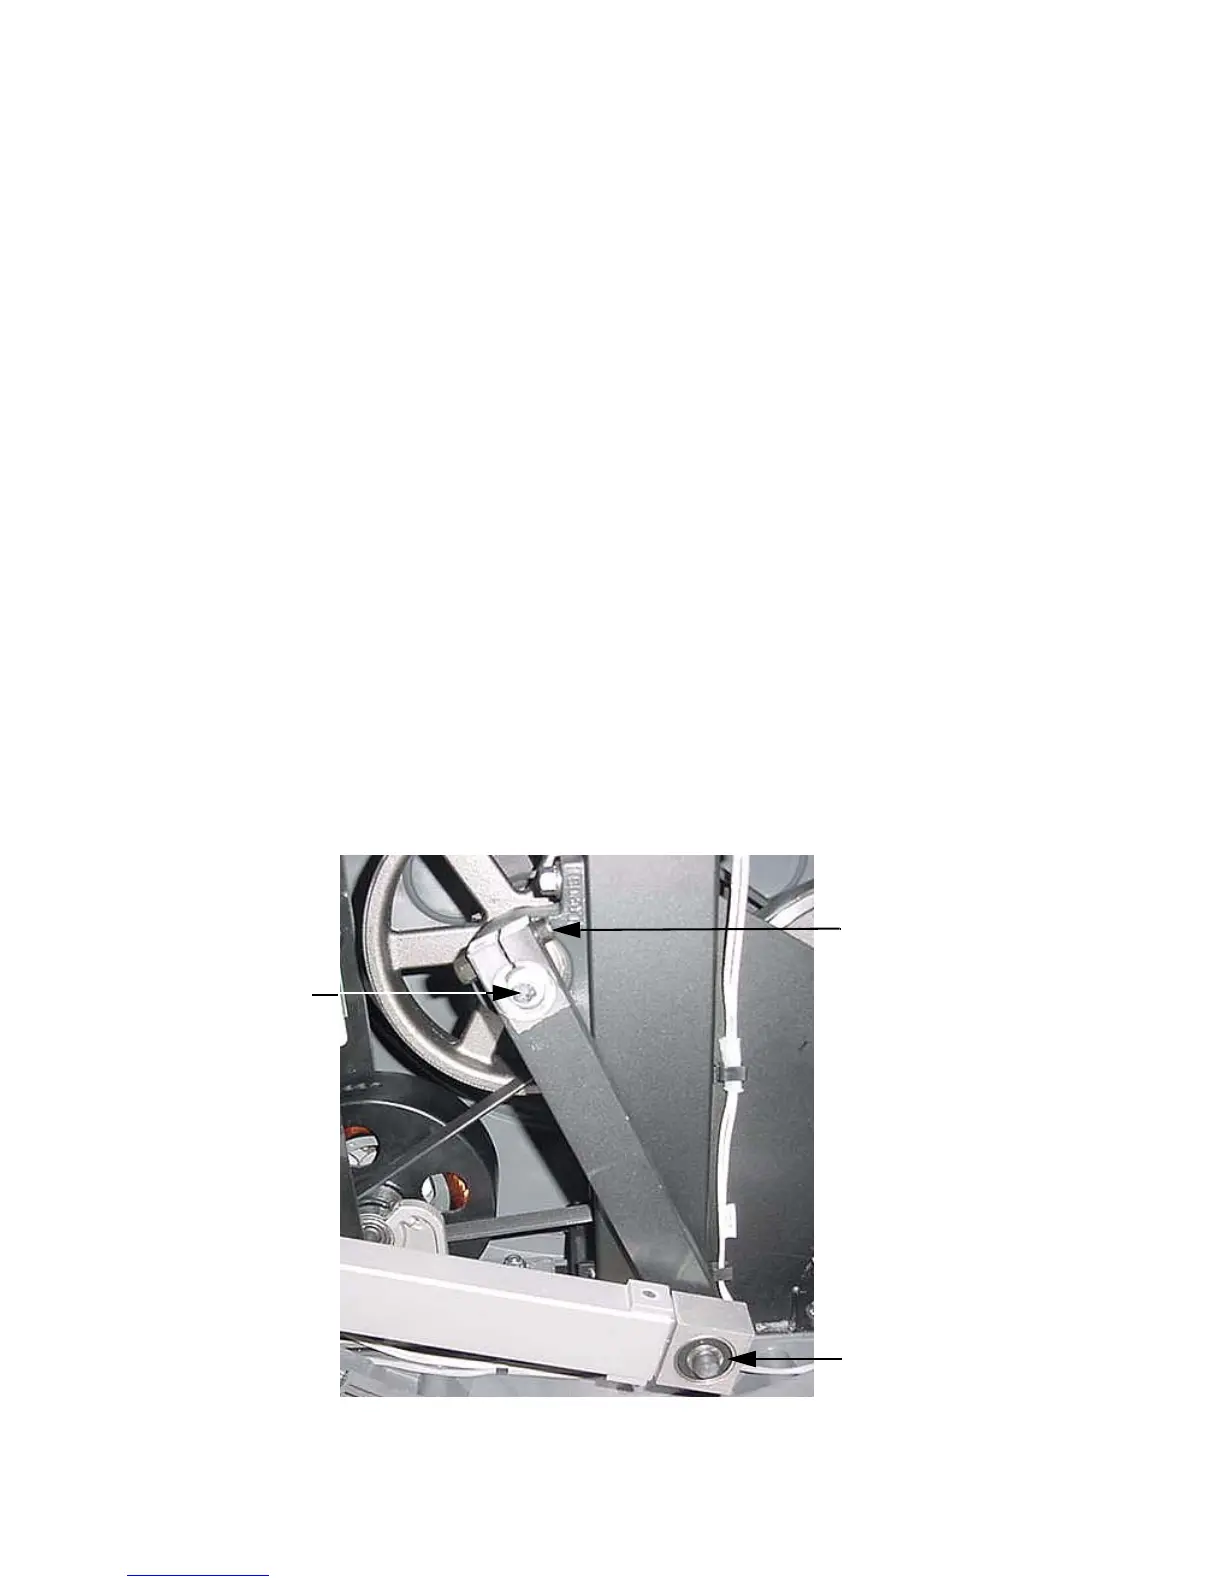
3. Remove the axle bolt that secures the crankarm to the input pulley shaft. Remove the pinch
bolt. Refer to Diagram 7.8. It may be necessary, use a Pitman arm puller or 4” to 6 “gear
puller to remove the crankarm. Do not use a hammer or mallet to remove the crankarm.
4. If you are removing both crank arm assemblies, repeat steps 2 and 3 for the second
crankarm assembly.
Diagram 7.8 - Crankarm
Pinch Bolt
Axle Bolt
Retaining Ring