S3.15 Assembly and Maintenance Guide
page 31
1 2 3 4 5 6
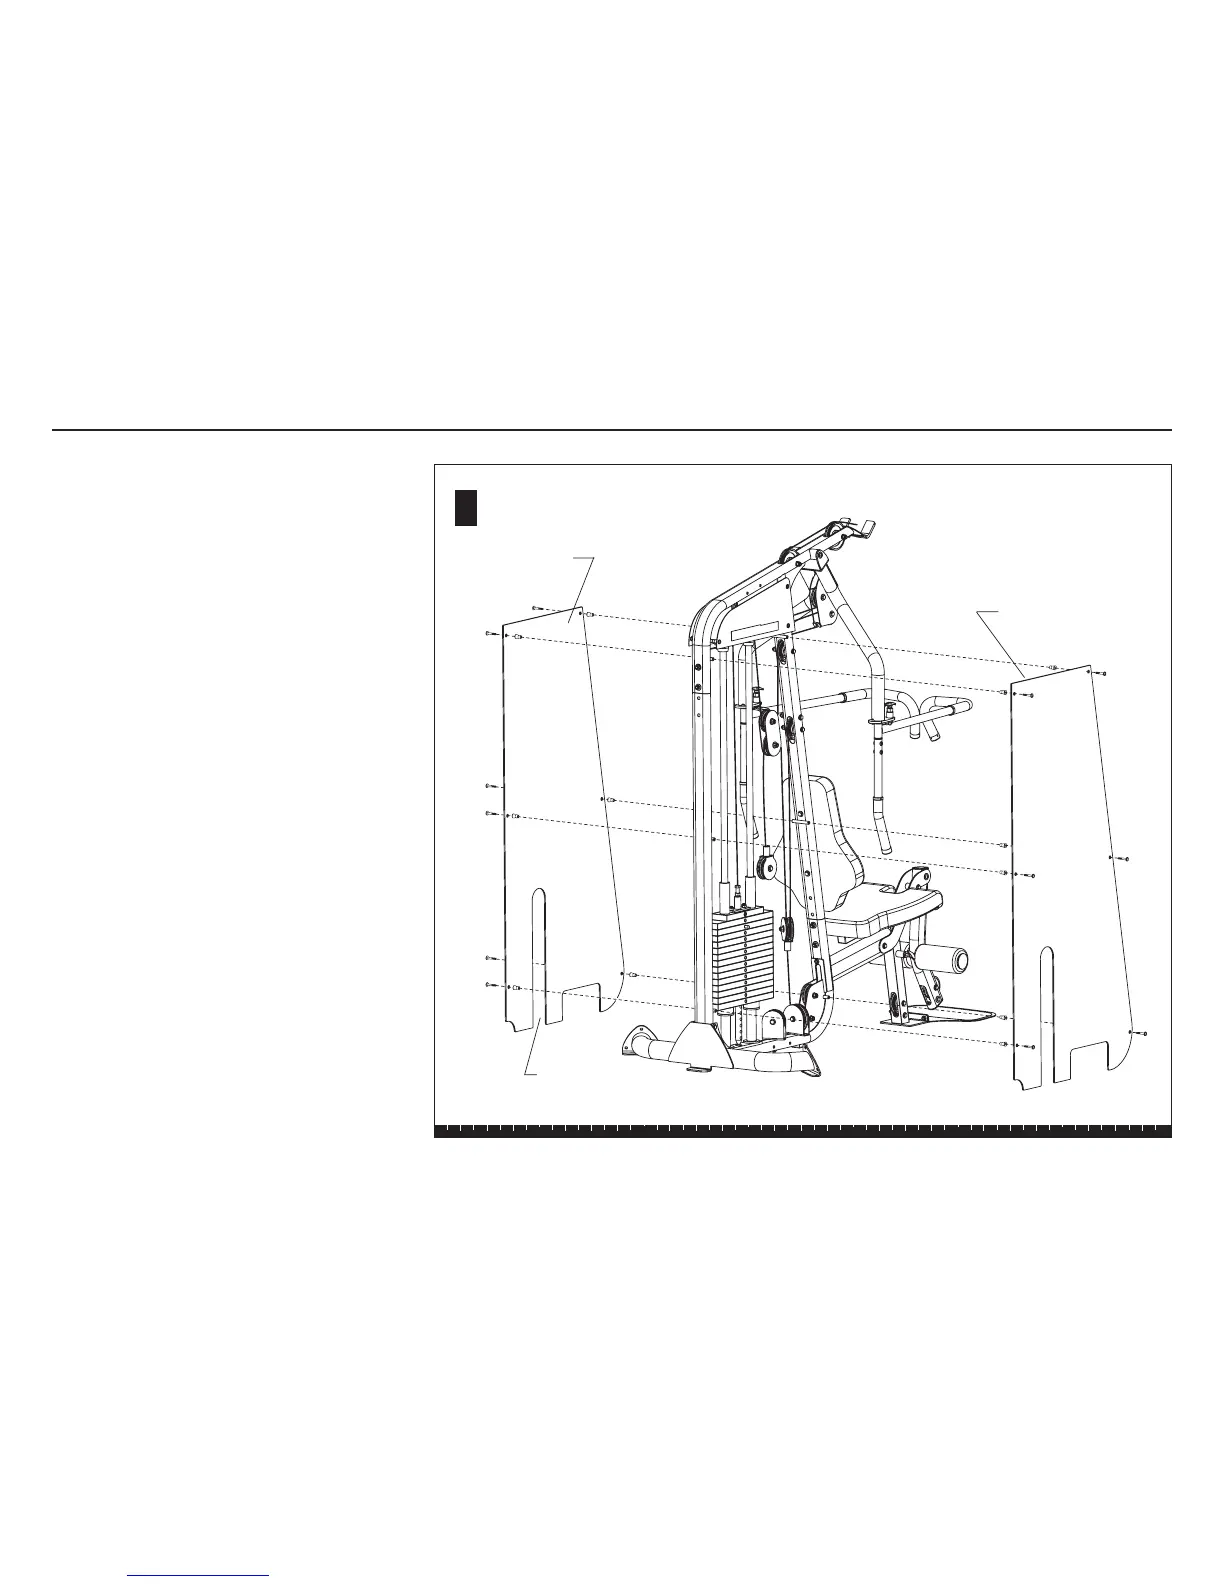
Shroud (frosted side
faces weight stack)
Cutout in
Shroud
A
6 - 1³⁄₄" buttonhead screws
6- tapered spacers
Shroud (frosted side
faces weight stack)
Appendix – Shroud Assembly
Two acrylic Shrouds can be attached to the Main
Frame. Complete the assembly steps for one side of
the unit before moving the other.
The frosted side of the Shroud faces the Weight Stack.
Install the Shrouds so the cutouts allow access to the
Weight Stack Pin.
Important: Handle each Shroud with care. The
shrouds require special handling as they are easily
scratched. For proper care and maintenance, refer to
Adjustments and Maintenance
in this guide.
A. Attach a Shroud to each side of the Main Frame
using
6 - 1¾-inch buttonhead screws
6 - tapered spacers
Note: Start with top fasteners and work toward the
base. Ask your assistant to hold the Shroud in
place while you insert the top spacers and
fasteners. Alternately finger tighten all six fasteners
while adjusting the alignment.
B. Wrench tighten using a 5mm hex key.
CAUTION: Do not over tighten. You can crack or
warp the Shroud if too much pressure is applied to
the fasteners.
Appendix – Shroud Assembly