32 Installing and Operating the Personal Viewing System (PVS) for Display C
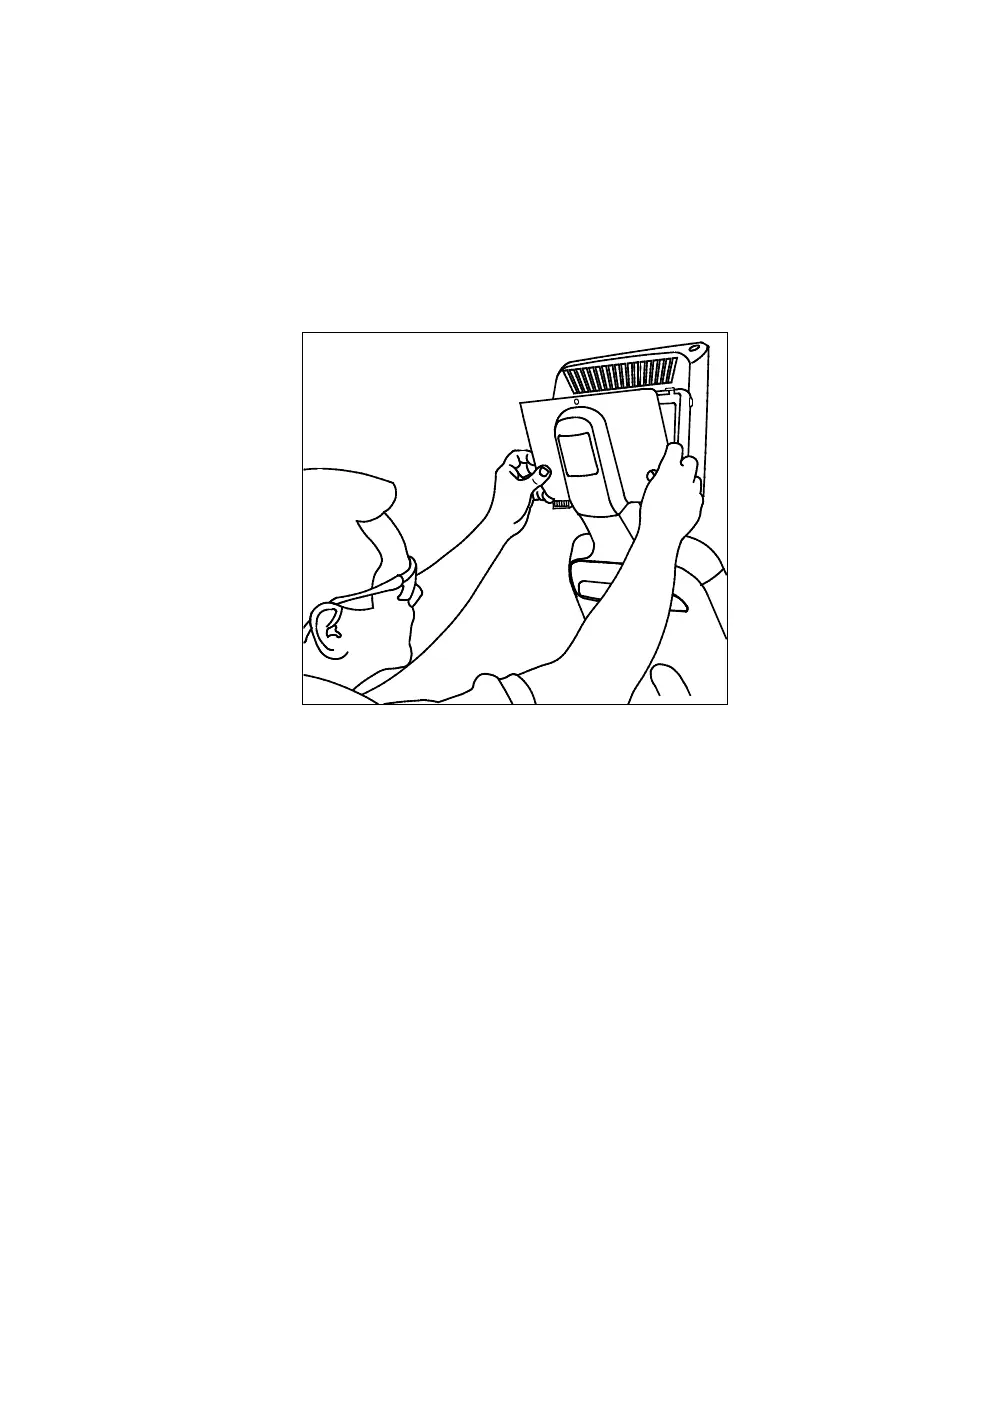
5. Replace the back plate. Insert the base tabs first and then,
apply pressure to engage the side tabs. Replace the
Phillips-head screw. Do not apply more than 6
inch-pounds of torque.
Note: You may want to test the PVS before replacing the
back plate. Refer to Testing the PVS in the following
section before you complete the PVS assembly.
Figure 28: Back plate reattachment
6. Reassemble the display console by using a Phillips-head
screwdriver to reattach the front and back covers (eight
screws) and reinstall the back console plate (four
screws).
Testing the PVS
To test the PVS:
1. At the base of the EFX, plug the power cable to the power
extension module and connect it, along with the coaxial
cable, into the strip provided for Cardio Theater
equipment.
2. Observe whether the PVS (screen and integrated
controller) is receiving power while you configure the
channels using the integrated controller and check the
audio connection. For instructions on how to configure
channels and troubleshoot the PVS, refer to the
appropriate PVS operation and maintenance guide
provided in the box.
Note: A green LED illuminates on the integrated controller
when it is connected to a power source.