26 Installing and Operating the Personal Viewing System (PVS) for Display C
Attaching the Entertainment Option
CAUTION: Do not try to access the tab found beneath the heart
rate electronics board.
To attach the entertainment option for the PVS:
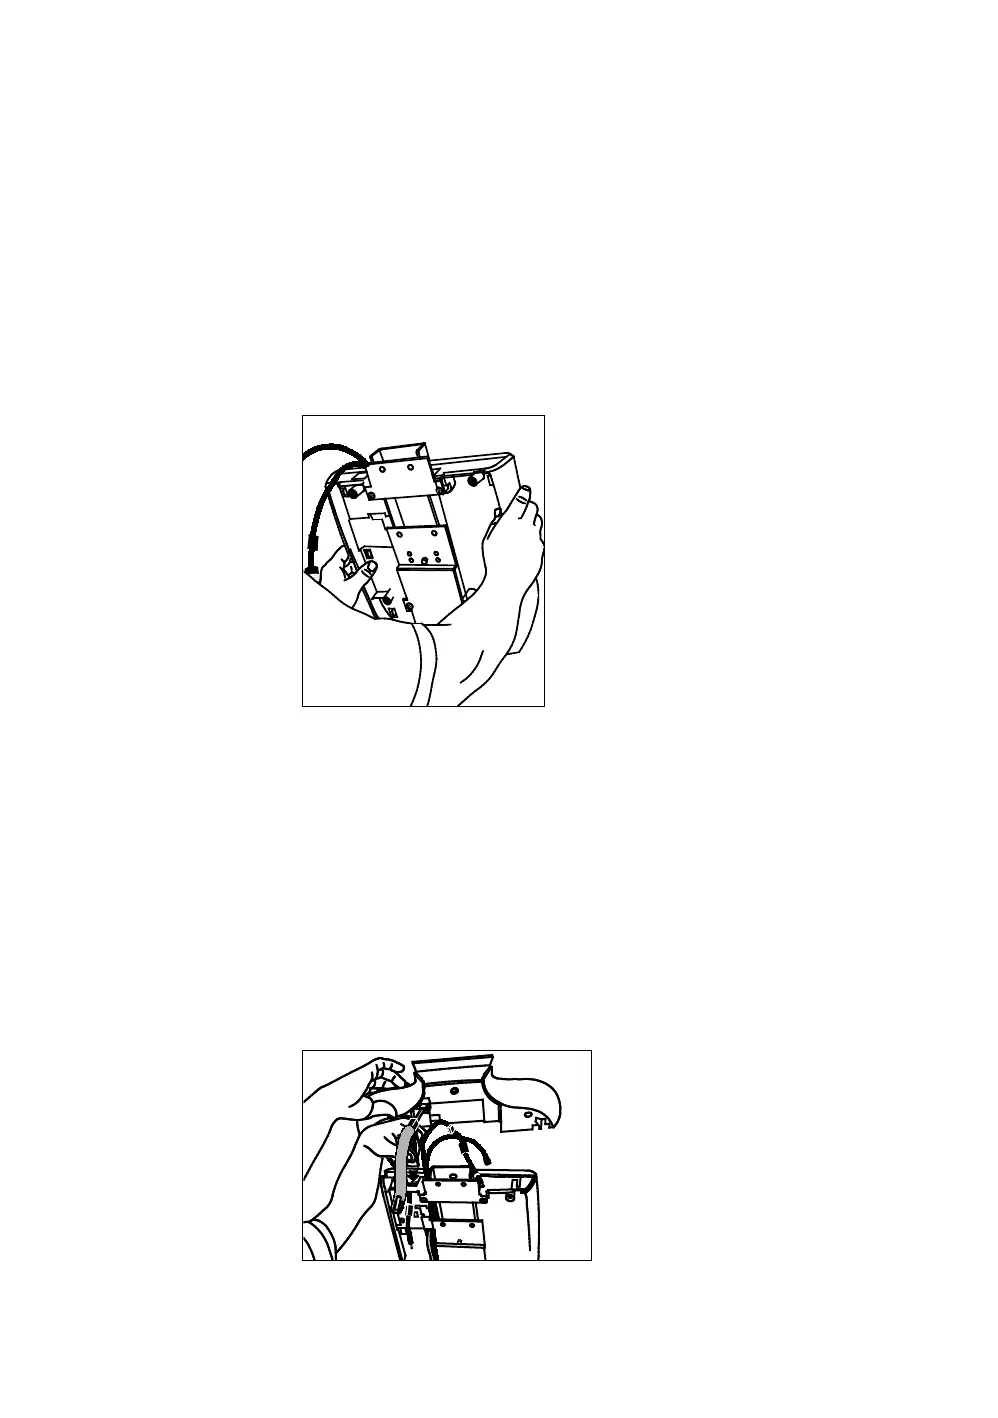
1. Separate the display console face from the console. Start
at the top and work toward the bottom, pressing the five
tabs to release it. This provides easier access to the 5-pin
connector.
Figure 16: Console face removal
2. Hold the integrated controller above the display console.
Feed the audio cable up through the opening in the top of
the display console and connect it to the integrated
controller. Let the end of the audio cable with the ferrite
clamp hang loose for now.
CAUTION: It is critical that you attach the red wire on the
5-wire entertainment option cable to Pin 1. The word, PIN 1, is
inscribed on the back of the display console. An arrow points
to the location of Pin 1. The connector is keyed so it will only
connect one way. Do not force the connection.
Figure 17: Audio cable routing