33
Owner’s Manual
OverviewHookupControlsConnecting
to a
Computer
TutorialsTechnical
Information
Trouble-
shooting
and Warranty
Scenes, Presets, System Menu,
and MIDI Control
Software: Universal Control,
SL Remote, Capture,
and Studio One Artist
Quick Start 1
Quick Start:
Level
Setting
11. Press the Main button in the Assign section of the Fat Channel so that it is
illuminated. This routes the channel to the main output bus.
12. Bring up the Main fader until you can comfortably listen
to your microphone through your speakers.
13. With Channel 1 selected, you can use the Fat Channel
to add dynamics processing and EQ.
For more detailed level-setting procedures and techniques, refer to Section 8.7.
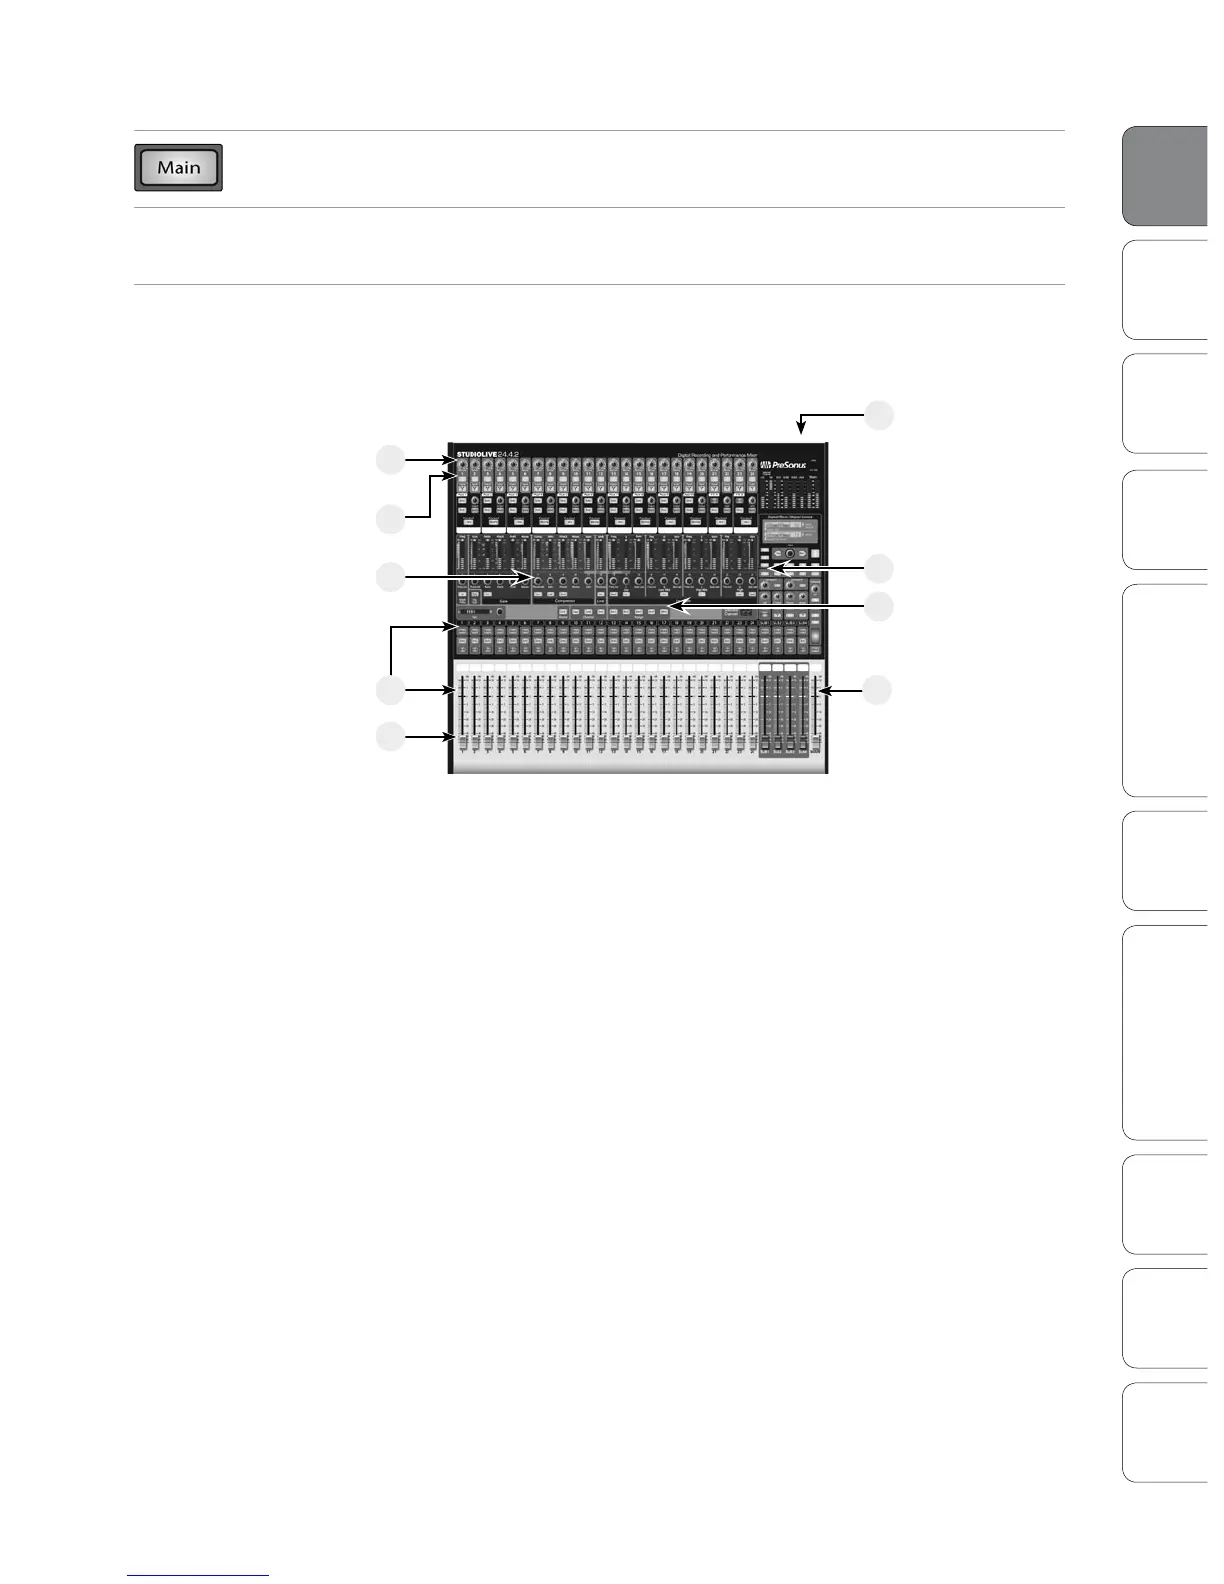
10
4
13
9
6
11
8
5
12
Power User Tip : Using SIP (Solo In Place) To Dial In Your Mix
Most engineers start with the drums and work from the bottom up. To begin, bring all your faders
down and raise your main fader to unity gain. Press and hold the SIP button in the Solo section
until it illuminates red. Press the Solo button, and then the Solo button on your kick-drum mic
channel. Notice that all the other channels on your StudioLive have been muted. Bring up the fader
on the kick-drum channel and press the channel’s Select button. The Fat Channel will display the
dynamics processing, EQ, output routing, and pan settings for the kick drum. Using the encoders
and meters in the Fat Channel, set up the compressor and EQ for this channel. Once you are satised,
press the Solo button again. Next, press the Solo button on the snare-mic channel and repeat this
procedure. In this way continue with each drum mic and then move on to the other instruments
that are connected to your StudioLive. When you have nished with all the instruments, lower the
main fader, press the SIP button again and slowly bring up your main fader to set up your mix.
Level Setting 1.1
 Loading...