Care and Maintenance
161
WALK-AROUND INSPECTION (BEFORE EVERY TRIP)
NOTE
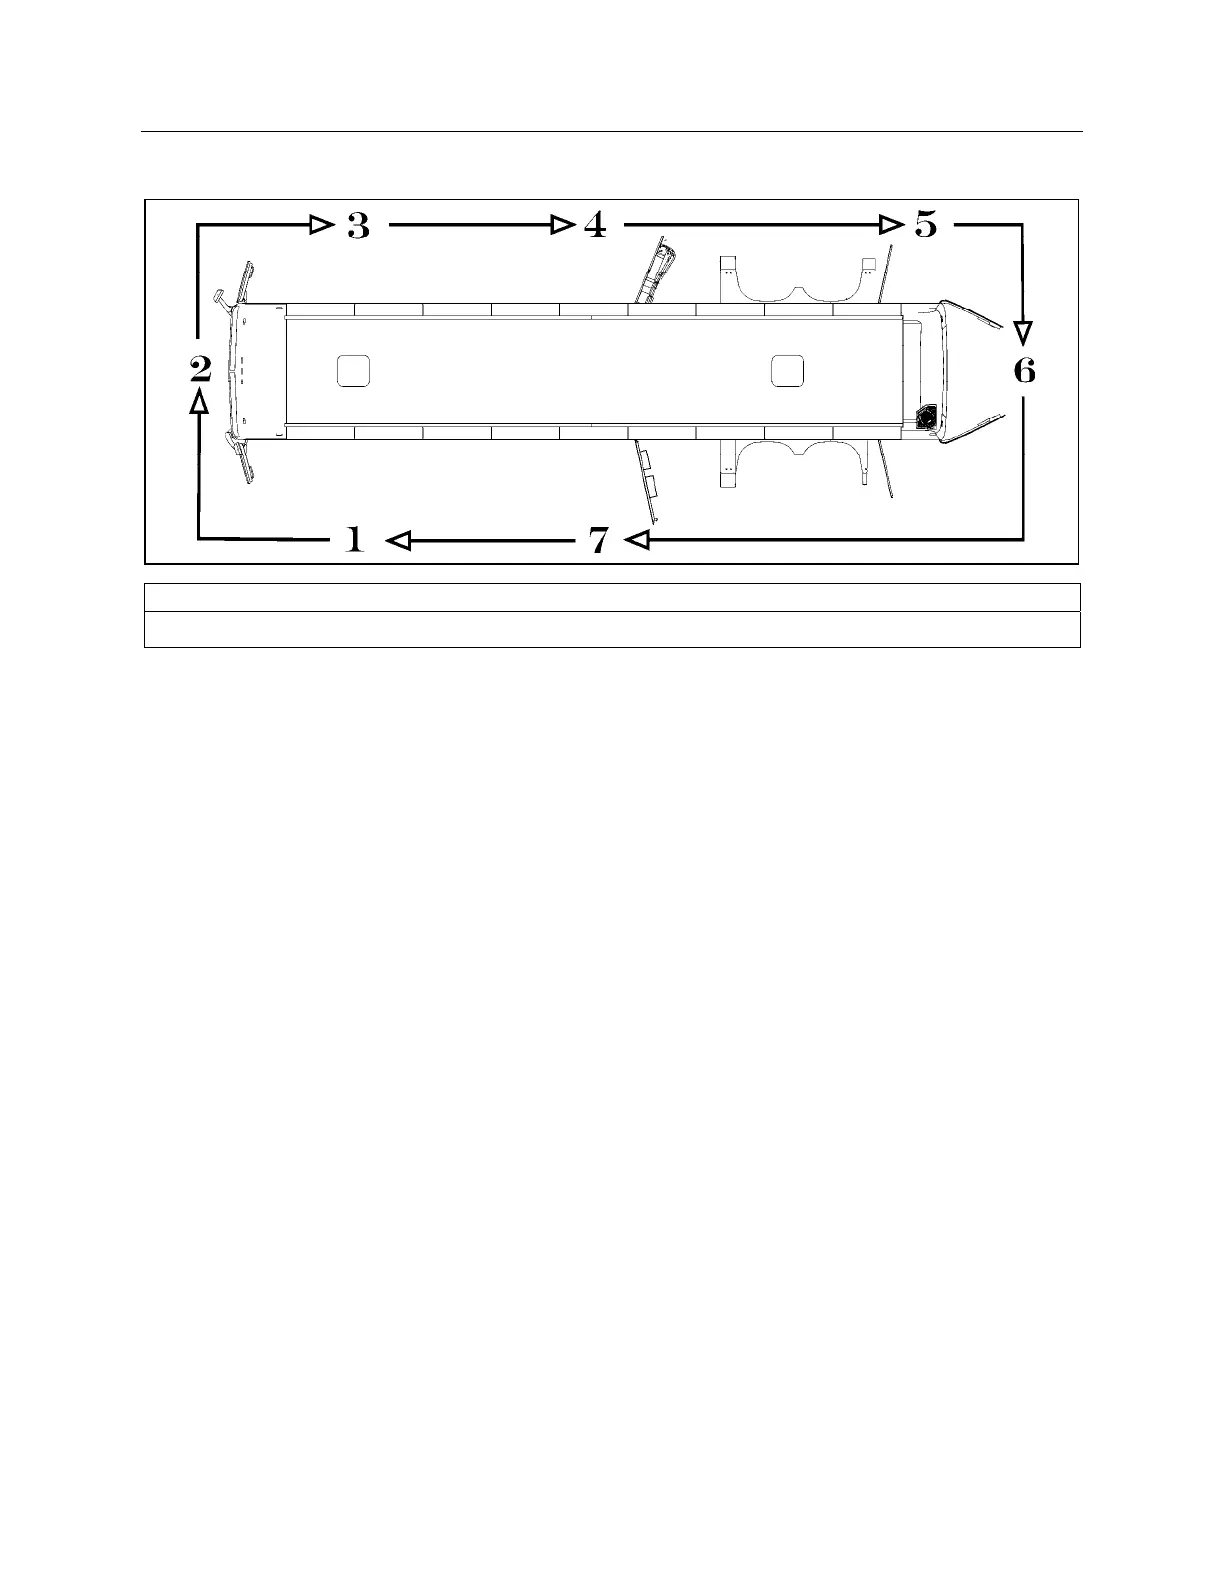
Inspect the coach in a circular manner as shown in the illustration.
Approaching the Coach
• Check under the coach for oil, fuel,
coolant leaks or other signs of damage.
• Check exterior body surfaces for signs
of breaks or damage.
Preparation
• Drain accumulated water from
accessory and wet air tanks.
• Close air tank drain valves.
• Start the engine and let the air pressure
build up to normal. Stop engine.
• Switch on hazard warning flashers.
• Make sure parking brakes are applied.
Step 1: Front Left Side of the Coach
• Check condition of wheel rim. Especially
look for cracks, missing nuts, bent or
broken studs.
• Check condition of tire: properly inflated,
no serious cuts, bulges, tread wear or
any signs of misalignment; valve stem
not touching wheel or rim; valve cap in
place.
• Check windshield and headlights
washer reservoir fluid level and add if
necessary.
Step 2: Front of the Coach
• Check for damage and clean if dirty.
• Check windshield wiper arms for proper
spring tension.
• Check wiper blades for any damage,
“dead” rubber and attachment to arm.
• Check to see thst there is no mud,
snow, ice build-up or other obstruction in
front of the ACB radar sensor, if
applicable.
• Check clearance and identification
lights, they should be clean, operating
and of the proper color. Refer to
“Exterior Lighting Verification” in Care
and Maintenance chapter.
• Turn on headlights. High and low beams
should be operating and lenses clean. If
equipped, check fog lights. Refer to
“Exterior Lighting Verification” in Care
and Maintenance chapter.
• Left and right front turn signal lights
clean, operating and proper color. Refer
to “Exterior Lighting Verification” in Care
and Maintenance chapter.
Step 3: Front Right Side of the Coach
• Check condition of wheel rim. Especially
look for cracks, missing nuts, bent or
broken studs.