10 Label Stock
D. Set the Stock Sensor Mode
The stock sensor mode refers to the method the printer will use to detect the print starting
position for each label. To adjust the stock sensor mode, open the PTStatus program.
PTStatus automatically installs with your printer driver and can be accessed through the
printer driver or as program that is accessible in the same manner as all other programs.
Important Note: Set the Stock Sensor Mode BEFORE loading label stock!
1. Connect the printer via USB or ethernet and turn on the power. The Stock Sensor
Mode setting is stored on printer main board so you will not be able to access it unless
the printer is turned on and properly communicating with the computer.
2. Go to Start - Programs - Primera Technology - PTStatus.
3. Click on the Alignment Tab (3rd tab from top).
4. Click on the Stock Sensor Mode button.
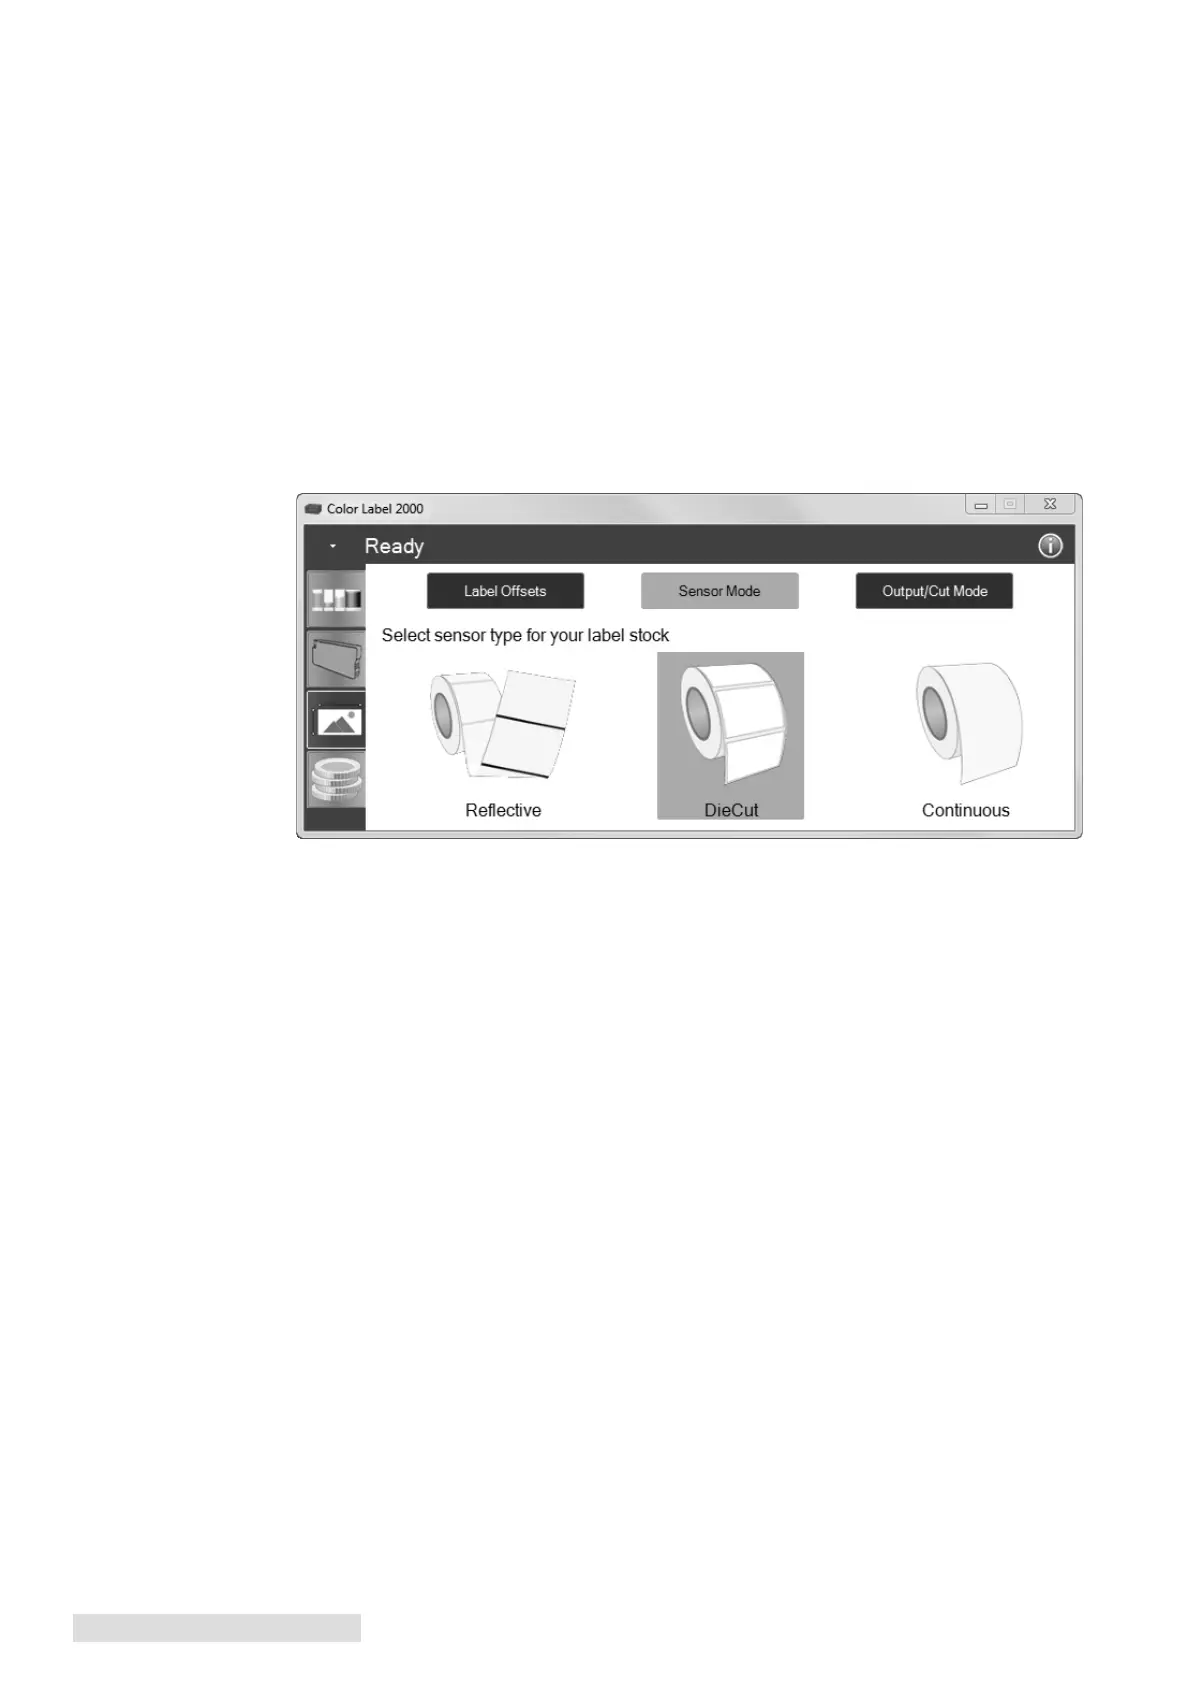
5. Select the Stock Sensor Mode by clicking on the graphic that most closely corresponds
to the stock you intend to install.
There are three sensor modes:
Die Cut (Default). If you are using standard die-cut labels that look similar to the graphic,
use this setting regardless of the size of the label. Also, use this setting for thru-hole label
material where a hole is punched through each label or a notch is cut in the side.
Reflective. Use Reflective for label material where a black pre-printed line (black mark) on
the back of the label stock indicates the break between labels. Black marks are required on
clear label stock rolls, or label where the label waste matrix (waste) is left on the liner. Black
marks can also be used for irregular shaped labels, circles larger than 4.6 inches or on any
stock where the print starting position can not be sensed using the label itself.
Continuous. (Sensor off) If you have continuous stock with no die-cut, reflective mark or
holes, set the sensor type to Continuous. This will turn off the stock sensor. In this mode
there is no way to set the print starting position. The printer will simply start printing the
first label and print each subsequent label immediately after that previous one. To produce
a gap between prints simply add the desired amount of white space to the end of the label
being printed.
Important Note: You must also set the Stock Sensor Position (Section 2C) so that the sensor is sensing the
correct point on the label stock.