EasyManuals Logo

Pro-Form R500 User Manual

Pro-Form R500
12 pages
To Next Page IconTo Next Page
To Previous Page IconTo Previous Page
Page #4 background imageLoading...
Page #4 background image
3
ASSEMBLY
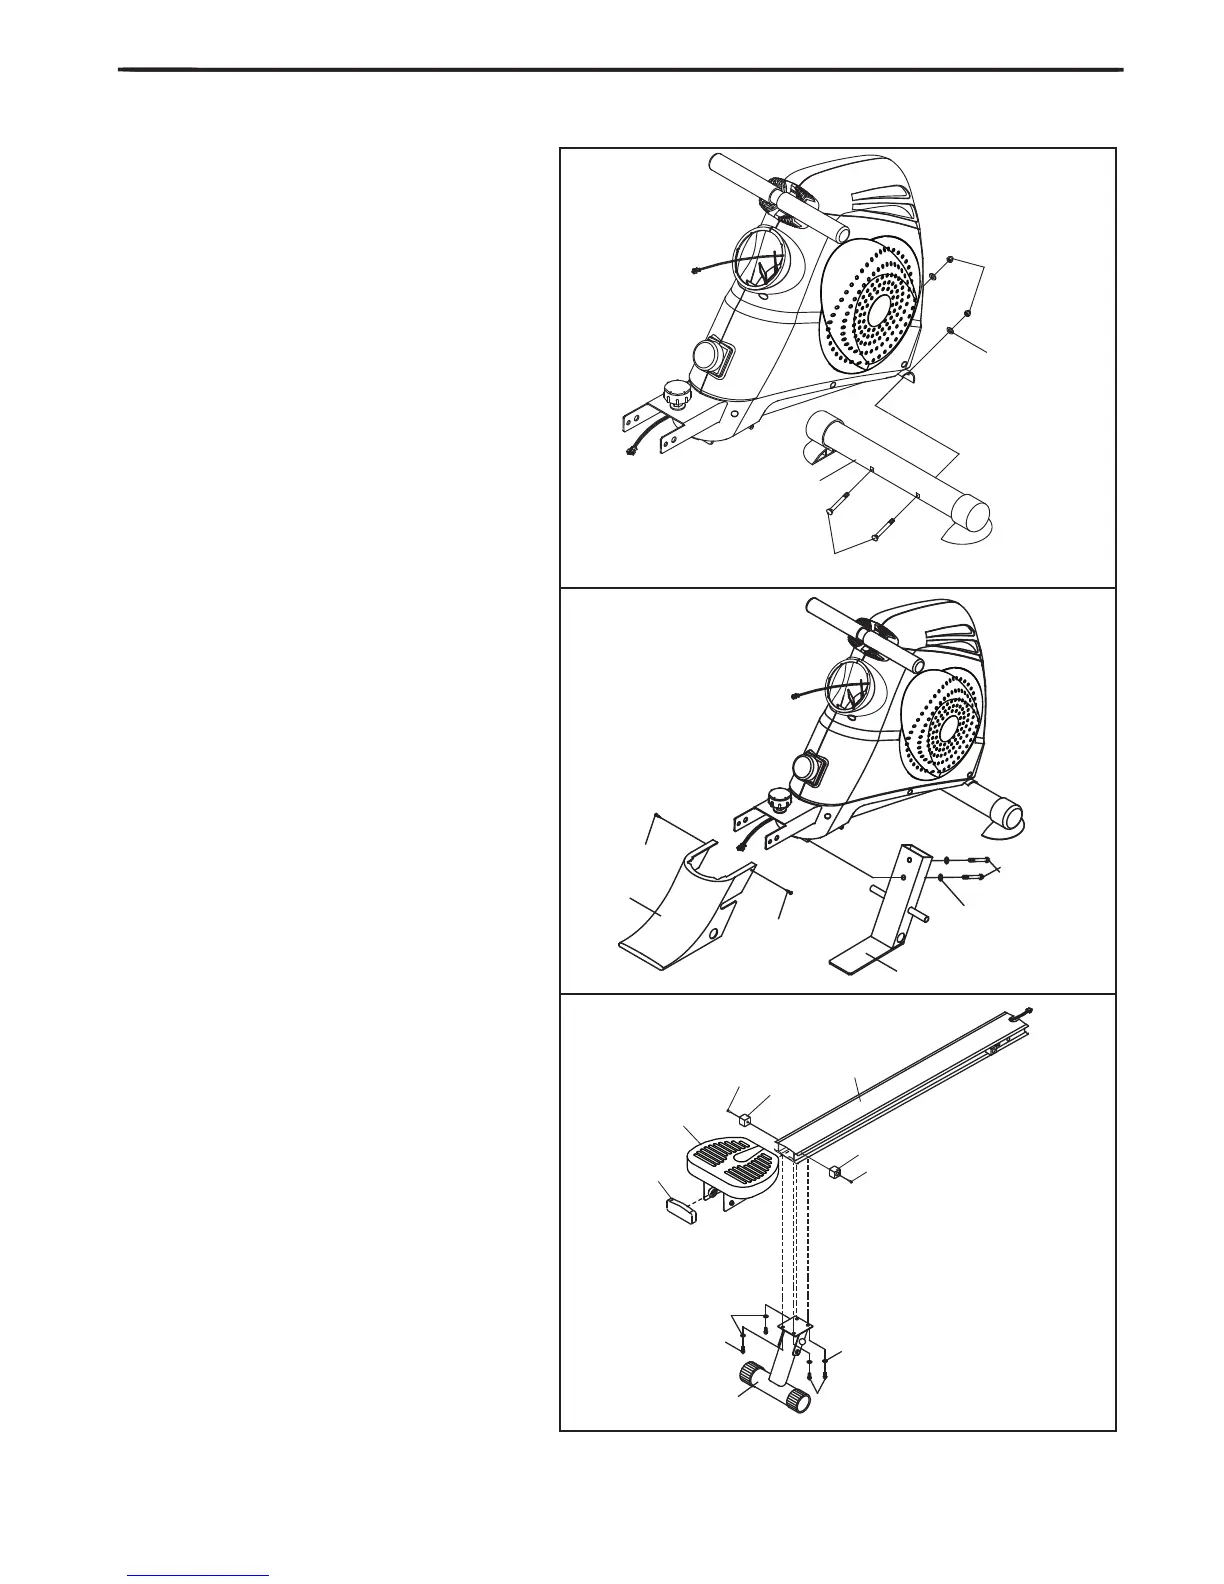
1. Attach the front stabilizer onto the main
housing bracket using the two carriage bolts
(#21), 2 arc washers (#13) and the nylock nuts
(#12).
2. Attach the bracket (#3) to the Main
frame using two washers (#14) and two bolts
(#22). Ensuring to attach the bracket cover (#4)
when you tightened the screws (#23).
3. Slide the Seat Bracket (#6) to the Rail
(#5) then lock the stoppers (#19) to the Rail (#5)
using Screws (#24) as FIG 3 demonstrated.
Attached the Cap (#28) to the end of the Rail.
Connect the Aluminum Rail (#5) to the rear Sta-
bilizer (#7) using the bracket provided.
Lock the bracket in place using bolts (#25) and
washers(#14)
#21 Carriage Bolt
#13 Arc Washer
12
13
21
2
#14 Washer (M8x16mm)
#23 Round Head Screw
22
4
23
23
3
14
#22 Hex Head Bolt
.
#14 Washer
#25 Hex Head Bolt
25
25
7
14
14
#19 Stopper
#24 Screw (Long)
28
6
24
19
19
24
5

Questions and Answers:

Question and Answer IconNeed help?

Do you have a question about the Pro-Form R500 and is the answer not in the manual?

Pro-Form R500 Specifications

General IconGeneral
BrandPro-Form
ModelR500
CategoryFitness Equipment
LanguageEnglish

Related product manuals