Do you have a question about the Pro Spot PR-8 and is the answer not in the manual?
General safety warnings, fire precautions, and electrical safety notices for operation.
Explains safety sign types (Directive, Warning) and their meanings.
Illustrates correct positioning of safety warning symbols on the equipment.
Details for connecting power supply, compressed air, and voltage requirements.
Guidelines for daily and regular maintenance to ensure trouble-free operation.
Lists and describes the six main operating modes available on the machine.
Explains the function of control buttons (+, -, V, S) and LEDs for specific modes.
Details control functions for Mode 6 and the automatic program.
Information on selecting appropriate welding cables and tools for repair tasks.
How to select operating modes, programs, and output power using control buttons.
Further details on automatic control, calibration, and weld quality signals.
Step-by-step guide for calibrating AC1 and AC2 automatic programs.
Explanation of automatic control systems and special programs like ACE, AC1/AC2.
Instructions for attaching stud holders, graphite arc probe, and tongs.
Instructions for fitting electrodes, wheels, and slide-hammer tool attachments.
Procedures for preparing and securing the earth connection for various operating modes.
Basic welding rules and operational steps for using the single electrode gun.
How to adjust welding current and select modes/programs via display.
Common welding issues categorized by operating mode and their troubleshooting solutions.
List of error messages with codes, meanings, and actions to resolve them.
Key technical specifications, including voltage, current, cable size, and operating modes.
Presents the electrical block diagram for the machine's power and control circuits.
Graphical representation of welding current versus cable length and mains voltage.
Diagrams illustrating intermittence factor and welding current relationships.
List and images of components included in the basic spare parts set.
Spare parts and accessories specific to the C-tong welding attachment.
Spare parts and accessories specific to the X-tong welding attachment.
Catalog of available welding cables with specifications and part numbers.
Catalog of various electrode lengths and types with corresponding part numbers.
List of general accessories like handles and yokes with part numbers.
Spare parts and accessories for the Fender Edge Kit.
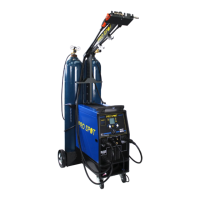
| Brand | Pro Spot |
|---|---|
| Model | PR-8 |
| Category | Welding System |
| Language | English |