EasyManua.ls Logo

Pro Spot SP-5 DP - User Manual

Pro Spot SP-5 DP
24 pages
Print Icon
To Next Page IconTo Next Page
Loading...
All Info Copyright © Pro Spot International Inc. 2 0 1
Instruction M anual
 PS S
D PS
 D
SP-5 DP
MNL-SP-5 -Rev.A
Instruction M anual
MNL-SP-5

Questions and Answers

  • M
    Michele SchaeferSep 6, 2025
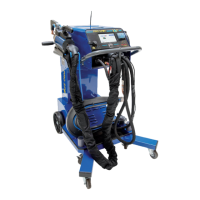
    What to do if my Pro Spot Welding System display is off?
    • J
      Jennifer HallSep 6, 2025
      If there's no “life” from your Pro Spot Welding System and the display is off, it could be due to: * An input cable or plug malfunction. Check for proper input cable connection. * A wrong size fuse. Check the fuse and replace it as necessary.
  • R
    Robert TuckerNov 25, 2025
    What to do if my Pro Spot SP-5 DP feed motor operates but wire will not feed?
    • Y
      ymckayNov 25, 2025
      If the feed motor operates but the wire won't feed on your Pro Spot Welding System, consider the following: * The wire feeding motor might be faulty (rare), consider replacing it. * There might be insufficient feed roller pressure, increase the roller pressure. * There might be a burr on the end of the wire, recut the wire square with no burr. * The liner might be blocked or damaged, clear it with compressed air or replace the liner. * The voltage or wire feed speed might be too low, readjust the welding parameters. * There might be a loose connection inside the machine (rare), clear with compressed air and tighten all connections. * The contact tip might be worn or the wrong size, replace the contact tip. * The gun connection might be loose or the gun assembly faulty, tig...
  • A
    Amanda SchneiderSep 18, 2025
    How to fix not clear display on Pro Spot SP-5 DP Welding System?
    • J
      Joel NewtonSep 18, 2025
      Set display contrast.
  • K
    kayla83Sep 16, 2025
    Why is the weld deposit too thick with my Pro Spot SP-5 DP Welding System?
    • J
      Judy HillSep 16, 2025
      If the weld deposit is too thick with your Pro Spot Welding System, it may be because: * The torch was moved over the workpiece too slowly. Move the torch faster. * The welding voltage is too low. Increase the welding voltage.
  • P
    Patricia WilcoxSep 14, 2025
    Why is the weld deposit “stringy” and incomplete with my Pro Spot SP-5 DP?
    • J
      Jessica FowlerSep 14, 2025
      If the weld deposit is “stringy” and incomplete with your Pro Spot Welding System, it could be because: * The torch was moved over the workpiece too quickly. Move the torch slower. * The gas mixture is incorrect. See shielding gas table.
  • W
    Wanda DavisSep 12, 2025
    What to do if my Pro Spot SP-5 DP Welding System is showing the alarm screen with message “Max Pout”?
    • E
      Emily JacksonSep 13, 2025
      If your Pro Spot Welding System displays the alarm screen with the message “Max Pout”, it indicates that the required power exceeds the generator supply capacity. Limit the welding parameters.
  • A
    Amber OlsonSep 12, 2025
    Why does my Pro Spot Welding System gun nozzle arc to the work surface?
    • P
      Priscilla MuellerSep 12, 2025
      If your Pro Spot Welding System gun nozzle arcs to the work surface, it is likely due to slag buildup inside the nozzle or the nozzle being shorted. Clean or replace the nozzle.
  • N
    nmillerSep 9, 2025
    Why is my Pro Spot SP-5 DP wire pushing the torch back from the workpiece?
    • J
      Jason BakerSep 9, 2025
      If the wire pushes the torch back from the workpiece with your Pro Spot Welding System, it could be due to: * A wire feed speed that is too fast. Decrease the wire feed speed. * A bad connection between the earth clamp and the workpiece. Clean and deoxidize the contact area of the earth clamp. * The workpiece being excessively oxidized or painted. Brush carefully the point to be welded.
  • T
    Timothy RiceSep 7, 2025
    What to do if my Pro Spot SP-5 DP Welding System wire is birdnesting at the drive roller?
    • C
      Christopher DanielsSep 7, 2025
      If the wire is birdnesting at the drive roller of your Pro Spot Welding System, it could be due to: * Excessive pressure on the drive roller. Adjust the pressure on the drive roller. * A worn or damaged gun liner. Replace the wire liner. * A clogged or damaged contact tip. Replace the contact tip. * A liner that is stretched or too long. Cut the wire liner at the right length.
  • T
    Timothy RamirezAug 21, 2025
    Why is my Pro Spot SP-5 DP machine powered ON, but not working?
    • M
      Michael MorganAug 21, 2025
      Your Pro Spot Welding System might not be working due to several reasons: * The thermic protection might have been triggered because of overload or exceeding the duty cycle. Respect the duty cycle of the machine. * The thermic protection might have been triggered because of overtemperature. Allow the welder to cool. Wait until the pilot lamp on the wire feeder front panel is off, indicating the thermostat has closed. * The fan may be obstructed. Free the fan from possible obstructions or replace it.

Summary

About Pro Spot

Pro Spot Training and Services

Details Pro Spot's distributor training and customer support services.

Contact Information

Provides Pro Spot's official contact details including address, phone, fax, and email.

SAFETY INFORMATION

Personal Protection

Guidelines on protective clothing, eyewear, and ventilation to prevent injury.

Fire Prevention

Safety measures to prevent fire and explosion hazards during welding.

Electric Shock Hazards

Warnings and precautions against electrical shock during operation and maintenance.

NOISE EXPOSURE

Noise Control

Information on preventing hearing loss from welding noise.

ELECTROMAGNETIC COMPATIBILITY

EMC Guidelines

Guidelines for ensuring proper operation in environments with electronic devices.

PROTECTIVE WELDING GASES

Gas Cylinder Safety

Safe handling and usage of shielding gas cylinders.

INTRODUCTION

Main Features Overview

Overview of the welder's capabilities and inverter technology benefits.

INSTALLATION

Location Guidelines

Recommended placement for the welder to ensure safety and optimal operation.

Power Requirements

Details on voltage, amperage, and electrical connection for the welder.

General Safety Instructions

Essential safety precautions before connecting and operating the power source.

PREPARATION FOR WELDING

Connections

Instructions for connecting the earth cable and torch to the welder.

Wire Loading Procedure

Step-by-step guide for loading welding wire into the machine.

GAS CYLINDER AND REGULATOR CONNECTION

Gas Cylinder Setup

Procedure for connecting gas cylinders and regulators safely.

REPLACE WIRE LINER

Wire Liner Replacement Guide

Guide for replacing the wire liner for different torch types.

ALUMINUM WELDING SETUP

Aluminum Welding Settings

Specific settings and considerations for welding aluminum materials.

UNIT CONTROLS

Front View Control Interface

Detailed explanation of the front panel connectors and controls.

INITIAL SETUP MENU

Basic Setup Options

Configuration settings for VRD, initial speed, water cooling, units, language, and contrast.

SPECIAL SETUP OPTIONS

Advanced Setup

Advanced settings for Gas Lift, Arc Start, Drop Cut, Arc Feeling, Left/Right View.

SYSTEM INFORMATION

System Log and Info

Accessing system log and detailed system information, including PCB versions.

MIG WELDING

Torch Selection & Basic Setup

Selecting the torch and initial parameters for MIG welding.

MIG Manual Mode

Setup and parameters for MIG Manual (MAN) welding process.

MIG Synergic Mode

MIG Synergic Setup

Setup and parameters for MIG Synergic (SYN) welding process.

Wire Pulse Functionality

Wire Pulse Setup

Configuration and parameters for wire pulse welding.

Double Pulse Feature

Double Pulse Description

Description and setup for the double pulse welding feature.

MIG Pulse Welding

MIG Pulse Setup

Detailed setup and parameters for MIG pulse welding.

Double Pulse Setup View

Double Pulse Parameters

Detailed view of the setup parameters for the double pulse feature.

MMA WELDING

MMA Process Setup

Instructions for connecting electrodes and setting parameters for MMA welding.

TIG WELDING

TIG Process Setup

Instructions for connecting the torch and setting parameters for TIG welding.

TIG 2-Stroke Mode

TIG 2-Stroke Operation

Description of the 2-stroke welding mode for TIG.

TIG 4-Stroke Mode

TIG 4-Stroke Operation

Description of the 4-stroke welding mode for TIG.

SAVE & RECALL

Save;Recall for MMA;TIG

Procedure for saving and recalling MMA and TIG welding parameters.

Save;Recall for MIG MAG

Procedure for saving and recalling MIG/MAG welding parameters.

SOFTWARE UPDATE

USB Update Procedure

Steps to update the welder's software using a USB drive.

PROTECTION GASES GUIDE

Gas Selection Guide

Table and notes on suitable protection gases for different welding applications.

WELDING HINTS AND MAINTENANCE

Welding Tips and Maintenance

Practical advice for welding and routine maintenance of the equipment.

FAULTS LIST AND TROUBLESHOOTING

List of Common Errors

Table of common problems, their causes, and solutions.

GENERAL TROUBLESHOOTING

Troubleshooting Chart

Troubleshooting chart for common welder issues like no output or feed problems.

Pro Spot SP-5 DP Specifications

General IconGeneral
BrandPro Spot
ModelSP-5 DP
CategoryWelding System
LanguageEnglish

Related product manuals