FM15_P28 HV PN7 (-TS) Ver I_052217
Page 12 P2/3 HV-PN7 Series
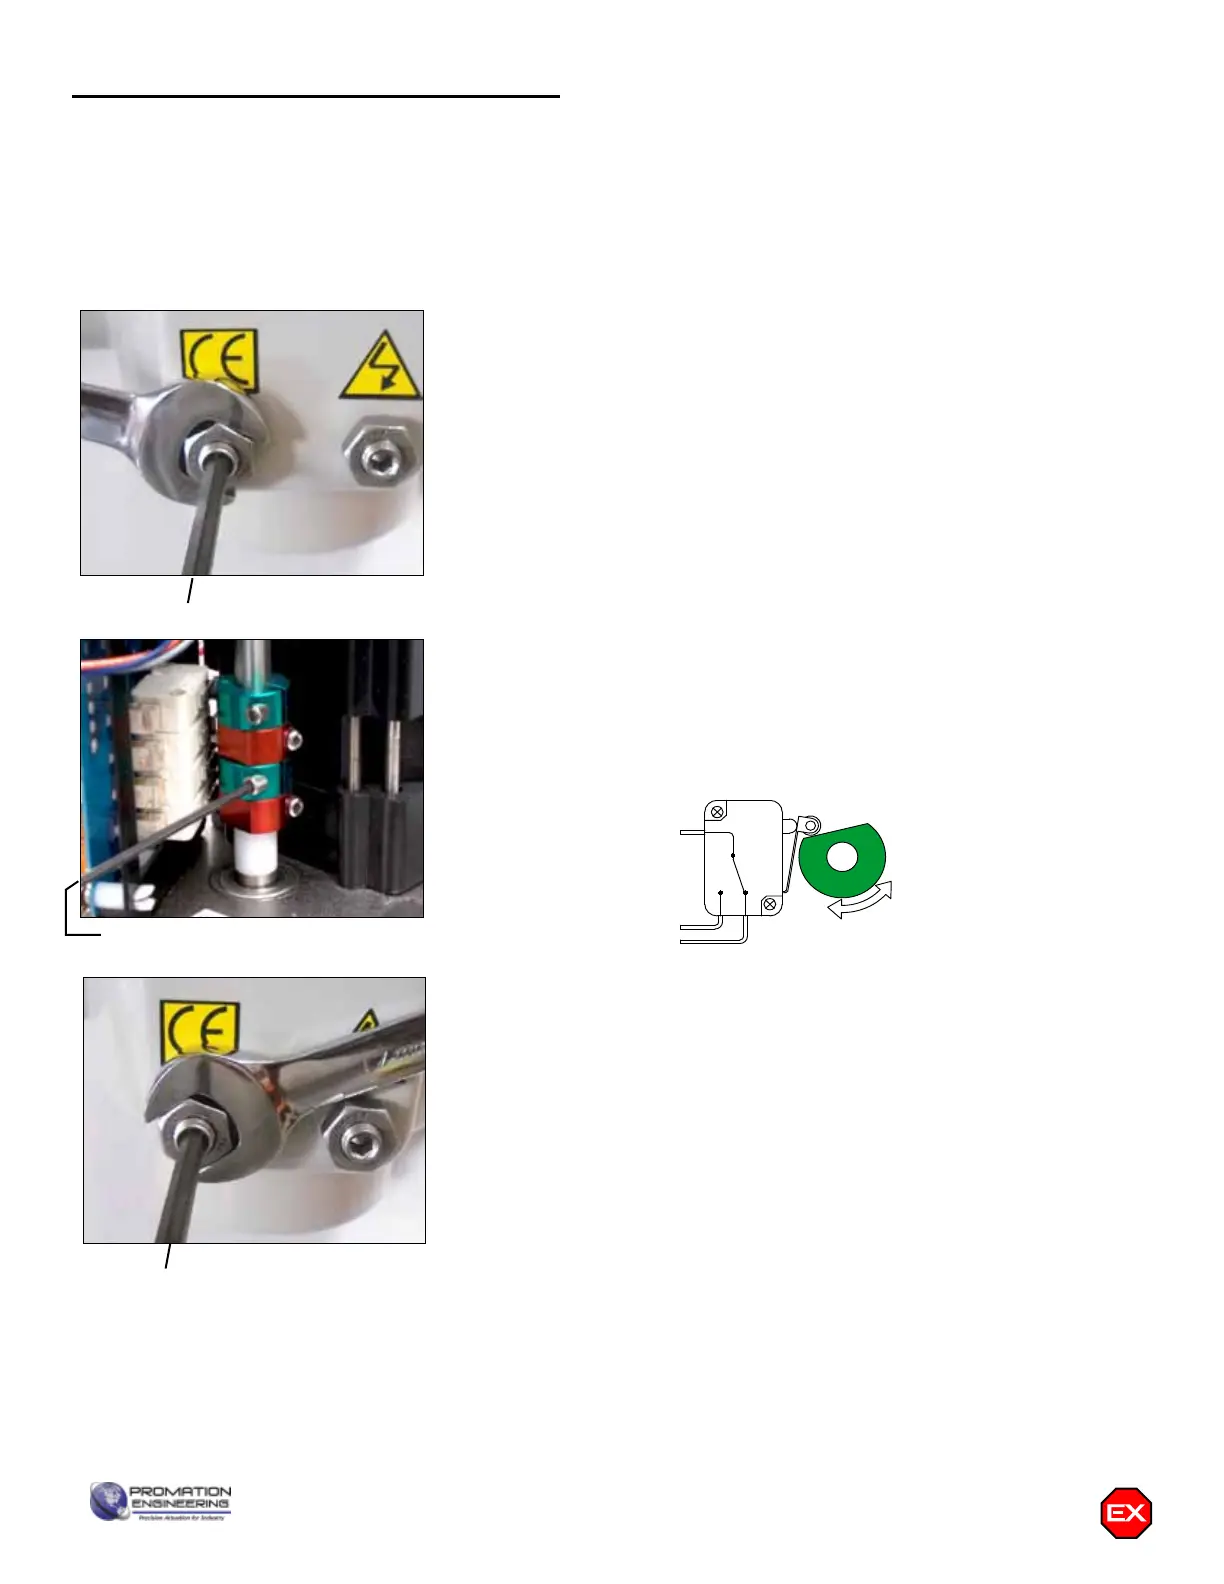
CCW Mechanical Stop
CCW Mechanical Stop
Notice! After completing this step, you must initiate a recalibration routine (see Auto-Calibration
Procedures) in order for the changes to take effect in the controller.
The mechanical stop screw limits handwheel operation ONLY and is NOT to be
used as an electrical travel limiting device.
Loosen Mechanical Stop
1. BEFORE power is applied, use a 17mm wrench and a 5mm hex key
to loosen the LEFT SIDE mechanical stop. This is the CCW stop limit
adjustment. Turn the stop screw 5-6 turns CCW to allow electrical cam
stop adjustment without running into the mechanical stop screw.
2. Use the manual hand wheel to position the actuator to your required
CCW position. This must be within +/- 3 degrees of the factory setting.
Adjust Cam 2
3. The second cam is Cam 2, the CCW end-of-travel adjustment. Once
the actuator is at its required CCW position, with POWER OFF, use
a 2.5mm hex key to free up the cam set screw. Once it is free, rotate
the hex key to the LEFT 10-15 degrees to reset the switch roller arm.
Then snug the set screw up against the camshaft (CW) until slight
pressure is felt. Then SLOWLY rotate the hex key pushing the cam to
the RIGHT until you hear the “click” on the second switch indicating
that correct adjustment has been achieved. Tighten the set screw.
4. Apply power to the actuator and drive CW at least 15-20 degrees.
Then drive the actuator CCW until the cam stops the electrical travel.
Check to be sure this is the correct CCW position you require. Repeat
step 3 if further adjustment is needed.
Tighten Mechanical Stop
5. While holding the 17mm wrench on the LEFT SIDE jam nut to prevent
the jam nut from locking, turn the 5mm hex key CW until the end of
the stop screw bottoms out against the internal stop boss. Then turn
the hex key ONE FULL TURN CCW before locking that adjustment
with the jam nut. This procedure assures that the actuator reaches
its end of travel electrically before there is any interference from the
mechanical stop.
6. This completes the CCW position calibration.
COM
NO
NC
CLOSED
LIMIT
SWITCH
LESS
CLOSED
FURTHER
CLOSED
COM
NO
NC
OPEN
LIMIT
SWITCH
LESS
OPEN
FURTHER
OPEN
COM
NO
NC
CW LIMIT SWITCH
LESS
CW
FURTHER
CW
COM
NO
NC
CCW LIMIT SWITCH
LESS
CCW
FURTHER
CCW
Serious Damage to the actuator will result if the motor is allowed to drive the gear train into the
mechanical stop!! Remove power from this device BEFORE making any travel adjustments.
This actuator has been factory calibrated to operate between 0 degrees and 90 degrees.
Most quarter-turn products will not require recalibration of these settings. Proceed ONLY if
adjustments are required.
Cam 2
Adjusting the actuator CCW position