LIZARD
This document is protected by copyrights.
Copying, using, or distributing without permission of PROMOTECH is prohibited.
11
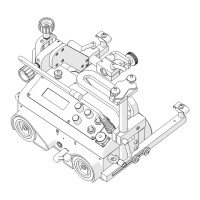
3.3. Positioning at the worksite
The guide arms must be positioned so that the carriage is in constant contact with the
workpiece. They can be set by a constant step (interval adjustment), or continuously
after they are swapped (continuous adjustment). To set them properly when the carriage
travels to the left, use the 4 mm hex wrench to loosen the screws securing the right
guide arm, move out the right arm about 10 mm (0.4’’) or one groove more than the left
arm (Fig. 5), and then retighten the screws.
Fig. 5. Proper positioning of the guide arms
Switch the magnet ON/OFF lever from left (‘O’) to right (‘I’), which will change the
clamping force from minimum to maximum. Loosen the levers to adjust the position
and angle of the torch, and set the torch position precisely using two knobs located at
the cross slide. When operating at heights, attach a safety line to the lug to prevent
possible injury if the carriage loses the clamping. The safety line is not included in
standard equipment.
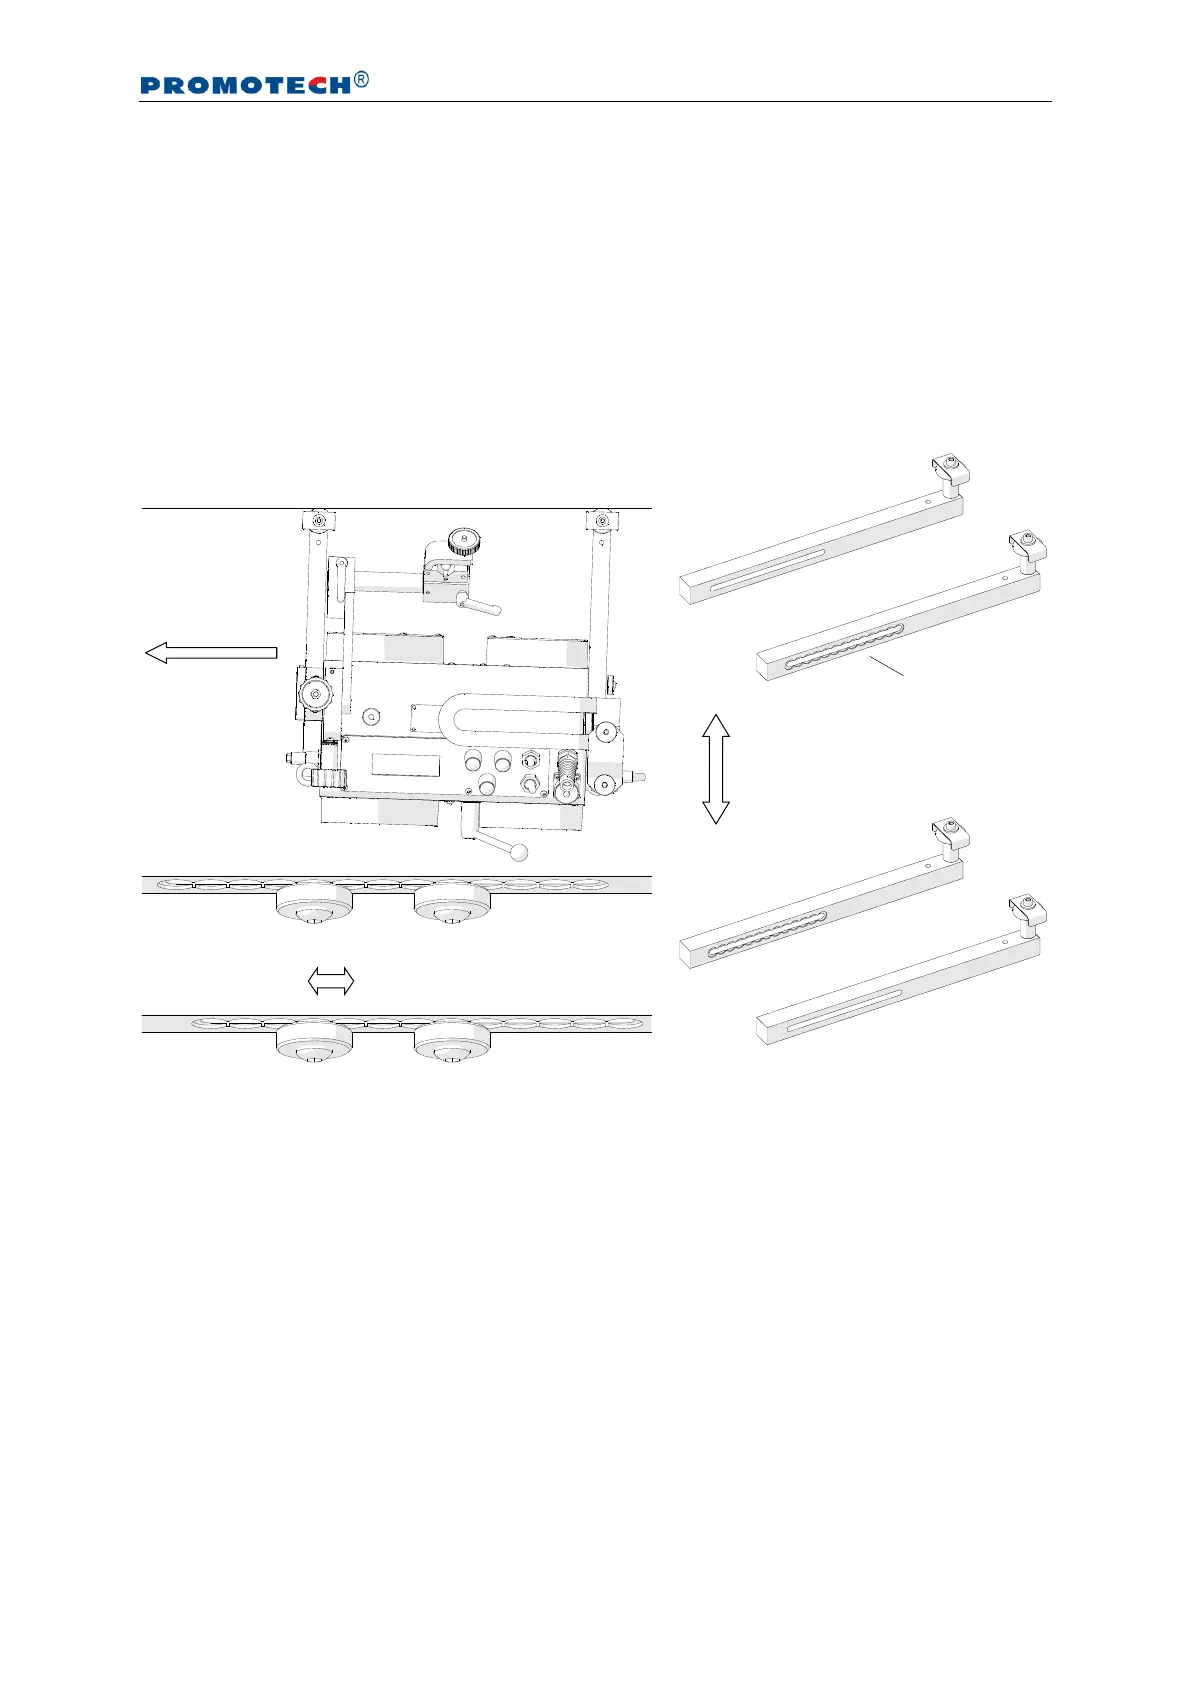
Swap the guide arms
to change between
methods of adjustment
Moving out the right arm
by one groove