37
Chapter 5
On-Site Replacements and Upgrading
Overview
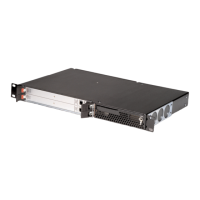
This chapter covers the removal and installation of replacement CPC358 cards in the event
that the MPS1000 needs to have cards replaced or repaired. It also covers upgrading a 4-port
version to an 8-port version and upgrading an 8-port version to a 16-port.
It is important to remember to follow safety procedures and grounding protocol in order not to
cause personal harm or equipment damage. If cards must be swapped out in the MPS1000, it
will be necessary to continue with the configuration of those cards as detailed in Chapter 6,
“Configuration Settings,” on page 43 before powering back up the MPS1000.
Topics covered in this chapter include:
• “Replacing a Card in an 4-port, 8-port or 16-Port MPS1000,” on page 37
• “Removing a CPC358,” on page 37
• “Installing a CPC358,” on page 39
• “Upgrading a 4-Port Version to an 8-Port Version,” on page 40
• “Upgrading an 8-Port Version to a 16-Port Version,” on page 41
• “Battery Instructions,” on page 42
Powering Down
To force a hard shutdown of the MPS1000, first make sure no applications are running, in order
to prevent loss of data. Press the power switch (located on the back panel of the unit on the
left-hand side).
The procedure for a soft shutdown of the MPS1000 is dependent upon the operating system it
is running. Your operating system will have a general procedure for shutdown, which should be
followed.
Replacing a Card in an 4-port, 8-port or 16-Port
MPS1000
The following instructions are used to replace a CPC358 card in a 4-port, 8-port, or 16-port
MPS1000.
Removing a CPC358
Follow these steps to remove a CPC358 from the MPS1000:
1. Unscrew the captive screws on the latches. Ensure that these screws are completely free before
trying to remove the card to prevent damage to the card and the MPS1000 chassis.