Pulsar® Infinity Operation and Installation Manual – Water Treatment 15
4 Feeder Start Up
4.1 Pre-Startup Procedure
Following the steps outlined below will ensure a smooth start-up of
the Pulsar® Infinity Feeder. For seasonal operation, perform this pro-
cedure each Spring.
IMPORTANT!! Do NOT put Pulsar® Infinity Tablets in the feeder
during the start-up operation.
4.1.1 Verify water flow through feeder
1. With the Pulsar® Infinity Feeder fully installed per the installa-
tion procedure, section 3.4, turn on the pool recirculation sys-
tem, and open all valves to the feeder.
Note: Before starting the flow test, ensure the pressure cap at
the top of the feeder is on and shut. Turn cap clockwise a quar-
ter turn until the triangle of the cap lines up with the body of
the feeder. This indicates the pressure tight seal on the feeder.
2. Increase the flow rate going through the feeder until it reaches
the maximum flow rate as read on the flow meter on the front
of the feeder.
3. With maximum flow going through the feeder, check the sys-
tem for leaks. Tighten all fittings as necessary if leakage is ob-
served.
4. When all leaks have been corrected, shut the inlet valve first,
then shut the outlet valve to fully isolate the feeder from the
pool filter system.
4.1.2 Adjusting the cartridge feed rate setting
Note: Adjust cartridge feed rate setting prior to loading with Pulsar®
Infinity Tablets. The feed rate setting of the cartridge may not be able
to be reduced if already full of tablets. Refer to table 4.2.2 on page 21
for feed rate setting.
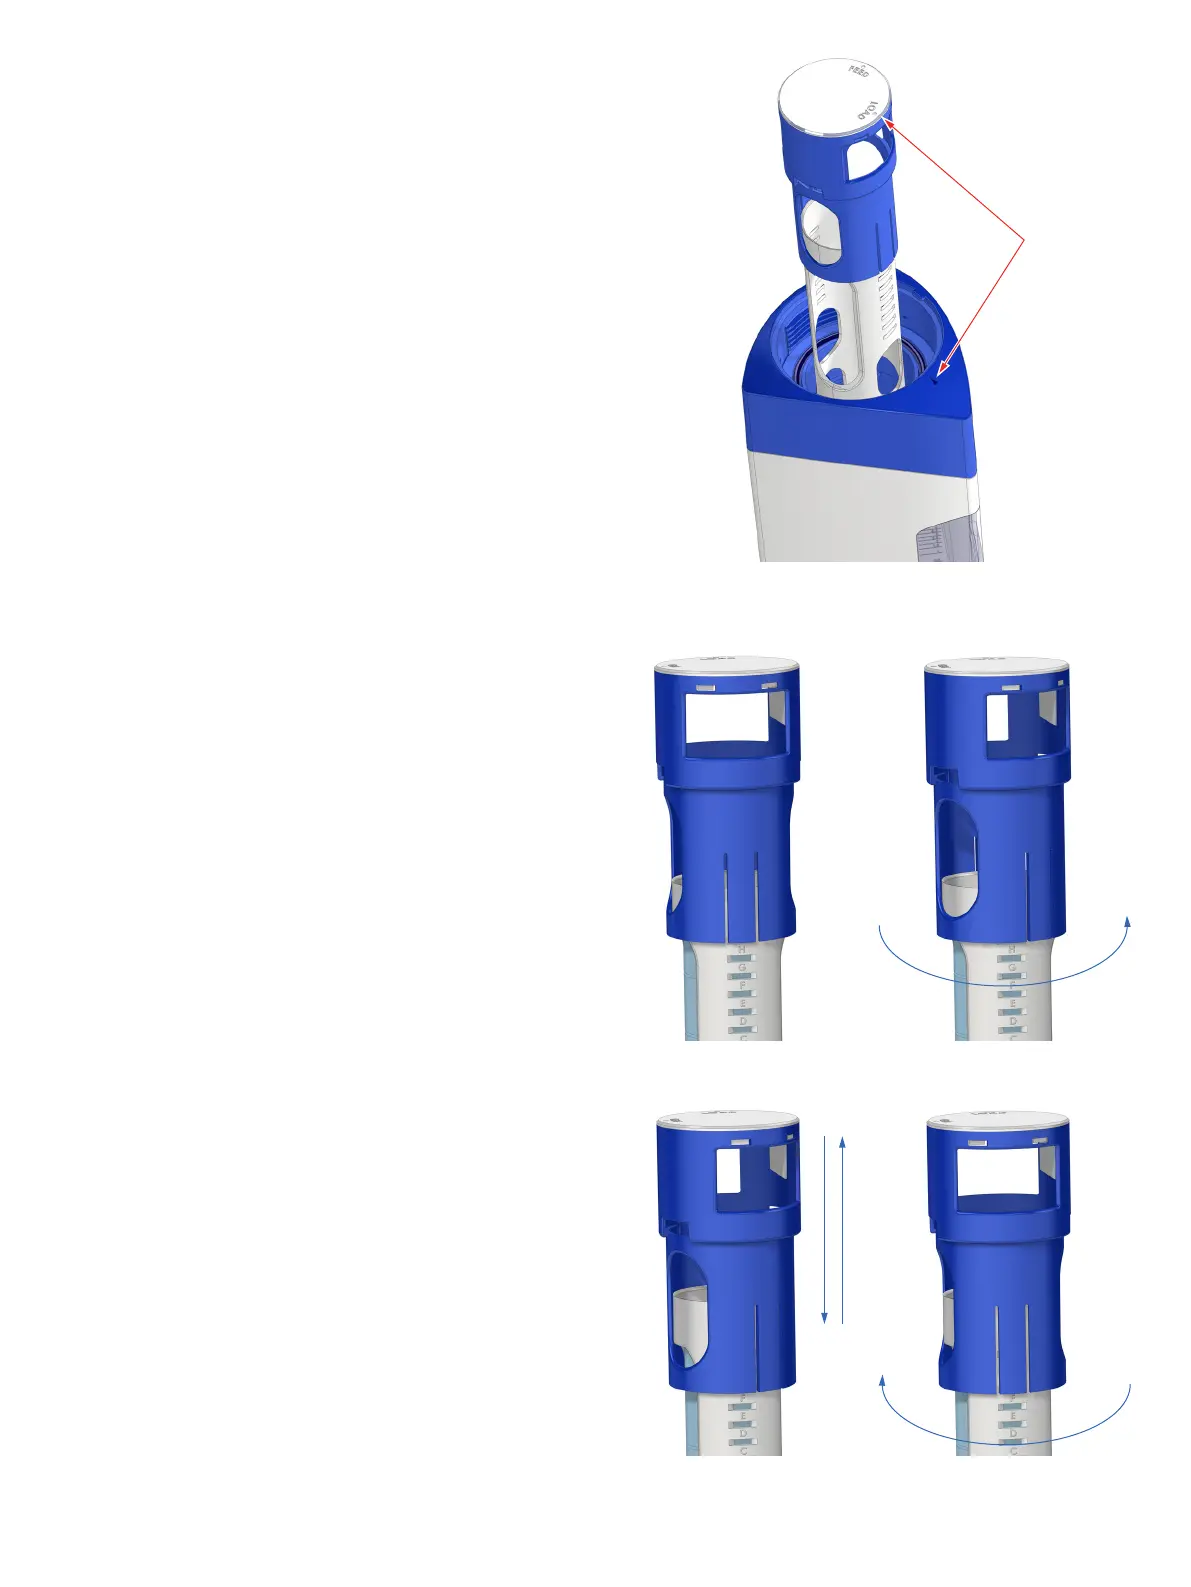
1. With pressure cap and seal cap removed, remove the cartridge
assembly from the feeder, turn counter clockwise so that load
lines up with arrow on the feeder (figure 9). This locks the car-
tridge assembly for easy loading or feed rate setting adjust-
ment. Follow steps #2 - #5 to complete the feed rate setting
adjustment.
2. See figure 10.
3. Twist counterclockwise (figure 11).
4. Slide up or down (figure 12).
5. Twist clockwise (figure 13).
Figure 9
Figure 10
Figure 12
Figure 11
Figure 13