Chapter 2: Installing the Chassis
Install Drives Into the QXS-456 Drive Chassis
QX and QXS Setup Guide 63
l If you are going to fully populate the entire drawer(s), install the drives starting from the back row and
moving towards the front row. Make sure to provide adequate support for the weight of the extended
drawer as you install the drives.
Drawer Diagrams
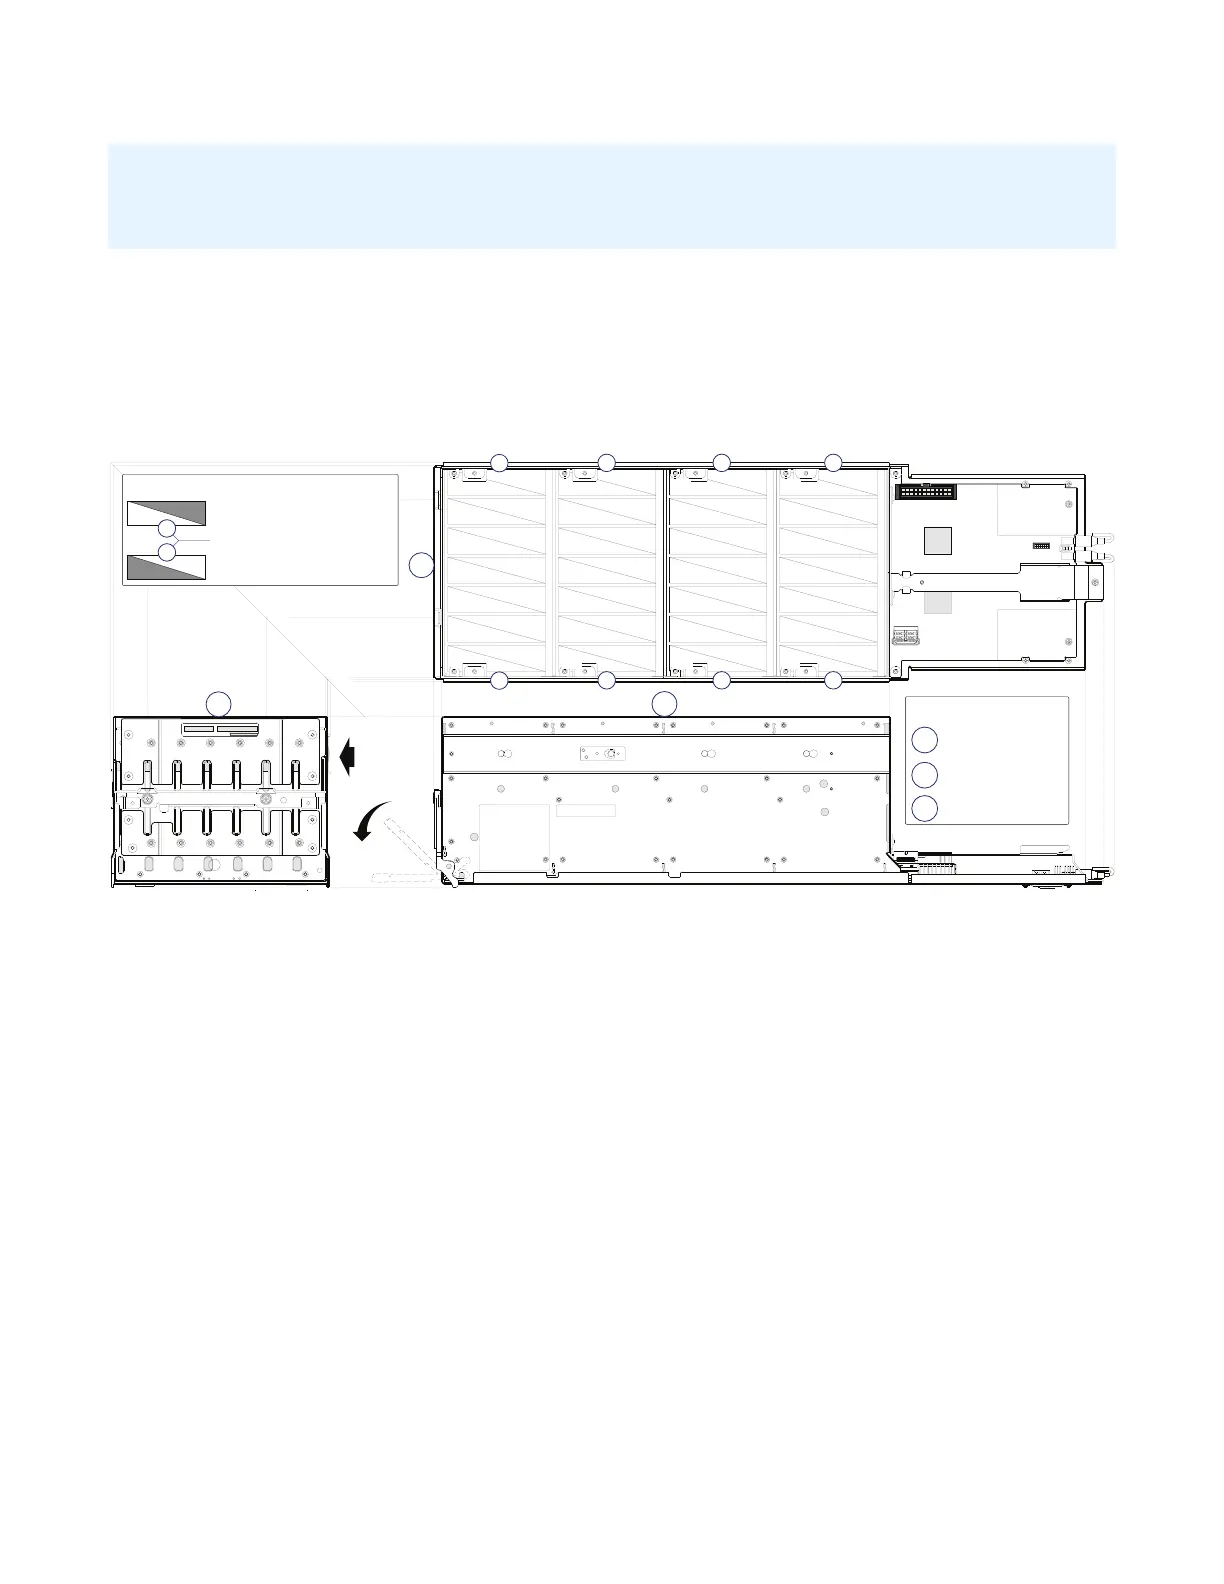
Diagram1:DriveLocations
PN: 21−00000590−00−02 rev A
0
28
1
29
2
30
3
31
4
32
5
33
34
7
35
8
36
9
37
10
38
11
39
12
40
41
42
15
43
16
44
17
45
18
46
19
47
48
49
22
50
23
51
23
52
25
53
26
54
55
14 21
2720
13
6
A
B
C
Front view
Top view
Right side view
Diagram legend:
A
Drawer multiviews
Disk rows with sequentially−numbered disk slots
B
C
0
3
1
2
0
3
1
2
D0
D1
Drawer 0 slot numbers
Drawer 1 slot numbers
Key: drawer/row/slot numbering
n
n
Disk row numbers
45° orthographic bisector
Revolve
handle
Theaboveimageillustratesthelocationofthedrivesanddrivenumbers(0-55).
l Drawer0containsdrives0-27.
l Drawer1containsdrives28-55.
l Populatethedrawerfromthefronttothebackwithdrives(0-27forDrawer0and28-55forDrawer1).
Diagram2:InstallingDrives