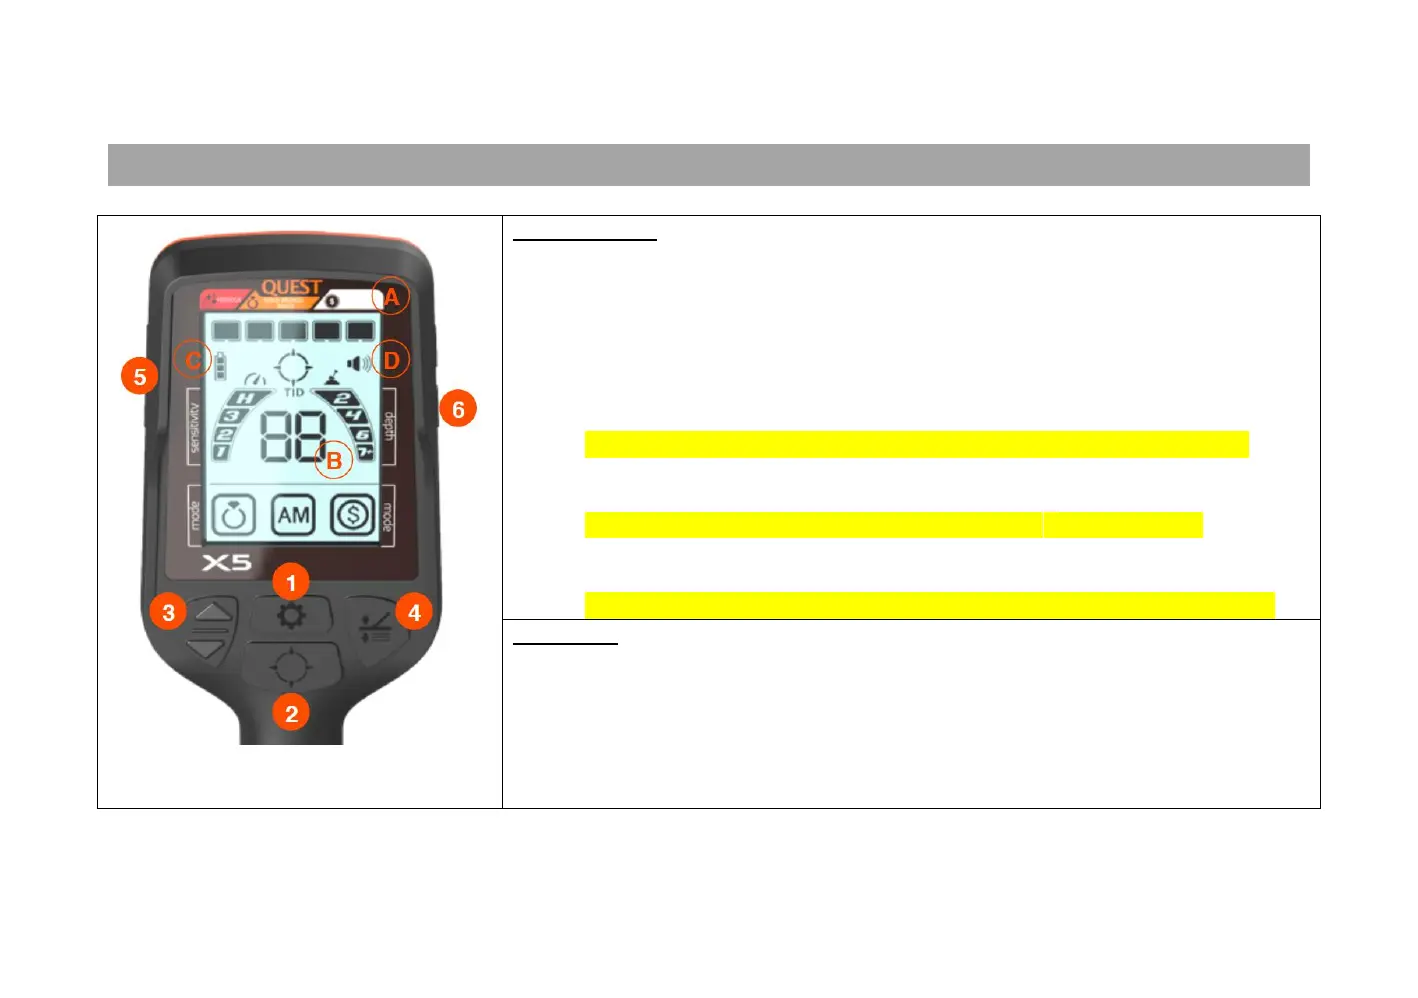
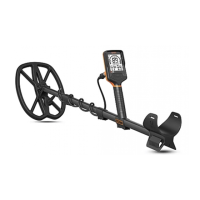
DISPLAY ICONS:
A. Target ID bars that are used to determine what targets are accepted and what
targets are rejected (see Advanced Programming section)
B. Two-digit target ID value used to provide a more accurate assessment of what
you have detected to aid in determining if you want to recover it
C. The first icon shows the current battery strength remaining.
D. This icon shows the current audio level heard through the speaker or
headphones
E. This shows a rough indication of the current Sensitivity level (1, 2, 3 or H). When
adjustments to Sensitivity are being made, the actual value is shown in the
center of the screen (see Area B)
F. This shows a rough indication of target depth (2”, 4”, 6” or 7”+). When the
Pinpoint function is activated, a more accurate indication is shown in the center
of the screen (see Area B)
G. Shows the 3 available search modes and which one has been selected for use
CONTROLS:
1. Turns the power On & Off and scrolls through the menu options
2. Activates the non-motion Pinpoint function
3. Adjusts the Sensitivity level
4. Used to set the Ground Balance for search locations
5. Adjusts the audio volume from the internal speaker or optional headphones
6. Activates the rear-mounted flashlight feature