Step 1. Connect the WaveGuide system to a computer
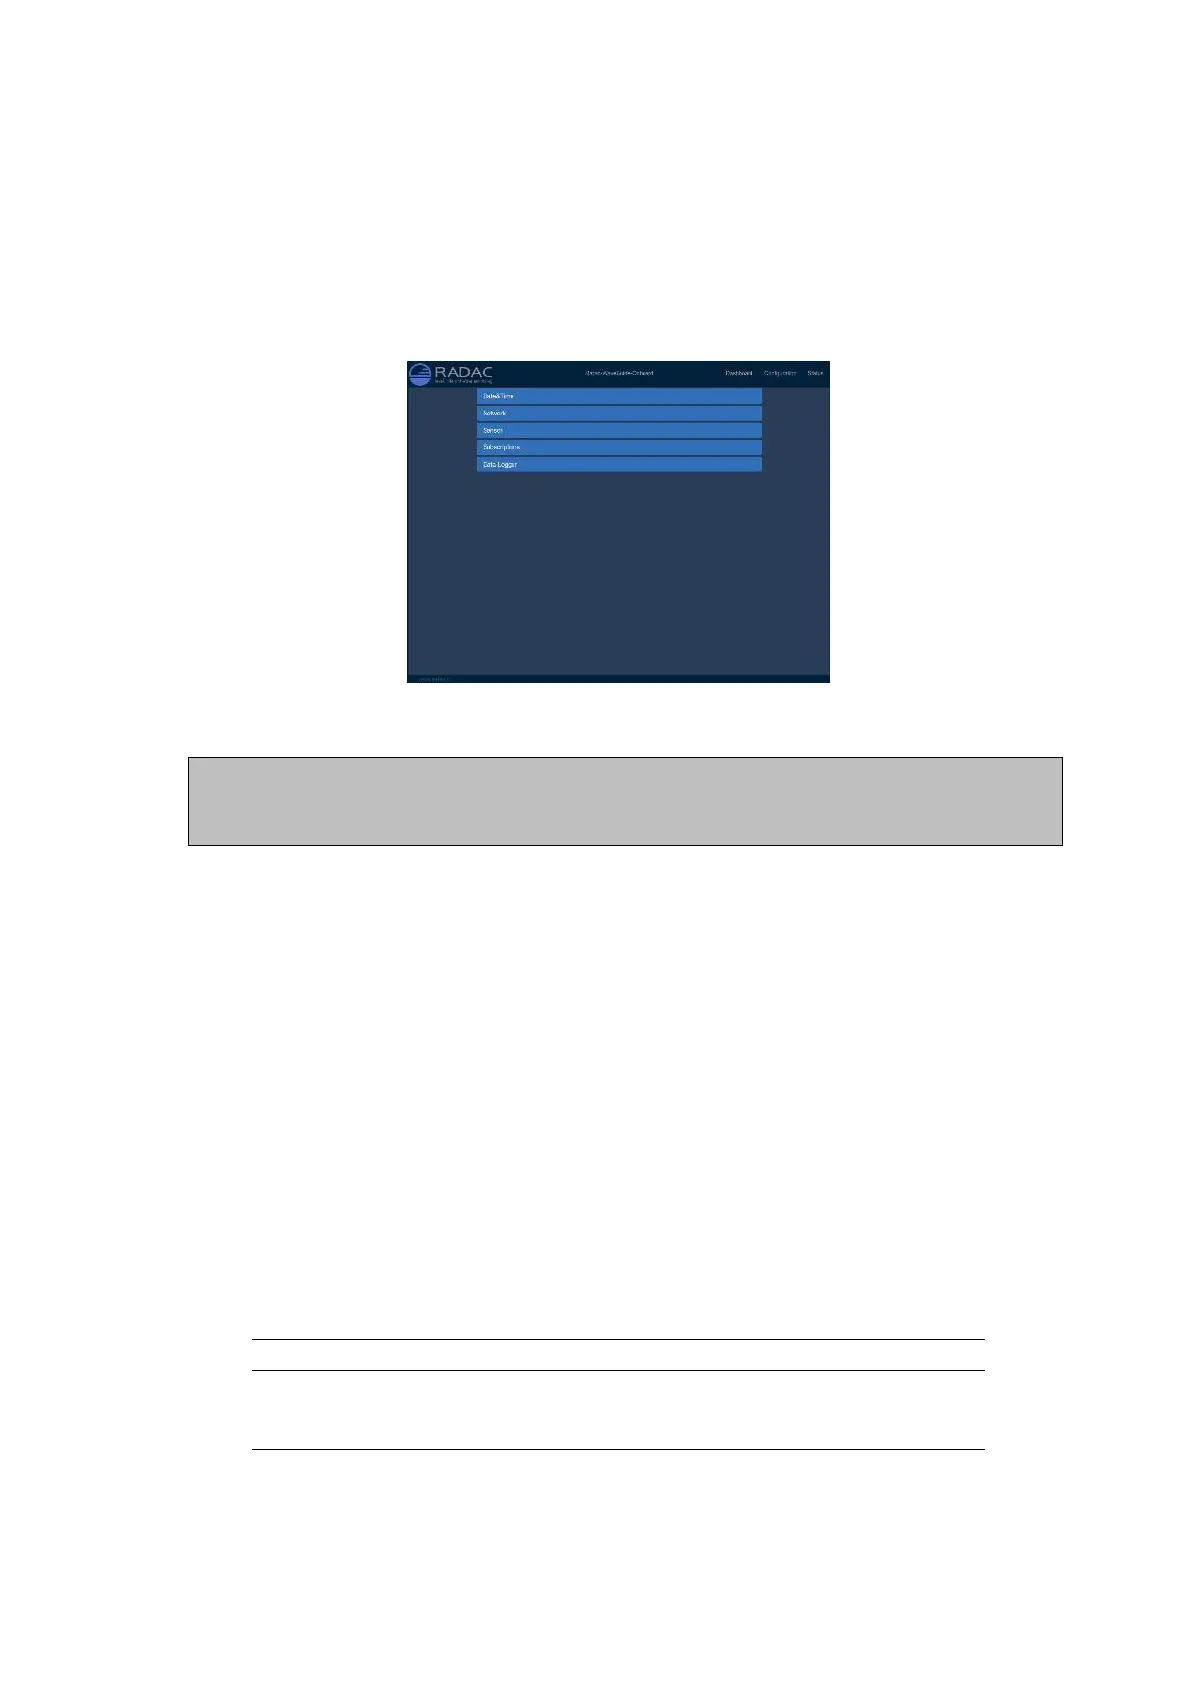
Once the WaveGuide system is connected to a Local-Area-Network, communication can be
done via the available web interface (Fig. 3.1). For this purpose any web browser with
JavaScript enabled can be used.
Figure 3.1: The web interface of the WaveGuide system.
Note
A computer can be connected to the WaveGuide system directly using a network cable (a
crossover cable is not required).
By default, during startup the WaveGuide system tries to obtain an IPV4 address by
searching the Local-Area-Network for a DHCP server.
If a DHCP server is available and the WaveGuide sensor completes the startup process, its
IPV4 address can be found using a Zeroconf browser such as Avahi or Bonjour.
If a DHCP server is not available, a temporary fixed IPV4 address can be set by connecting
the two reset poles in the sensors terminal compartment for 0.2 to 2 [sec]. This will cause
the sensor to use the default IPV4 address 192.168.111.71 until it is rebooted allowing the
user to access and change the network settings to the desired fixed configuration. Note,
that in order to access the user interface both the computer and the sensor must be on the
same IPV4 address subnet.
The WaveGuide sensor homepage contains three main sections (Dashboard, Configuration
and Status) as listed in Table 3.1.
Link Description
Dashboard Visualization of the measured data.
Configuration Changing the settings and configuration of the system.
Status System state overview and general information.
Table 3.1: Description of main sections in the user-interface.
15