•
H.m
Di'k
E.p,n,;on
Co"n""'"
.lra;"
RoH
..
B...
cke1
-'.,-'
r
A...,,,
P,,,,,I
Flo",",
D;,k""
Exp,n,ioo
Co"n"',,
•
•
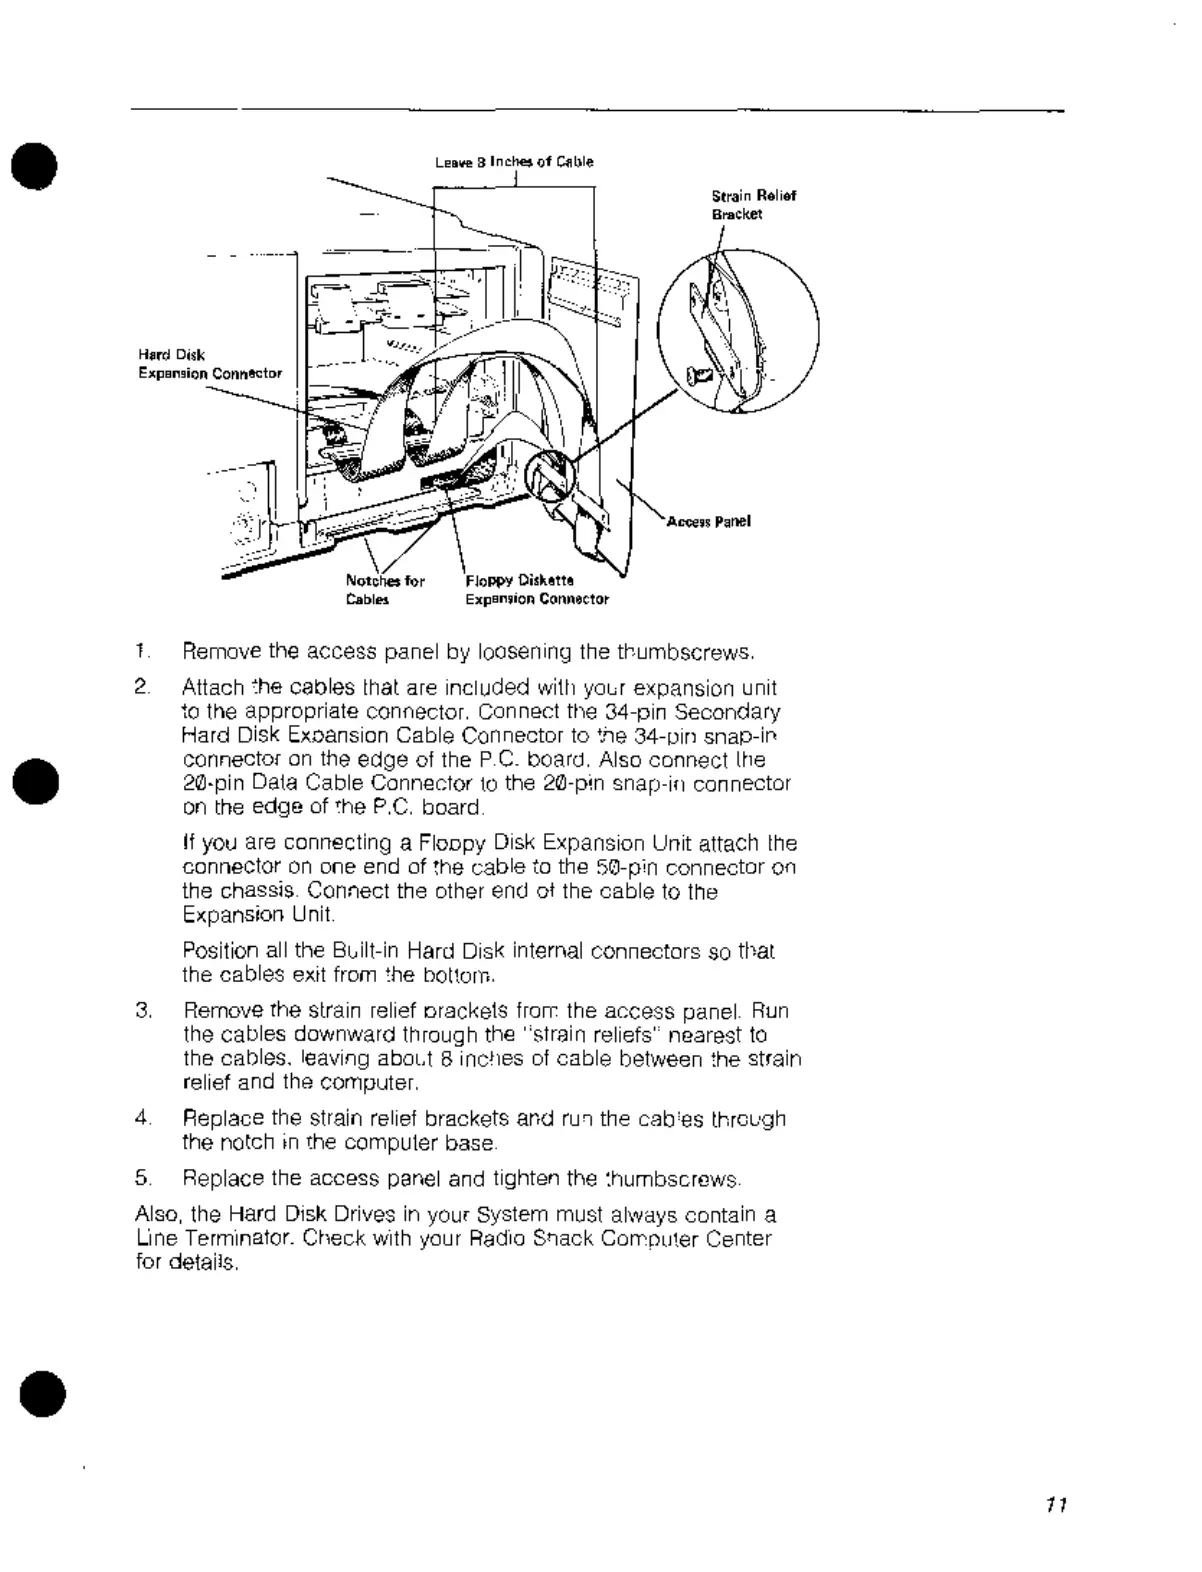
1 Remove the access panel by loosening the tbumbscrews.
2 Attach
'he
cables thai are included wittl
yOLr
expansion unit
to the appropriate connector. Connect
tl19
34-pin Secondary
Hard Disk Exoansion Cable Connector to 'he 34-pin snap-II'
connector
on
the
edge
of the
PC.
board, Also
conrwctll18
20·pin Data Cable Connector
to
the 20-pin snap-ill connector
on
the
edge
of
'he
P,C,
board
If
you
are
conll8cting a Floopy Disk Expansion Uilit attach
the
connector
on
one end of
,he
cable to the 50-p;n connector on
the chassis Connect the other end at the cable
10
the
E~pansioll
Unit
Position all the
B~ill-in
Hard Disk internal connectors so
tl'at
the cables exit from
'he
bolton"""
3,
Remove the strain relief orackets frorr the access panel.
Run
the cables downward through the "strain reliefs" nearest
fo
the cables. leaving abOl.t 8 incJl€s
of
cable between the strain
relief and the computer,
4 Replace the strain relief brackets and
rU1
the cab'as through
the notch
,n
the compufer base
5 Replace the
access panel and tighten the thumbscrews
Also, the Hard Disk Drives
in
your System must always contain a
L'lne
Terminator. Check
With
your
RadiO
S'lack COll'puter Center
for defails,
"

 Loading...