Wiring
Installation Guide CT100
Prepare Wires
Make sure your wires are labeled. If necessary, fi nd the “other
end” connection for each wire on your heating or air conditioning
equipment and note the label there.
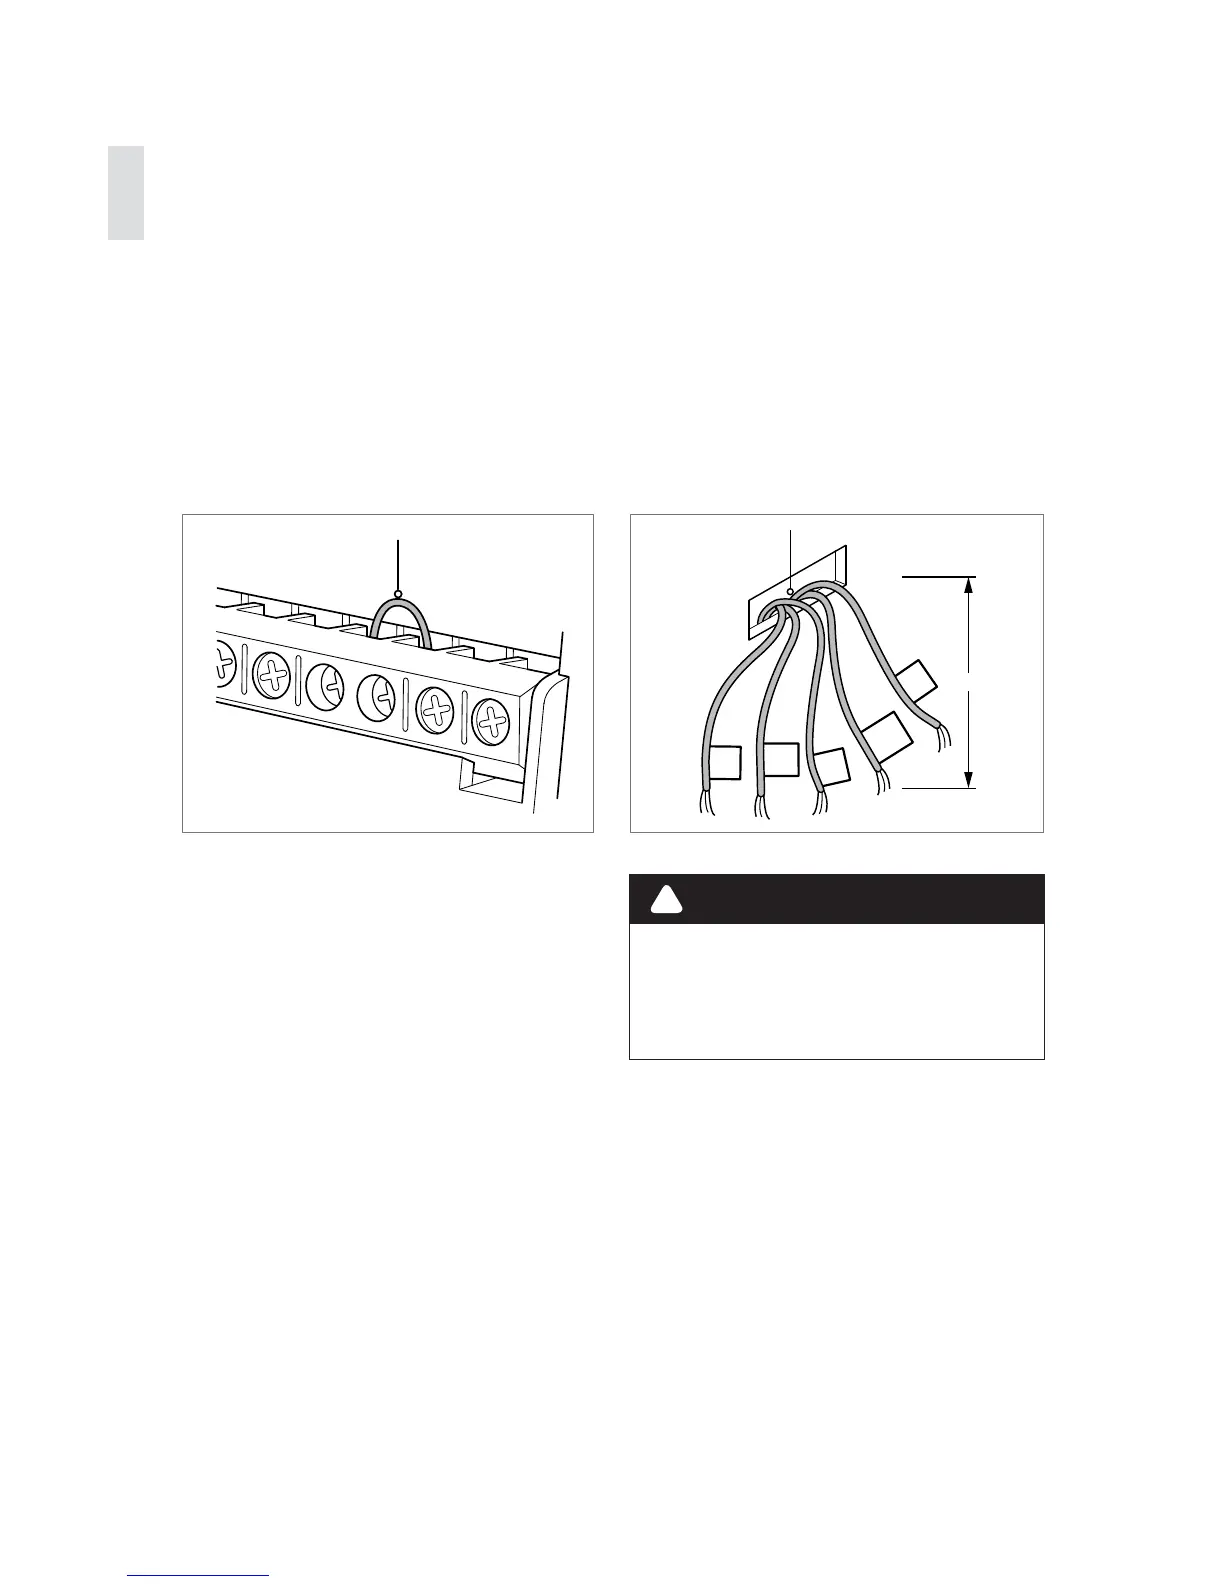
1. Fan out wires so that they are aligned with their terminals.
2. Position wires behind the CT100 and over the terminal area.
3. Do not bunch wires behind the CT100. Feed any slack back into
the wall opening.
Y
Y2
RH
RC
G
A
JUMPER WIRE
C
W
Y
RH
G
2.6”
FROM HVAC
SYSTEM
Follow these guidelines for safe and secure wire connections:
• Use at least 2.6 in. of wire for each of your connections to the
CT100.
• If you do not have enough wire, splice additional wire to allow
enough slack.
• Terminals accept wires from 16-22 awg.
• Remove 1/8 in. insulation from the tip of each wire.
• Take care not to damage the labels for each wire.
!
CAUTION
Do not allow wires to touch
each other or other parts on
the thermostat.
If you have both RH and
RC connections you must
remove the jumper wire
between these two terminals.
8
 Loading...