Wiring Diagrams
Installation Guide CT100
Accessory Wiring
Zoned Hot Water Heat
For Solenoid or Motor valves,
connect the wires based on the
diagrams to the correct terminal on
the CT100.
• USE ONLY IN HEAT MODE.
• The CT100 must be powered by
24v ac.
The third wire on your valve may be called 6, Y, or G (see the Wire
Reference Table on page 23.
Wiring Diagrams
Installation Guide CT100
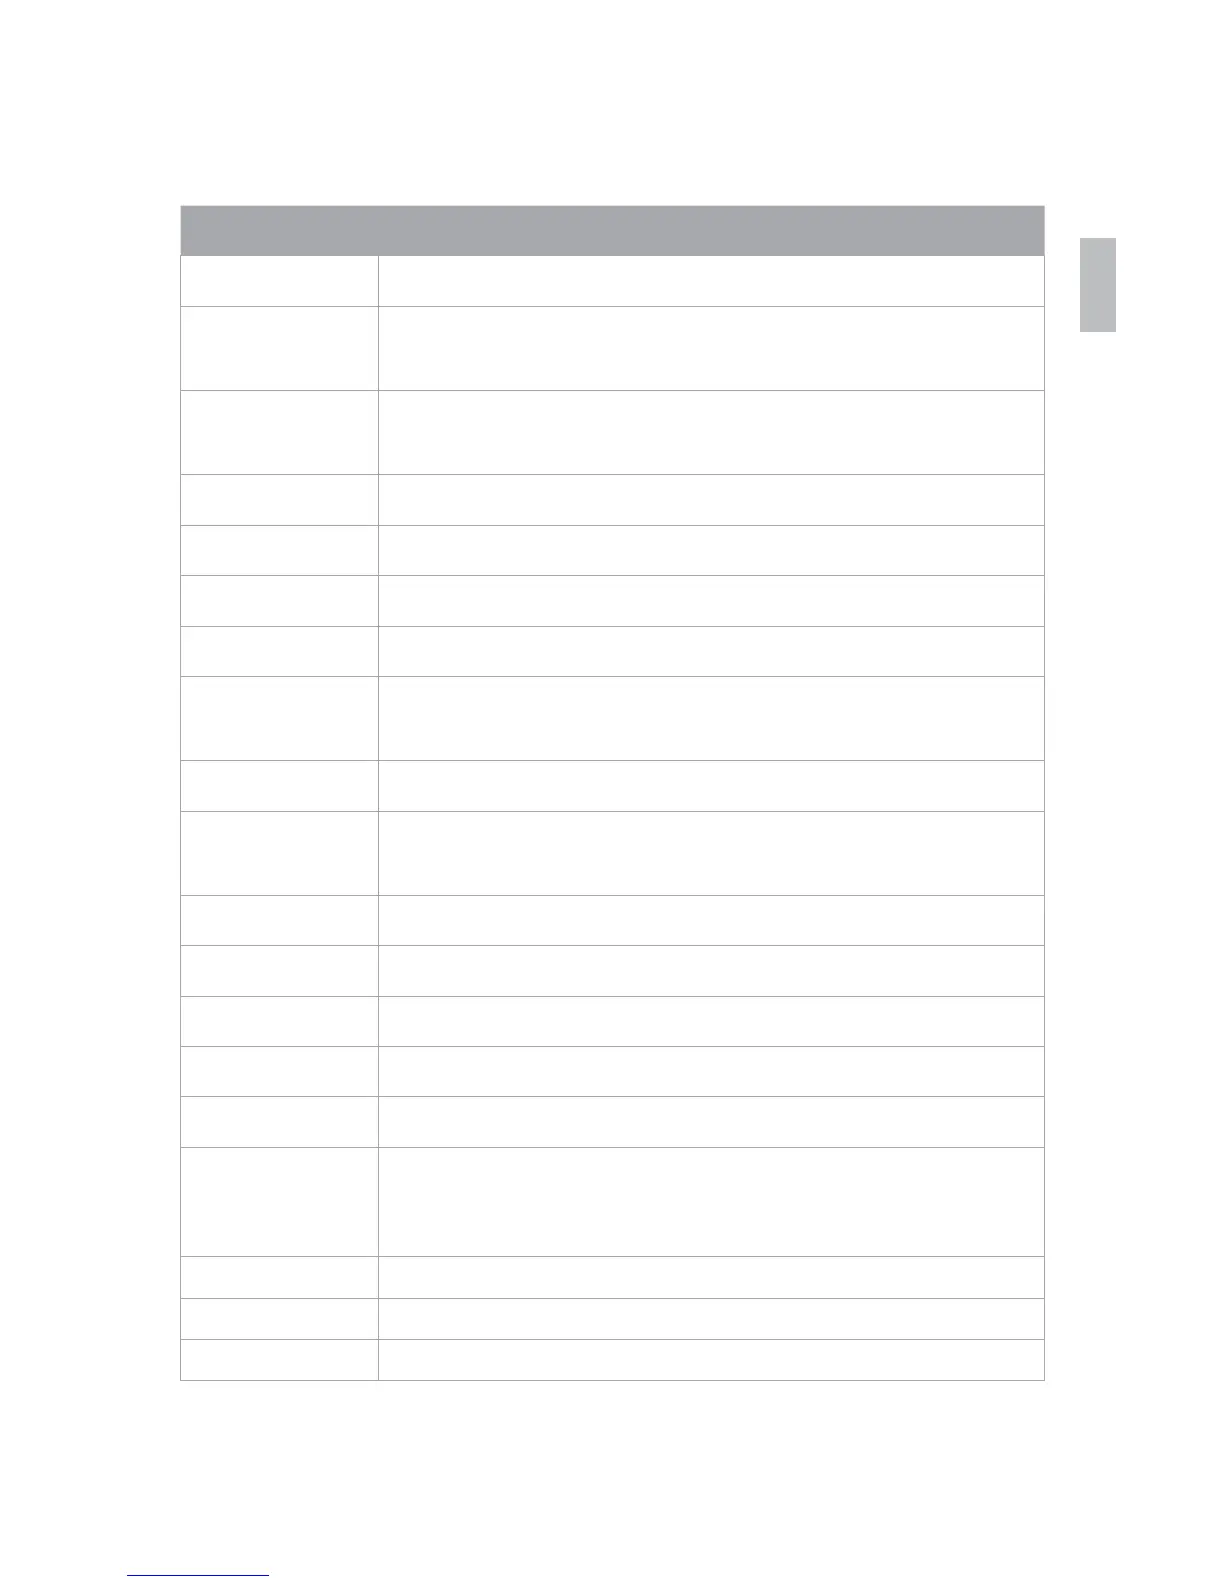
Wire Reference Table
Possible Wires What They Control
R or V or VR RH and RC Single power for HEAT and COOL
RH or 4 RH Power for HEAT (RH not connected to RC jumper clip
removed)
RC RC Power for COOL (RH not connected to RC jumper clip
removed)
W W Heat control
W2 W2 2nd stage HEAT or heat pump auxiliary heat
W3 W3 3rd stage HEAT or 2nd stage of 2 stage auxiliary heat
Y Y COOL control or 1st stage compression for heat pump
Y2 Y2 2nd stage COOL control or 2nd stage compression for
a heat pump
G or F G FAN control
C or X C 24VAC power (to power thermostat) NOTE: TRANE uses B
for this connection
H H External Humidifi er
DH DH External De-Humidifi er
EX
EX external fresh air baffl e
B
B Heat pump changeover (cool to heat, powered in heat)
O O Heat pump changeover (heat to cool, powered in cool)
B and O
IMPORTANT: If there are both B and O wires (Trane pump
products) DO NOT CONNECT B to B terminal. Instead,
connect B to C terminal. If not a Trane product, tape off B.
E n/a Emergency heat (do not connect, tape off )
L n/a System monitor (do not connect, tape off )
T n/a Outdoor sensor (do not connect, tape off )
23
 Loading...