- 14 -
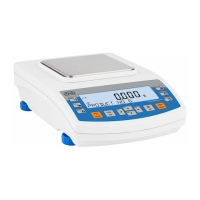
pane of the chamber.
Remove the left
and the right side
pane.
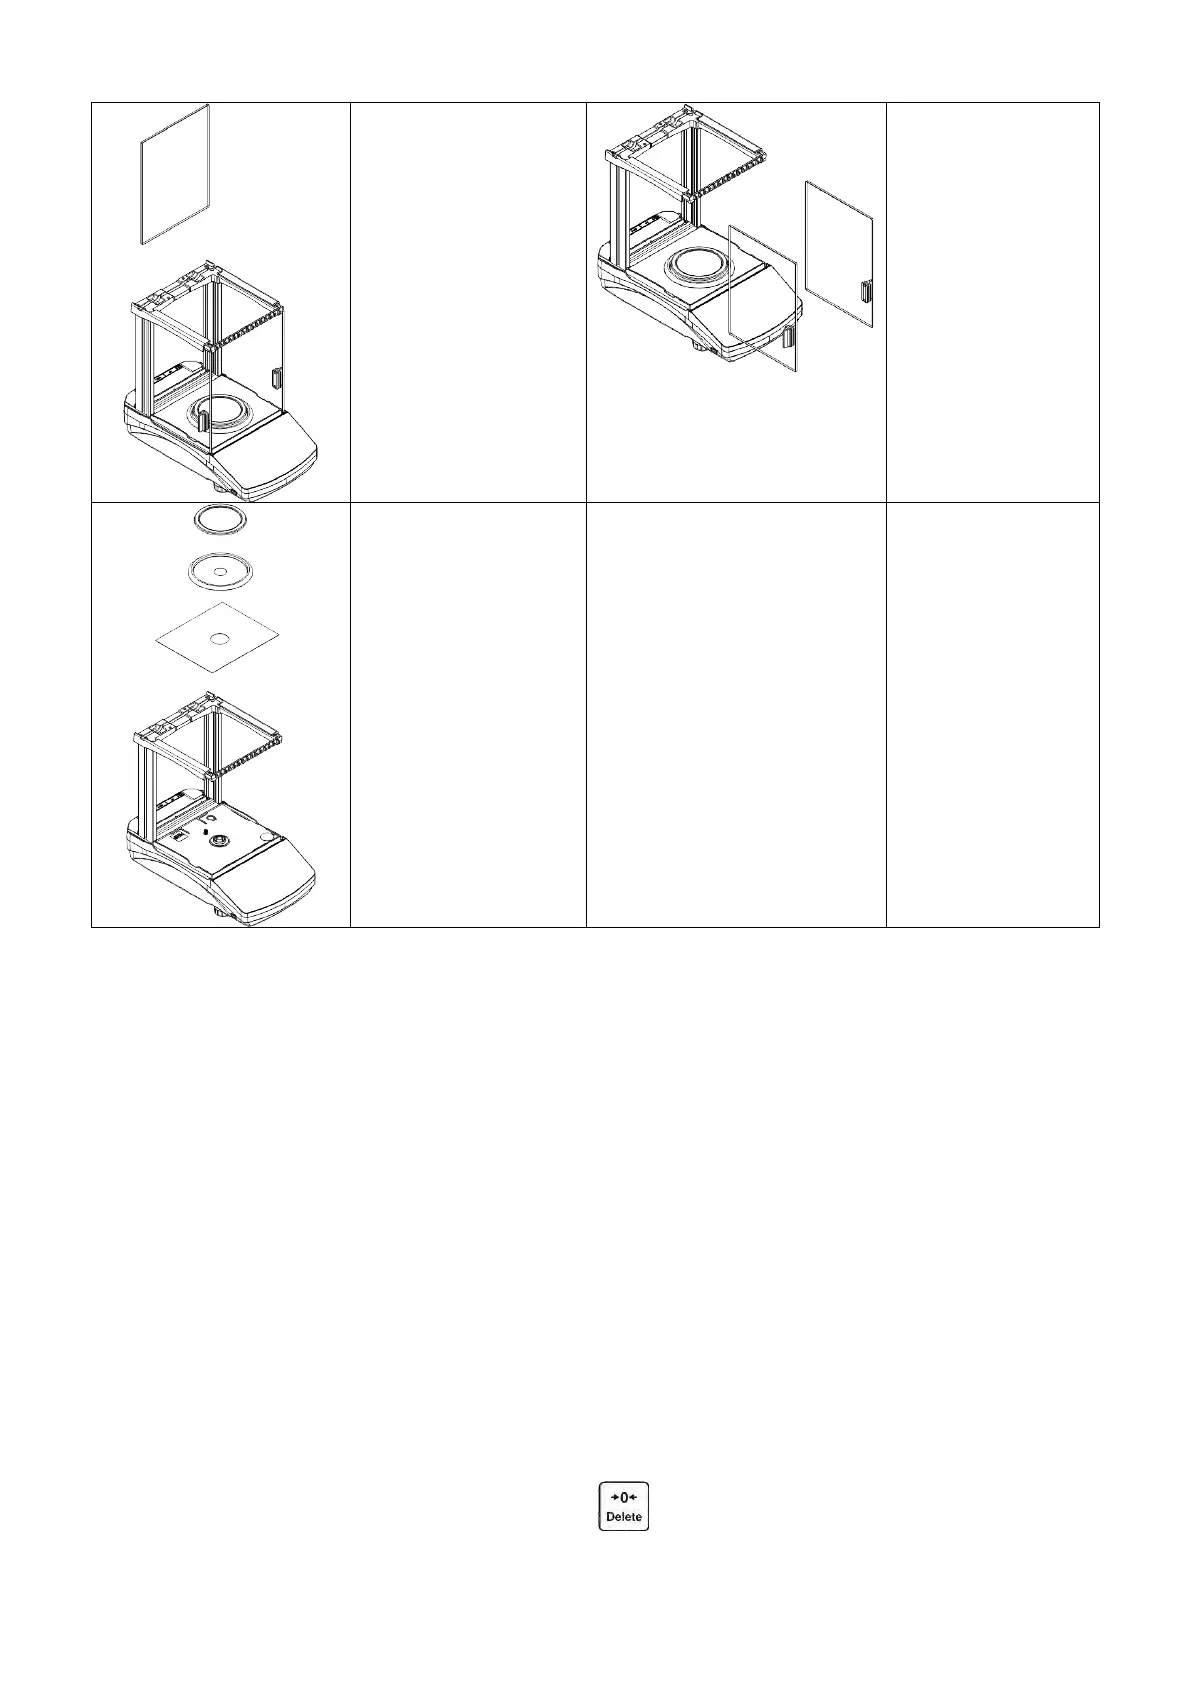
the weighing pan, the
bottom insert.
Clean the weighing chamber and the panes. All the operations have to be done carefully. Pay special
attention to the spot where the weighing pan is installed; dirt and other small elements might enter
the balance construction through this opening. This may cause incorrect operation of the instrument.
Upon maintenance completion carry out the same set of actions in a reverse order. Pay a special
attention to the left and the right side panes, assembly them on the correct side of the balance.
Thus prepared draft shield and panes can be properly cleaned. All the operations should be done
carefully. Pay special CAUTION to the spot where the weighing pan was installed: dirt and other
small elements might enter the balance construction through this opening, which might negatively
influence the balance parameters.
3.6. POWERING THE DEVICE
Balance can be connected to the mains only with a power adapter that comes standard with
the particular model. Nominal power supply of the power adapter (specified on the power
adapter data plate) should be compatible to the power from the mains.
Plug the balance to the mains – connect the power adapter to the socket, next connect its connector
to port located at the back of the balance housing.
Test of the display unit takes place right after connecting the balance to the power, all the elements
and pictograms are backlit for a short time. Next, the name and the program number appears, the
indication gets to ZERO (displayed reading unit depends on the balance). During the balance start,
the test of an internal mass adjustment mechanism occurs (single location and elevation of the
internal mass adjustment).
If the indication is different than zero, please press
button.
CAUTION!If the balance is “verified”, automatic adjustment occurs right after switching the balance on.
 Loading...