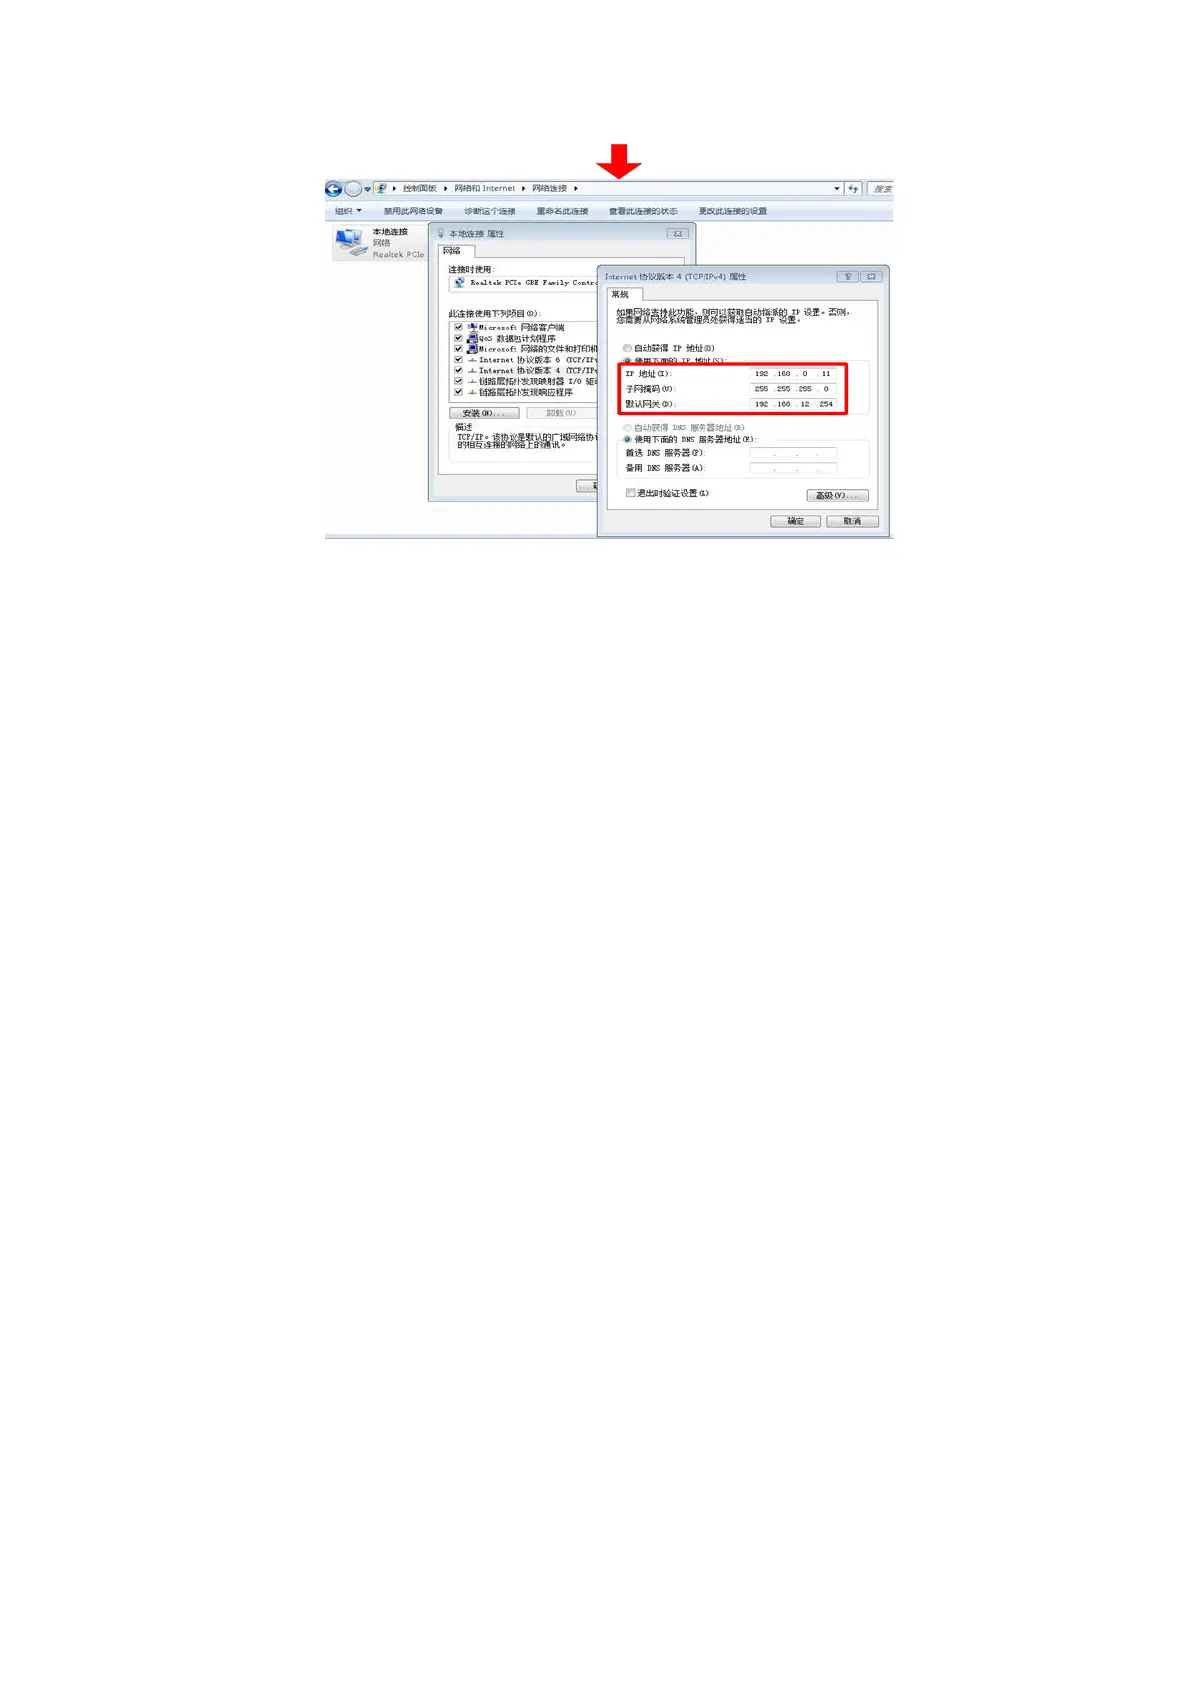
Configure TCP/IP in local PC
( the IP address of the PC
must be in the same network
segment)
Figure 9 Steps of Ethernet Connection
4.5 Steps of Installation
(1) Carefully take out the laser from the box and move it to the installing position and then
lock the casters;
(2) Remove the output cable protective cap and check the output lens for dust with strong
light and clean it if necessary, then cover the output cable protective cap;
(3) Install the output cable on the processing equipment according to the actual situation
(install the output head cooling water pipe at the same time), pay attention to the output
cable and head, then remove the protective cap and confirm that the output lens is clean
and install the output head;
(4) Connect cooling water pipe;
(5) Connect the control line and power according to the control mode.
4.6 Steps of Starting
All electrical connections must be finished before the laser is powered on;
Make sure the air switch is OFF and the emergency stop button (EMERGENCE STOP) on
the front panel of the laser has been pressed down.
(1) Make sure that the pins 2-3 and 1-4 of the 24-pin are closed;
 Loading...