Wuhan Raycus Fiber Laser Technologies Co., Ltd.
User Guide of RFL-C3300W~RFL-C15000W
13
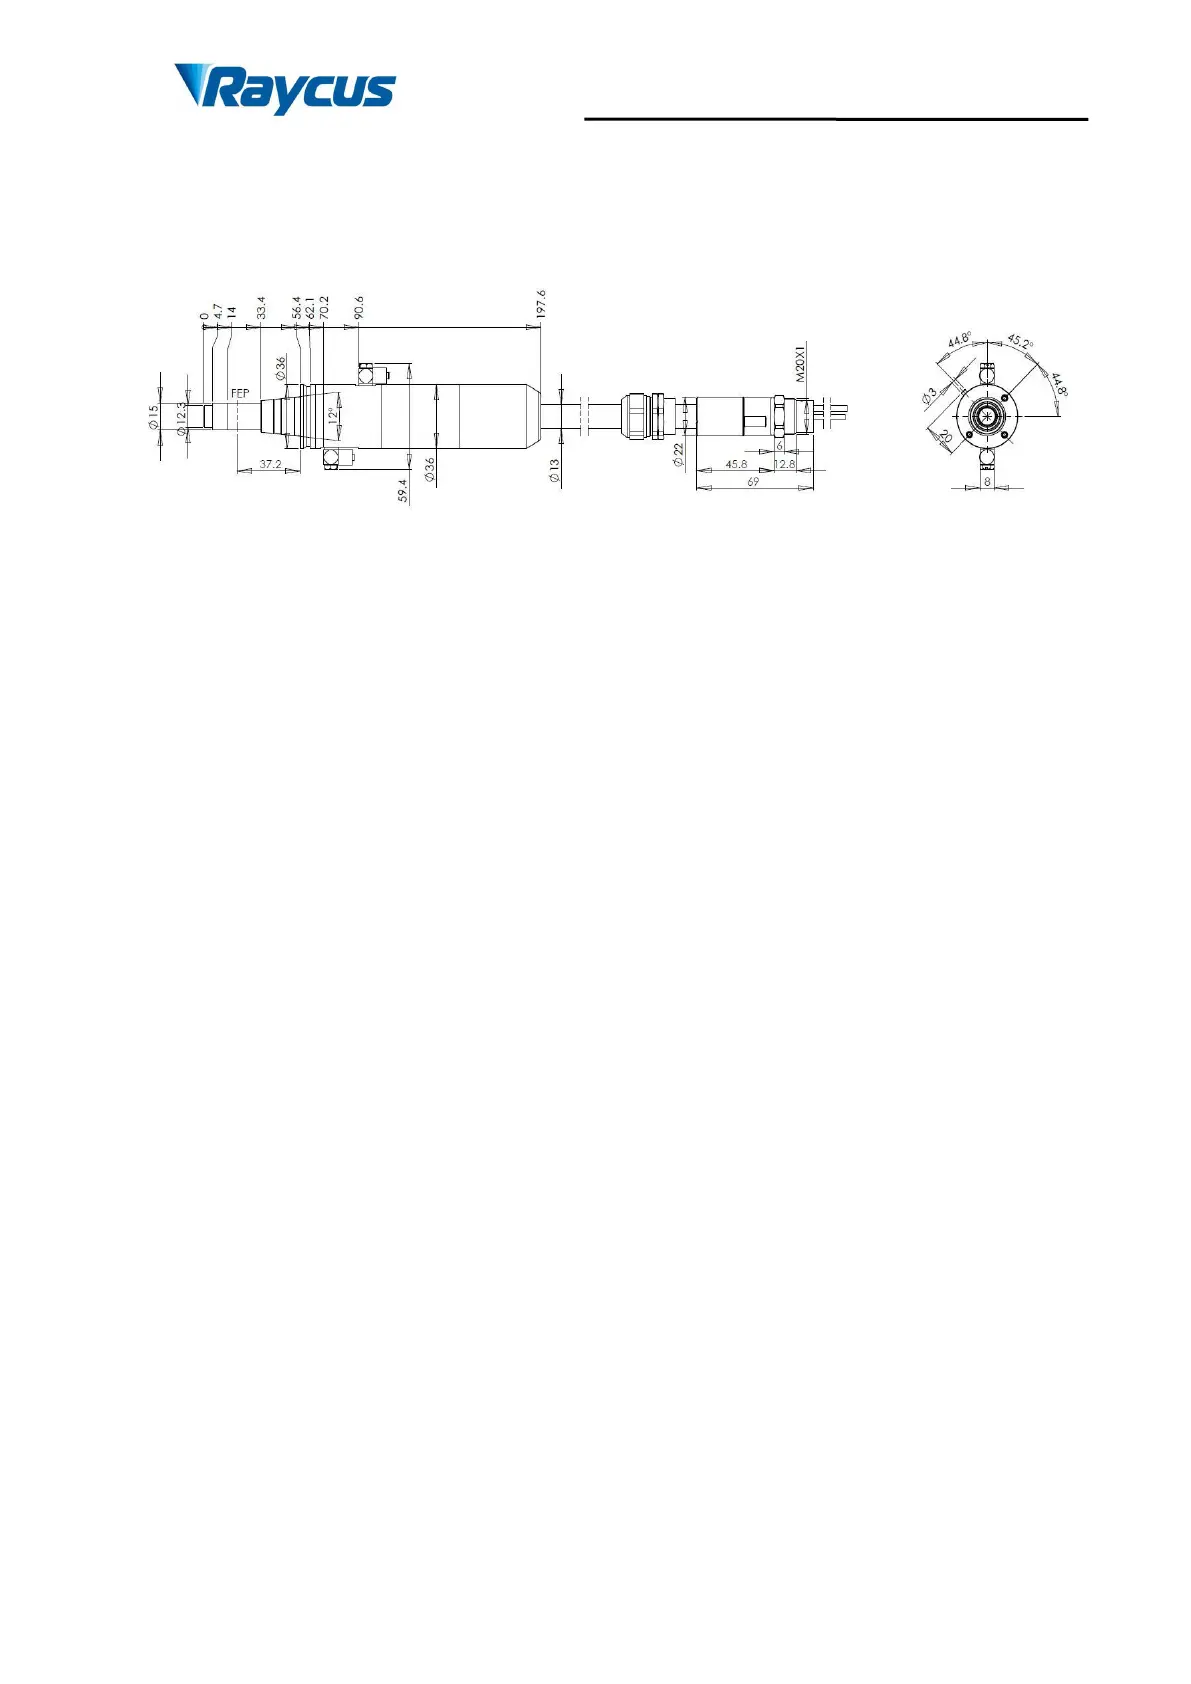
(2) RFL-C8000X / RFL-C10000X / RFL-C12000X / RFL-C15000 lasers use
RFL-QD output optical cable. and the dimension of output optical cable head
are shown in Figure 6
:
Figure 6 RFL-QD output optical cable head.
Note: The dimensions in the above diagram are in the unit of mm.
Before the laser works, make sure that the two copper contacts (Interlock pins)
on the output head are shorted, otherwise the laser will not work properly. Before
installing the output cable into the processing head, the lens of the output cable
must be inspected. If the output cable lens is dirty, the lens must be cleaned. It is
forbidden to disassemble the output lens by anyone other than staff in Raycus,
otherwise the warranty will be invalidated.
3.2 Installation rule
(1) Place the laser horizontally in a suitable position and fix it as necessary;.
(2) Before the laser is powered on, Please check the power supply has the
correct voltage (380VAC ± 10%,50/60Hz, See Table 2 Product Technical
Data Sheet for details.), please refer to the technical parameter table of
Table 2 for details, whether the grounding line is well grounded.
(3) Connect the power cable and control cable to the product when power
supply is OFF.
(4) Clamp the water pipes ontopipe connector, run the chiller to check if there
is any leakage in the water circulation.