8 S1 Wheel and Tiller Pilots Commissioning Guide
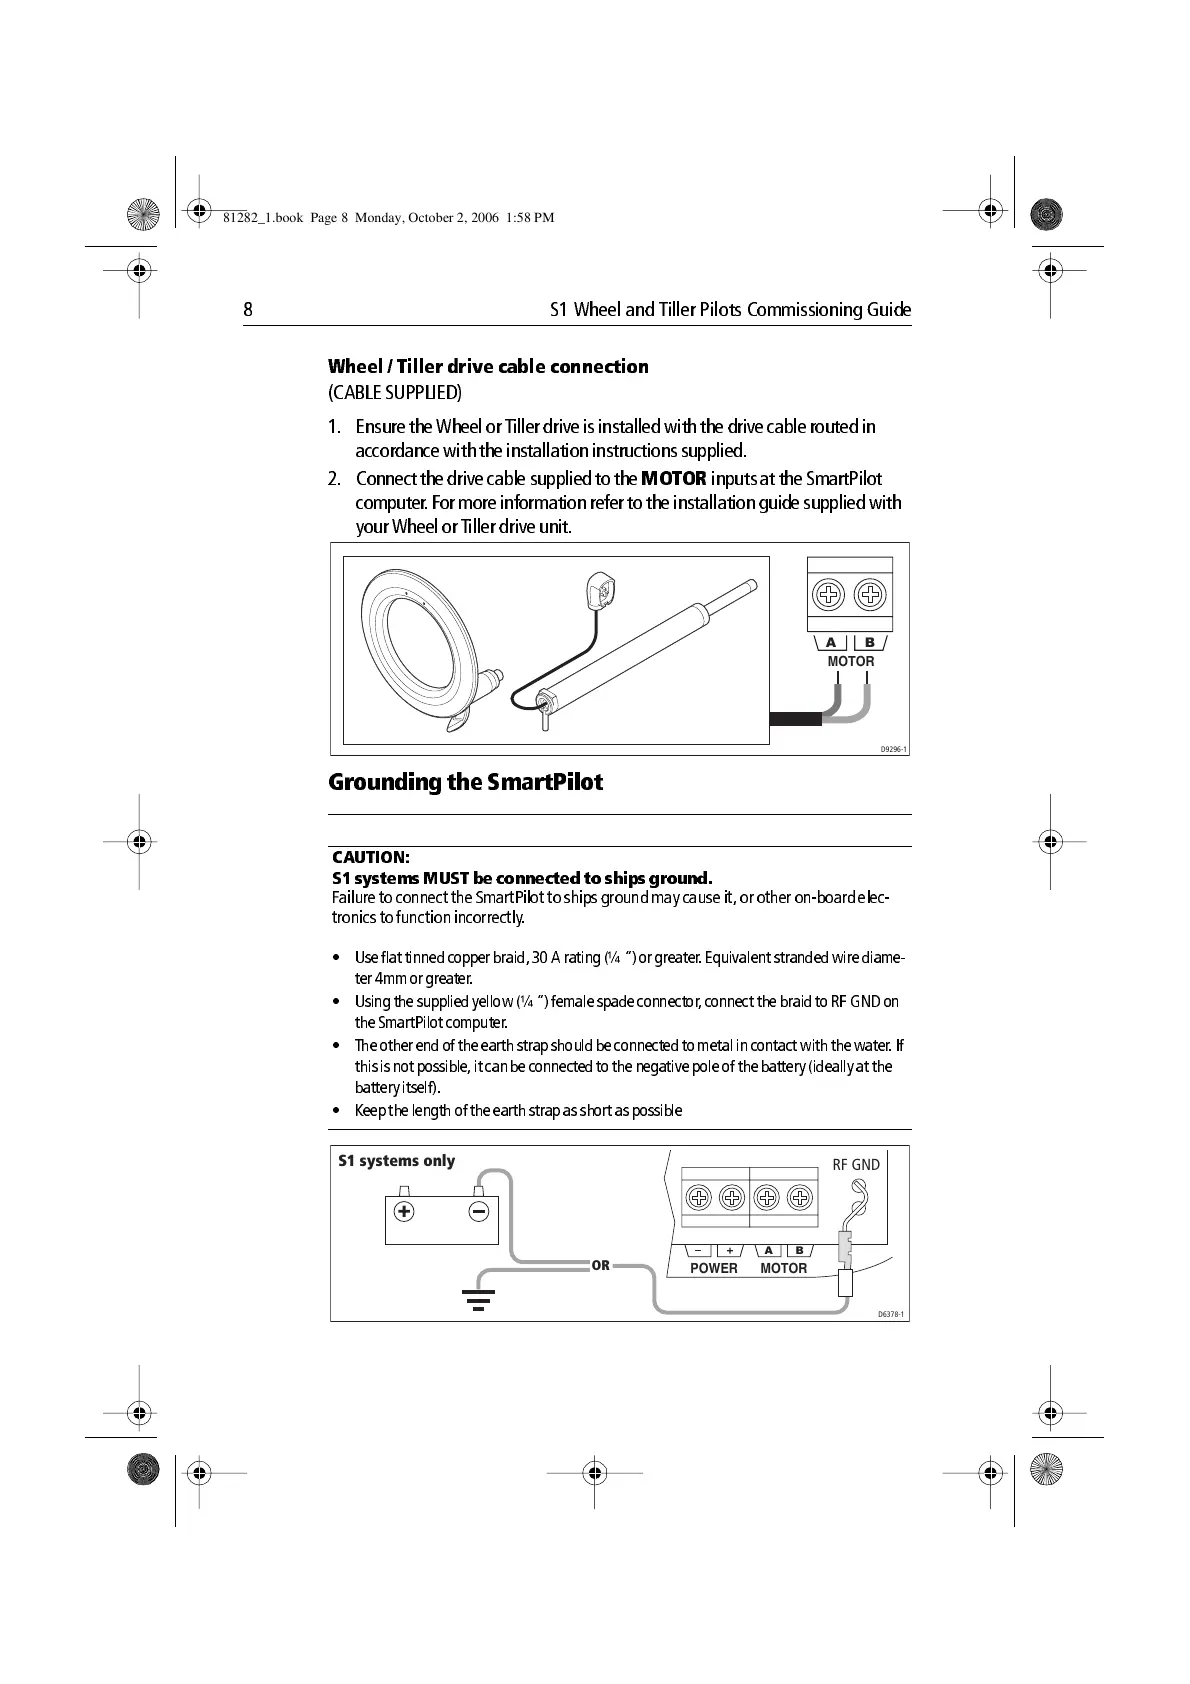
Wheel / Tiller dri ve cable conn ection
(CABLE SUPPLIED)
1. Ensure the Wheel or T iller drive is installed with the drive cable routed in
accord ance with the installation instructions supp lied.
2. Connect the drive cabl e supplied to the
MOTOR
inputs at the Sma rtPilot
comp uter . For more informati on refer to the installation guide supplied with
your Wheel or T iller drive unit.
Grounding the SmartPilot
CAUTION:
S1 systems MUST be connected to ships gr ound.
F ailure to connect the SmartPilot to sh ips ground may cause it, or other onboard elec
tronics to fu nction in correctly .
• Use flat tinn ed cop per brai d, 30 A rating ( ¼ “) or greate r . Equi vale nt stranded wi re diame
ter 4mm or greater.
• Using the su pplie d ye llow (¼ “ ) femal e spade con nector, conne ct the brai d to RF GND on
the SmartPilot computer .
• The other end of the earth s trap should b e conn ec ted to metal i n contact wi th the wate r . If
this is no t possibl e , it can be con necte d to the neg ative pol e of the battery (ide ally at the
battery itsel f) .
• Keep the len gth of the e arth strap as short as poss ib le
MOTOR
AB
D9296-1
RF GND
MOTOR
AB
POWER
D6378-1
OR
S1 systems only
81282_1.book Page 8 Monday, October 2, 2006 1:58 PM

 Loading...