Operation (Apollo / Delta 34)
2.1 Startup
Press the key. The startup screen, which shows the software version, will display
for about 8 seconds then the MAIN screen is displayed.
2.2 Selecting the Tank / Product
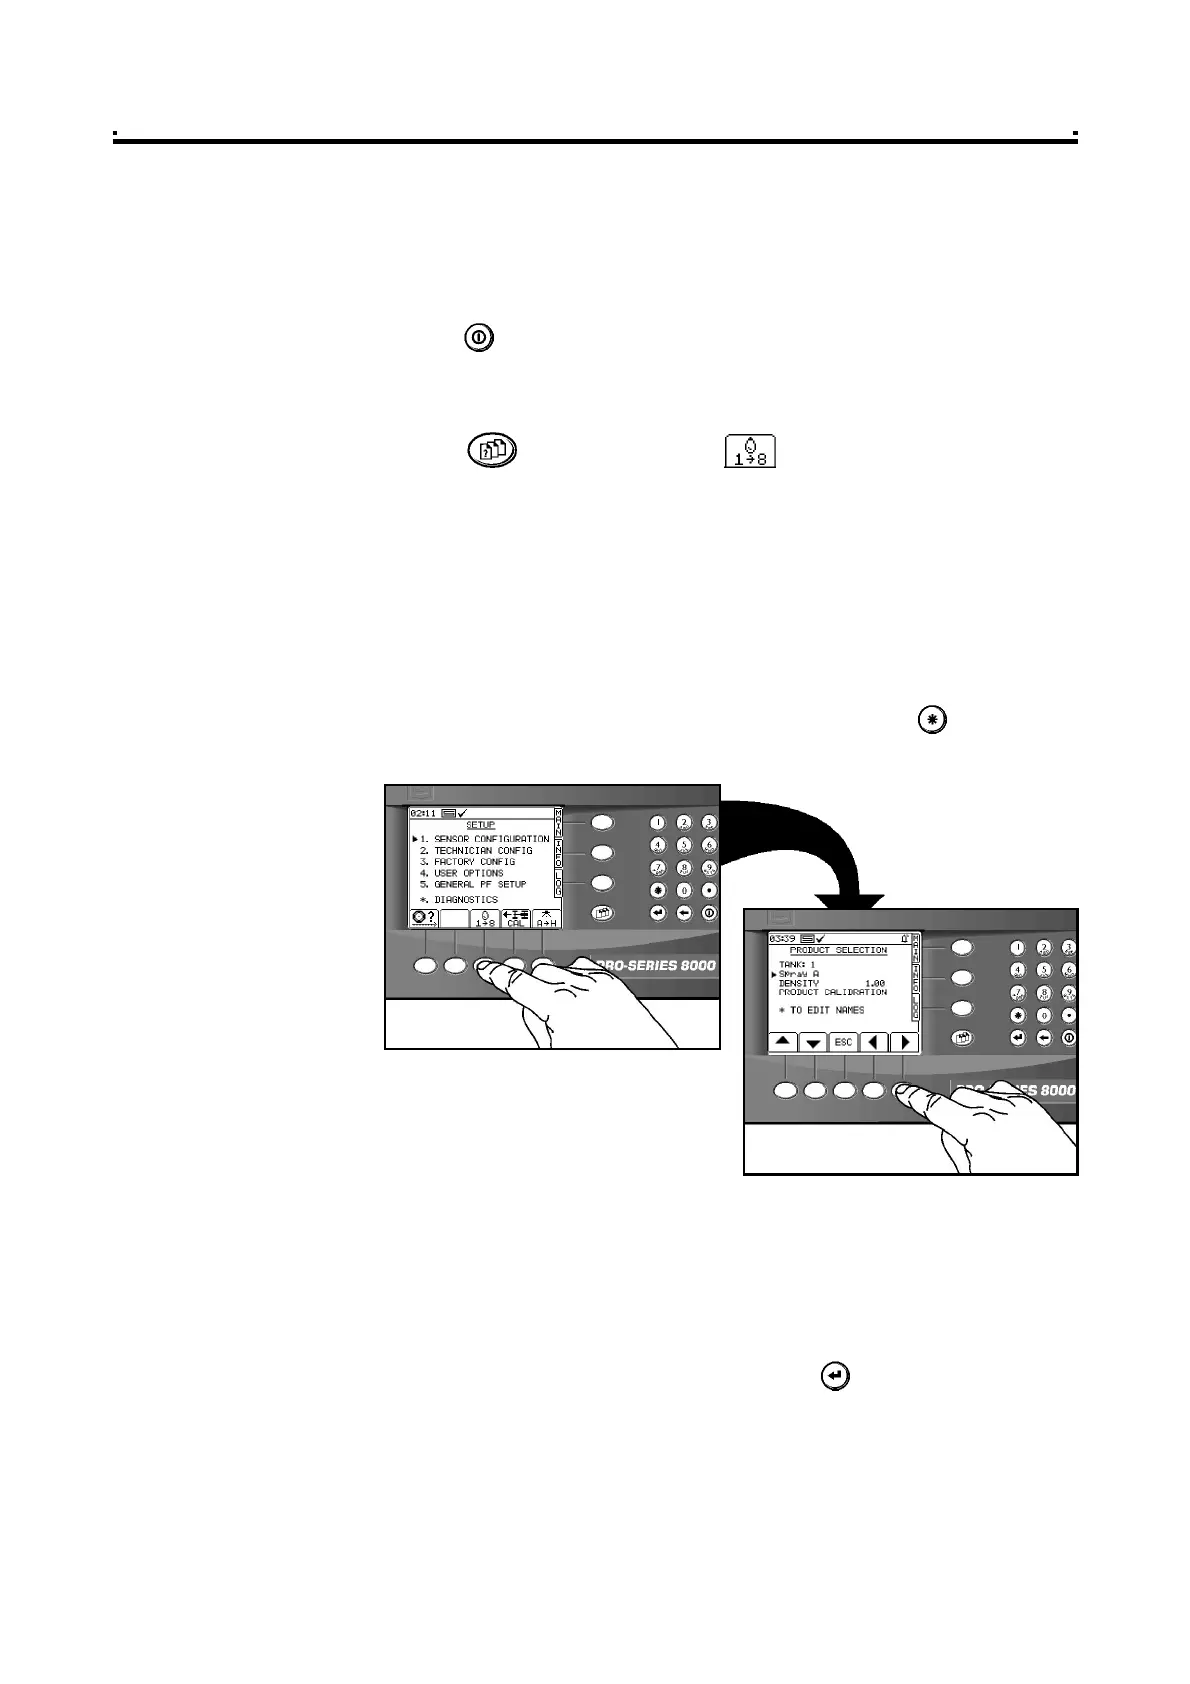
1 Press the key and then press the key (figure 9a).
The 'PRODUCT SELECTION' screen only lists tanks that have been enabled via the
calibration menu.
NOTE 1: By default, the tanks labelled "Tank 1" to "Tank 4" however, these descriptions may be
edited via the "MACHINE OPTIONS" page in the calibration menu.
2 Select the tank using the left / right arrow key, then using the up / down arrow key,
move the screen cursor opposite the product for that tank (figure 9b). For any tank,
you can programme and calibrate up to 8 different products "A" to "H".
NOTE 2: By default, the products are labelled "A" for tank 1, "B" for tank 2, "C for tank 3 and "D
for tank 4. You can edit the product description by pressing the key while the
"PRODUCT SELECTION" screen is displayed (section 2.2.1).
3 Press the MAIN key to return to the "MAIN" screen page.
2.2.1 Editing Product Names
The 8 default product descriptions are 'Spray A' to 'Spray H'.
From the 'PRODUCT SELECTION' screen, press the key to select the
'PRODUCT NAMES' screen.
Select the product name using the arrow keys, and edit the name using the alpha-
numeric keypad.
2 - Operation
2
Figure 9
Selecting the PRODUCT
SELECTION screen