12
7. Machine Assembly - Cont.
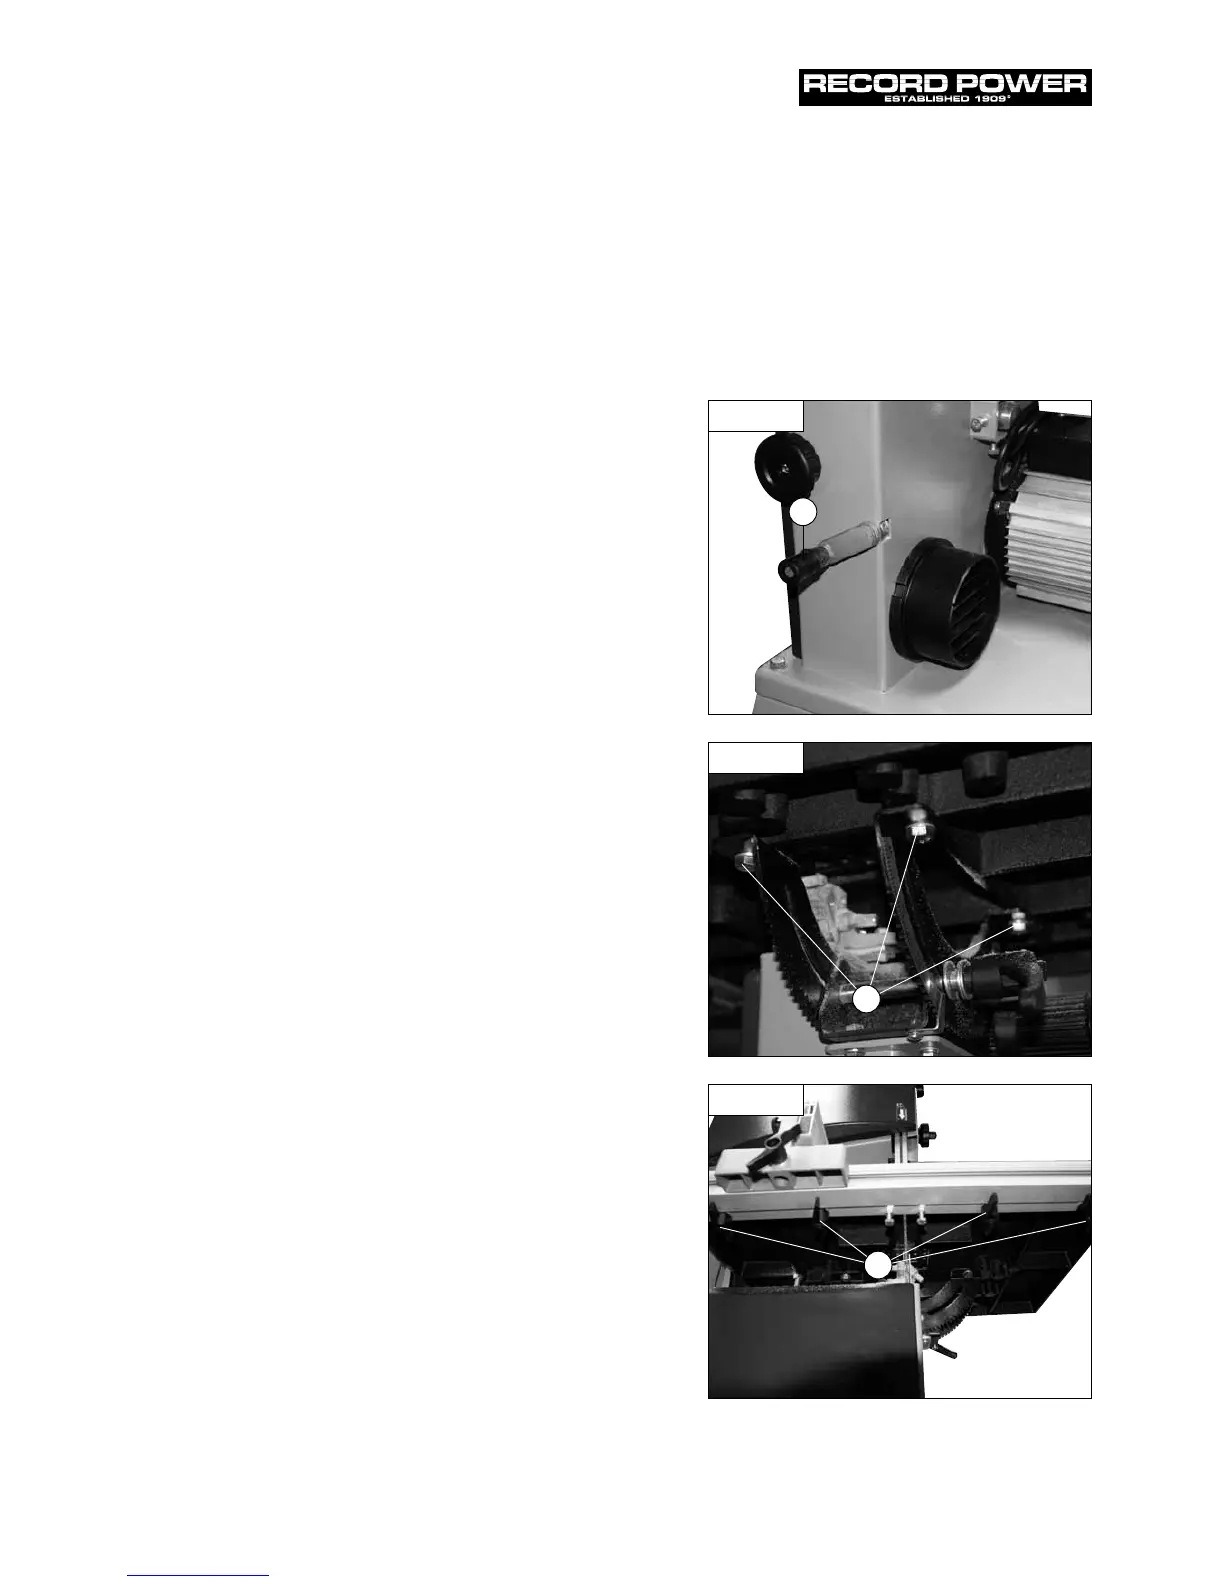
Belt Tension Handle
Attach small crank handle (Fig. 7.1, A) to belt tension and
speed mechanism with 10mm spanner (not supplied).
First assemble the crank:
• This is done by fitting one M6 nut to the end of the
crank screw.
• Now Insert the end of the crank screw into the
corresponding hole in the tensioner.
• Fit the second M6 nut to the crank screw and
fully tighten.
• The nuts should be adjusted to allow the small crank
handle to rotate freely.
Fitting the Table
Tools Required: - 13mm spanner (not supplied)
With the help of another person, lift the working table
onto the trunnion. Mount the working table on the
trunnion using the supplied 4 x table fixing bolts and 4 x
washers (Fig. 7.2, A).
Fitting the Fence Rail
Take the four wing nuts (Fig. 7.3, A) and washers and fit
them into the threaded holes on the underside of the table
but do not fully tighten.
Slide the fence rail into the gap left between the table and
the star knobs then tighten the star knobs to secure the
fence rail.
Fig. 7.1
A
Fig. 7.3
Fig. 7.2
A
A