32
14. Maintenance
CAUTION! Before carrying out any adjustments or
maintenance ensure that the machine is isolated and
disconnected from the electricity supply.
Replacing the Bandsaw Blade
HAZARD! Take great care when unpacking the
bandsaw blade as they are usually folded and can
spring out very suddenly with great force.
Tip:
If the new blade being fitted is a different width to
the one being removed, it is advisable to move back
and slacken off all blade guides before fitting the
new blade as this will make fitting easier. Whenever
a different size blade is fitted the blade guides will
always need re-setting.
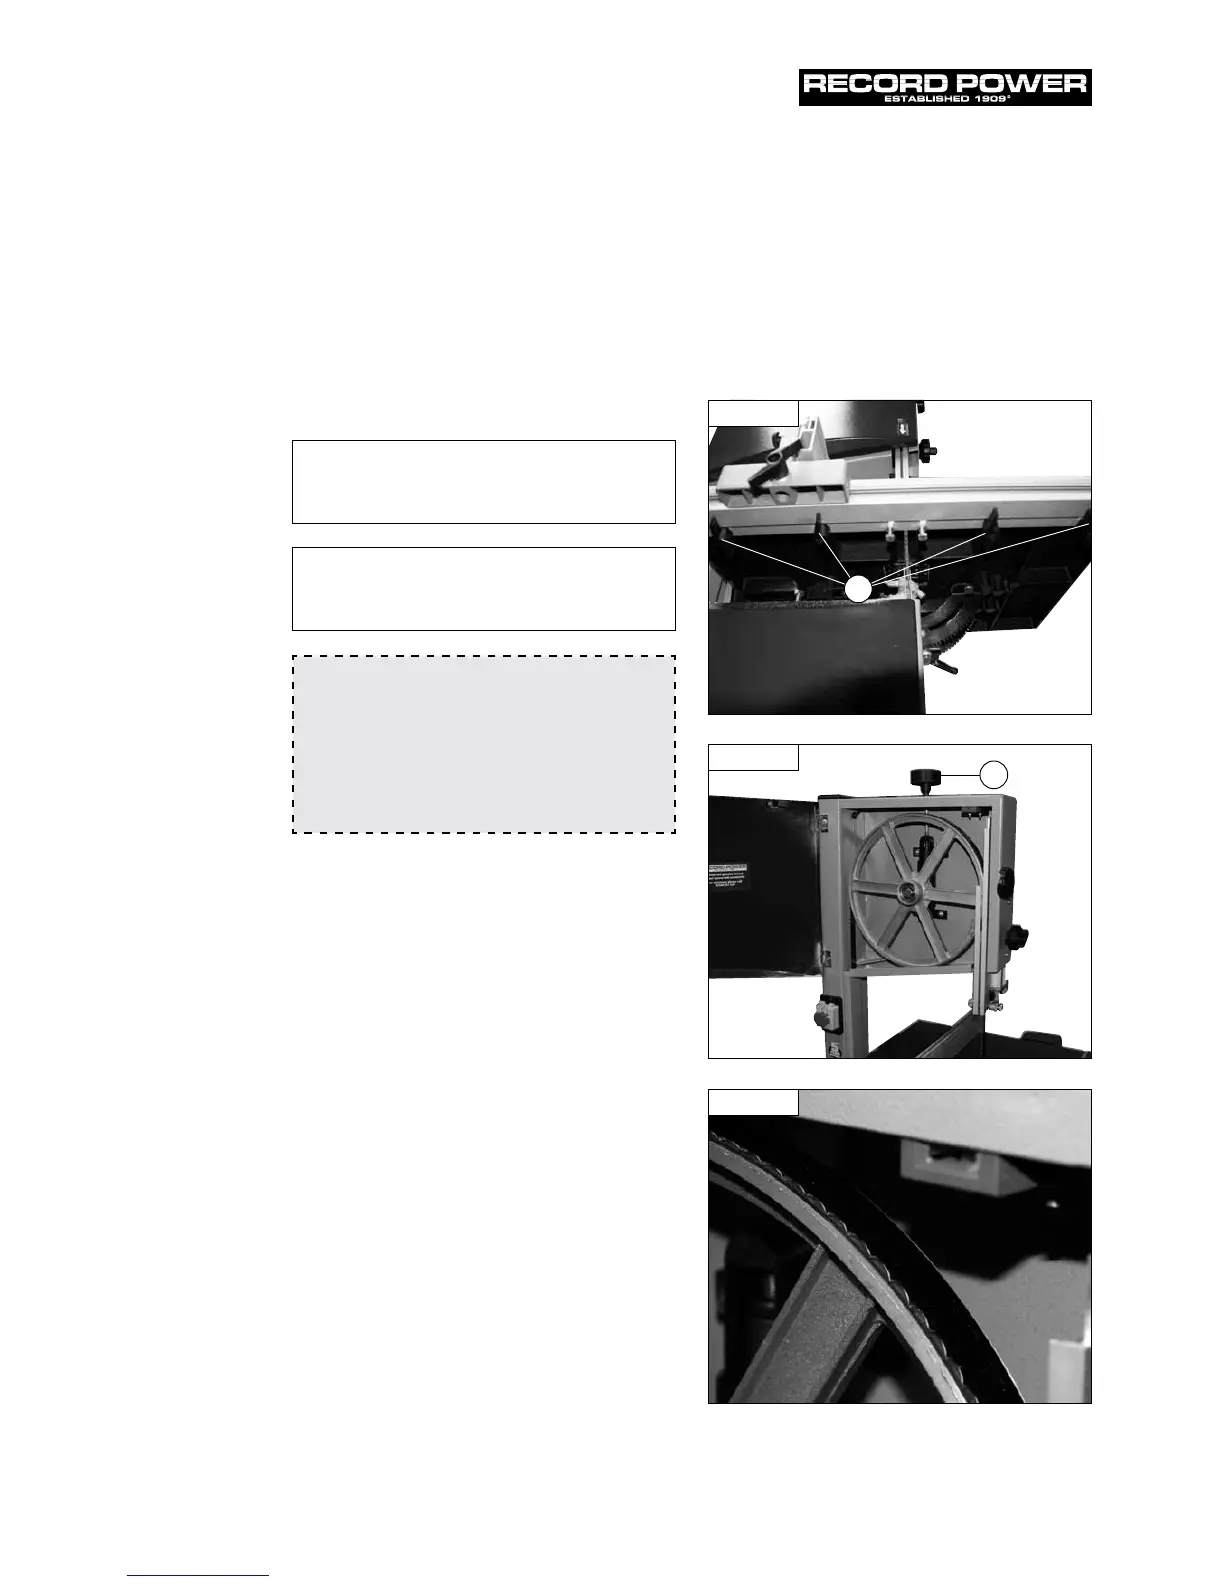
1. Remove the rip fence and fence rail by unscrewing the
wing nuts (Fig. 14.1, A) located on the underside of
the table.
1. Open the top and bottom bandwheel doors.
2. Turn the blade tension knob to release the blade
tension (Fig. 14.2, A).
3. Remove the bandsaw blade by feeding it through the
slot in the table, upper blade guides & guard and slot in
the spine of the machine taking care not to cut yourself,
wear gloves if necessary.
4. If the new blade being fitted is a different width to the
one being removed, before the new blade is placed
around the bandwheels:
• Adjust the tension wheel to suit the new blade size.
• Place the new blade on the bandwheels.
• Fit the new blade ensuring the blade teeth are pointing
downwards and towards you at the position where the
blade passes through the table.
• Ensure the blade is fully in place on bandwheel,
re-apply tension using the tensioning knob.
• Fine adjust the blade tension further if required using the
blade tension wheel.
Fig. 14.1
Fig. 14.2
Fig. 14.3
A
A