Bellavista® B36XTCE-11 Gas Fireplace | 29
installation
919-754
919-754
05.12.17
05.12.17
1
1
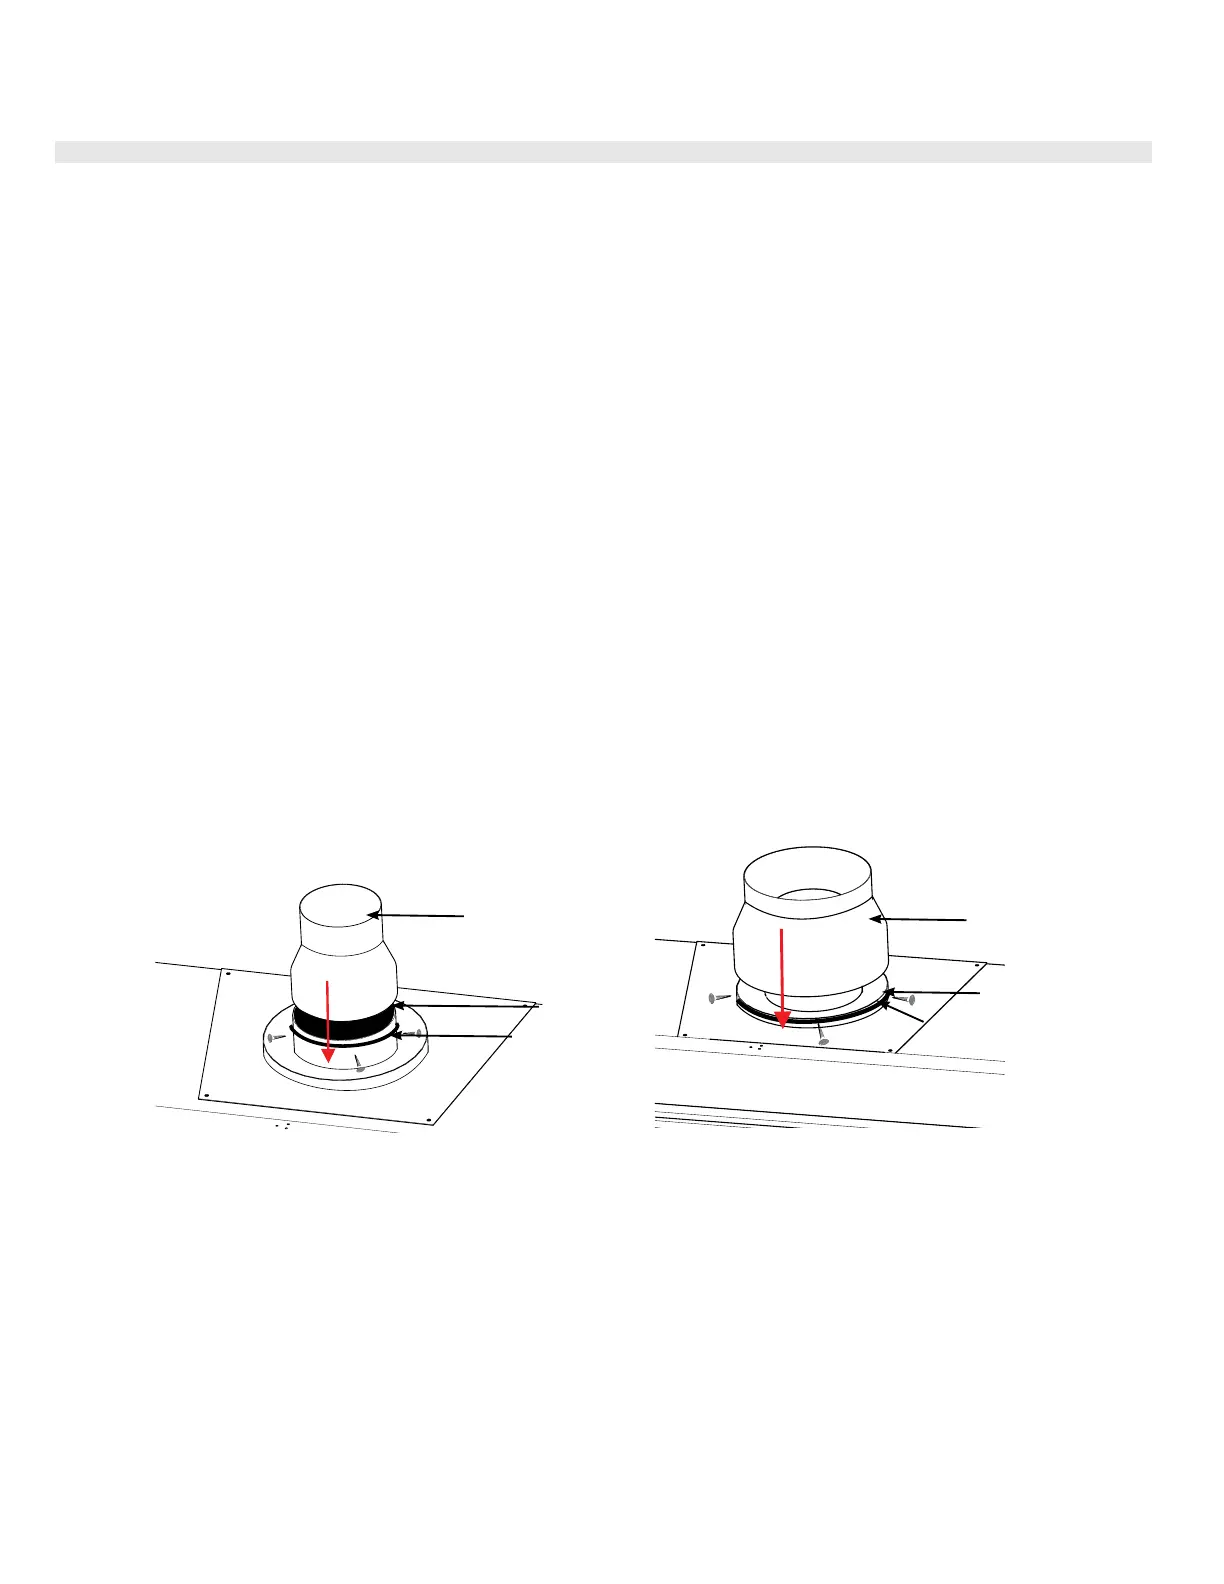
TOP VENT REDUCER INSTALLATION—FROM 5" X 8" TO 4' X 6-5/8"
TOP VENT REDUCER INSTALLATION—FROM 5" X 8" TO 4' X 6-5/8"
1. Apply a bead of Millpack around the base of the inner vent collar. Slide the
inner adapter over the collar and secure with 3 screws.
3. Follow installation instructions for the Flex venting kit.
2. Apply a bead of Millpack around the base of the outer vent collar. Slide the
outer adapter over the collar and secure with 3 screws.
Inner adaptor
Outer adaptor
Inner collar
Outer collar�
B36XTE/B36XTCE
B36XTE/B36XTCE
1. Apply a bead of Millpack around the base of the inner vent collar. Slide the
inner adapter over the collar and secure with 3 screws.
3. Follow installation instructions for the Flex venting kit.
2. Apply a bead of Millpack around the base of the outer vent collar. Slide the
outer adapter over the collar and secure with 3 screws.
Inner adaptor
Outer adaptor
Inner collar
Outer collar�
TOP VENT REDUCER INSTALLATION (FLEX VENT ONLY) — FROM 5" X 8" TO 4" X 6-5/8" (PART #946-758)
VENTING INTRODUCTION 5" X 8" OR 4"X 6-5/8 "
The B36XTCE can be vented with either 5"x 8" or 4" x 6-5/8" venting depending on the vent configuration. Please see examples below and this manual to
determine which venting options will be required for your customers application.
5"x 8" venting can only be used when:
a) Installing the unit against a flat exterior wall and venting it directly out the rear and to the termination cap.
b) Installing the unit in a corner exterior wall and venting it directly out the back + 45
o
elbow, then out to the termination cap.
c) Installing the unit against a flat exterior wall or corner exterior wall, converting the unit from rear to top vent, then adding a 90
o
directly off the top, then
directly out the back to the termination cap.
Rigid vent - This would require a rigid pipe adaptor (770-994) only when using any of the approved rigid vent manufactures listed in this manual.
Flex Vent - Flex vent will slide over both the inner/outer collars when using the approved Astro Cap horizontal flex vent kit. No adaptor is required. Use the
approved 946-615 (4 foot horizontal flex kit).
4" x 6-5/8" venting can only be used when :
a) Installing the unit against a flat exterior wall or corner exterior wall, converting the unit from rear to top vent, adding any length of vertical vent (within venting
parameters - see manual for details), then directly out the rear to the termination cap.
b) Installing the unit anywhere within the interior of the home converting the unit from rear vent to top vent, adding any length of vertical vent (within venting
parameters - see manual for details), then directly out the back to the termination cap or out of the roof.
Rigid vent - This would require a rigid pipe adaptor (770-994) + reducer (946-606) only when using any of the approved rigid vent manufactures listed in this
manual. This would apply to both vertical and or horizontal venting.
Flex vent - Flex top vent reducer (946-758) for both vertical and/or horizontal venting.
Vertical Venting - Use the approved 20 foot vertical flex vent kit (946-755) and (946-756) 20 foot vertical extension kit.
Horizontal Venting - Use the approved 946-515 (4 foot horizontal flex kit) or 946-516 (10 foot horizontal flex kit).
 Loading...