Instruction Manual
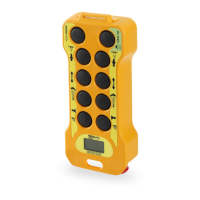
Radio control devices T3, T5 and T7.
version 1.4 Genn. 10
INSPECTION OF THE RADIO CONTROL
DEVICE
With the operating machine turned off, insert the plug of the
multicore cable of the receiver in place of that of the wired
pushbutton panel and secure it with the fastening hooks; check that
the connecting cable between the receiver and the machine does not
hinder or get caught in the mechanical parts during movement of the
machine.
Switch on the operating machine, remaining at a safe distance, that
is outside its radius of action, as an error in wiring could cause it to
start up accidentally.
In the receiver, check that the green led ON is lit (see Fig. 7,9),
indicating that it is powered.
In the receiver, check that the green led PLL is blinking (see Fig.
5,7,9), indicating that waiting status of the radio signal.
Switch on the transmitter and check in the receiver that the green
led LINK has a fixed light (see Fig. 7,9), indicating the correct
communication between transmitter and receiver.
Checking the efficiency of the Stop/Emergency button and of
the control buttons
Press the Stop/Emergency button (see Fig. 1) and check in the
receiver that the led LINK switches off (see Fig. 7,9), indicating that
the radio control has been deactivated.
To continue the inspection procedure, reset the Stop/Emergency
button, activate the transmitter with the START button and then
press a control button to make the machine perform the assigned
movement: now while it is moving, press the Stop/Emergency button
to check that the machine stops immediately.
After having reactivated the transmitter, press one button at a time
and check that the machine performs the respective movement.
Walk away from the receiver and, still checking the machine
movements, give the various commands in the different zones of the
work area, to ensure that it is fully covered by the radio signal.
At the end of inspection, clearly fill in the wiring diagram of
the receiver and sign the declaration of correct installation.
The serial number of the radio control device to be given on the
documentation is indicated on the Receiver (fig. 4) and is not on the
Transmitter.
page 16 of 28 REMdevice
®
- ITALY