14
REMKO GPS series
Permanent wall installation
Align the wall brackets in a suitable place on the wall
(spirit level) and securely fasten.
Mark the boreholes to be made with a pencil.
- Securely attach the wall brackets with suitable
anchors and screws - M10 or greater.
- Install the two bracket pairs with the supplied
material as shown in the figure
- When installing the brackets, lock the nuts with
a locking ring between the bracket and nut.
Brackets for wall installation (standard design) EDP
no.: 228780 GPS 15 - 75
We reserve the right to modify the dimensions and design as part of the ongoing technical development process.
s
s
s
NOTE
Make sure that the type of anchor and size
of the screws are appropriate for the type of
masonry, in order to bear the weight of the unit.
- Position the unit on the brackets so that the holes
of the unit line up with those of the brackets,
whereby the corners of the brackets must be flush
with the front edge of the unit.
- Fasten the units with the M8 screws provided;
in the process, insert a locking ring between
the screw and bracket.
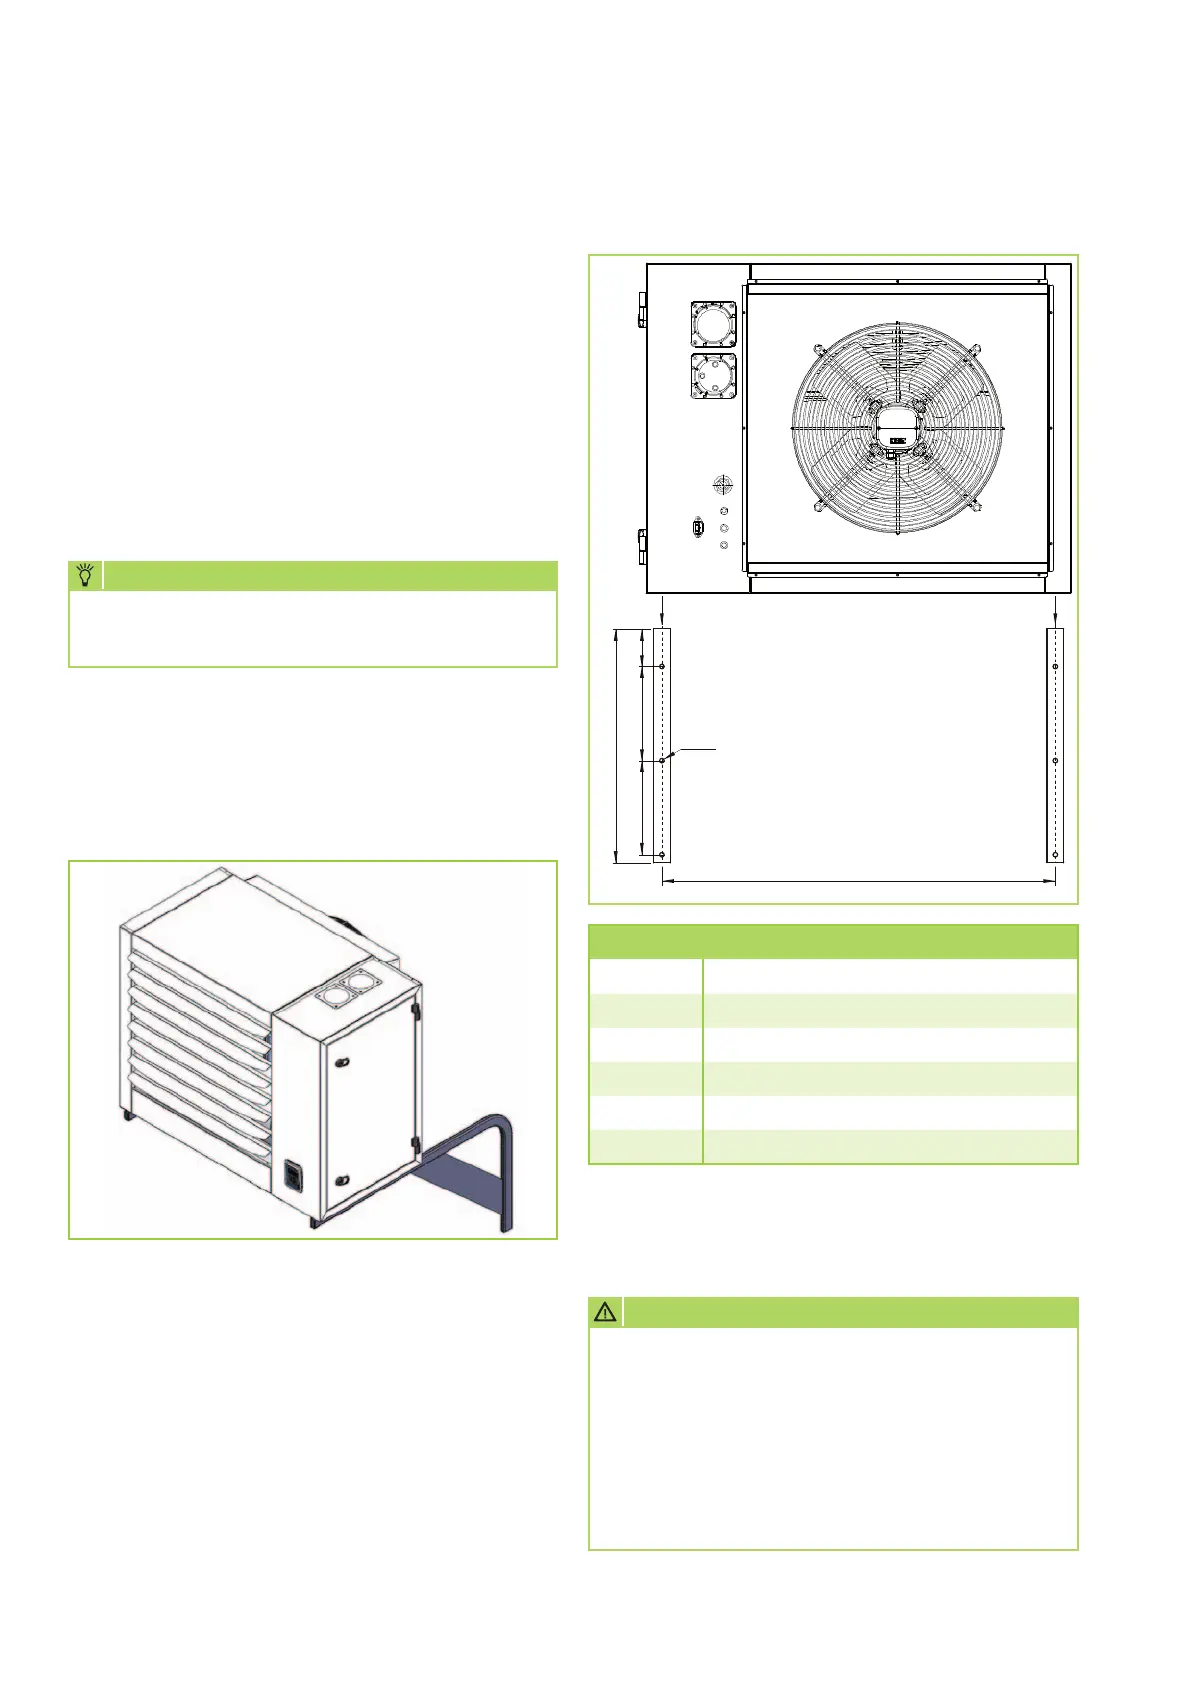
225225
560
90
Abstand B
ø12
Distance B
Distance between the wall brackets
Model Distance B
GPS 15 719 mm
GPS 25 719 mm
GPS 35 910 mm
GPS 55 910 mm
GPS 75 1241 mm
CAUTION
The units may only be mounted on stable walls,
ceilings or structures made of non-flammable
construction materials with sufficient bearing
capacity.
The wall console must be affixed securely using
screws and wall plugs in accordance with the
customer’s type of wall and the unit weight.
The unit should be affixed “decoupled”.
 Loading...