- 8 -
H[WUDFWRUDQGKDQJWKHKROGHURQWRWKHKROGHUVFUHZV¿JE
)L[WKHKROGHULQSODFHZLWKWKHNQXUOHGKHDGVFUHZ¿JD
&RQQHFWWKHFRPSUHVVHGDLUWXEHVWRWKHSLQFKYDOYHV
- Ensure the compressed air tubes (A, B) are connected to the correlating suction pipes (A, B).
- Push the compressed air tube onto the pipe connection in the pinch valve as far as it will go. There
will be a slight resistance to overcome when attaching.
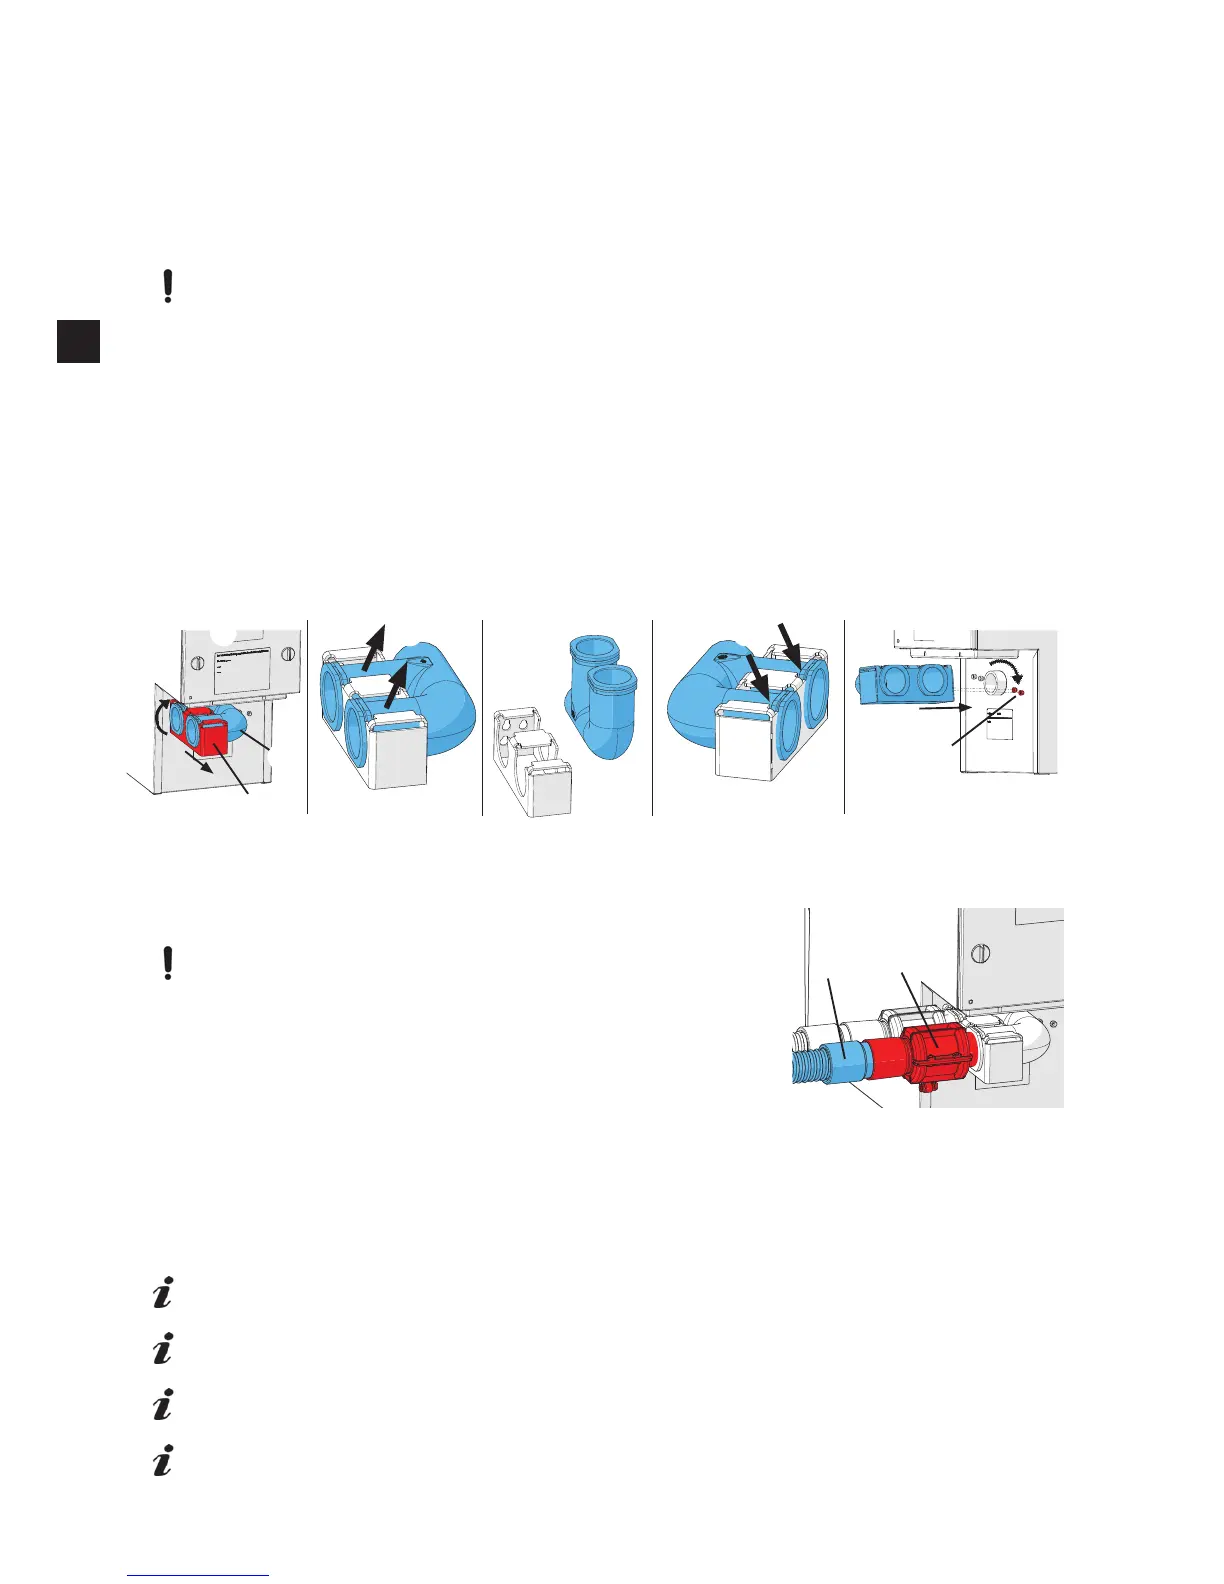
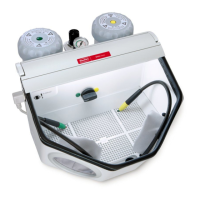
4.5.1 Suction Pipe Alteration
During the alteration, make sure that the compressed air tube is not unintentionally ripped
away from the pinch valves. If possible, loosen before the alteration (press the ring at the
compressed air connection and pull the tube towards you) and tighten again after the work has
¿QLVKHG
Pull the pinch valves out of the suction pipe.
Unscrew the knurled head screw (19).
Loosen the suction pipe (16) and the holder (20) from the holding screws by turning and then at the
EDFNUHPRYHIURPWKHH[WUDFWRUFRQQHFWLRQ¿WWLQJ$
Lever the suction pipe out of the holder (B), turn (C), and replace back into a new position in the
holder (D).
,QVHUWWKHVXFWLRQSLSHLQWRWKHH[WUDFWRUFRQQHFWLRQ¿WWLQJRQWKHH[WUDFWLRQGHYLFHKDQJ(WKHKRO-
der into the holding screws (26).
Fix the holder with the knurled head screw (19).
Push the pinch valve (15) into the suction pipe (16) as far as it will go. This process is made easier by
turning slightly when pushing into place.
4.6 Connection to the Extraction Point
7KHH[WUDFWLRQSRLQWLVDWWKHH[WUDFWRUFRQQHFWLRQ¿WWLQJ
7KH³SLQFKYDOYHZLWKH[WUDFWRUFRQQHFWLRQ¿WWLQJ³LVURWDWDEOH
When you turn the pinch valve, please ensure that there are no
kinks in the compressed air tubes and that they are not uninten-
tionally ripped off!
The compressed air tubes are marked with A and B so that they can
be easily allocated to the relevant suction hoses. If necessary, turn
WKHSLQFKYDOYHZLWKWKHH[WUDFWRUFRQQHFWLRQ¿WWLQJLQWKHGLUHF-
tion required.
,QVHUWWKHVXFWLRQKRVHQRWLQFOXGHGLQGHOLYHU\LQWRWKHH[WUDFWRUFRQQHFWLRQ¿WWLQJ
Please use a hose connection adapter (see accessories) if the diameter sizes are different, in order
to minimize ambient noise and loss of extraction force.
Attach the suction hose to the extraction point (e.g. Dustex master plus, extractor clamp, etc.).
Long suction hoses, tight bends and kinks will considerably reduce the extraction force at the
extraction point.
If different suction hose lengths are used, the extraction force will be lower at the extraction
point with the longer hose..
Make sure that the suction hoses are the same length and diameter. Excess hose can be cut to
size or laid in a large arch.
Avoid steep pitches or hanging points along the hose path.
Fig. 4b
20
16
A B C D E
26
Fig.