R 17A User’s Manual – Page 83
Signal settings
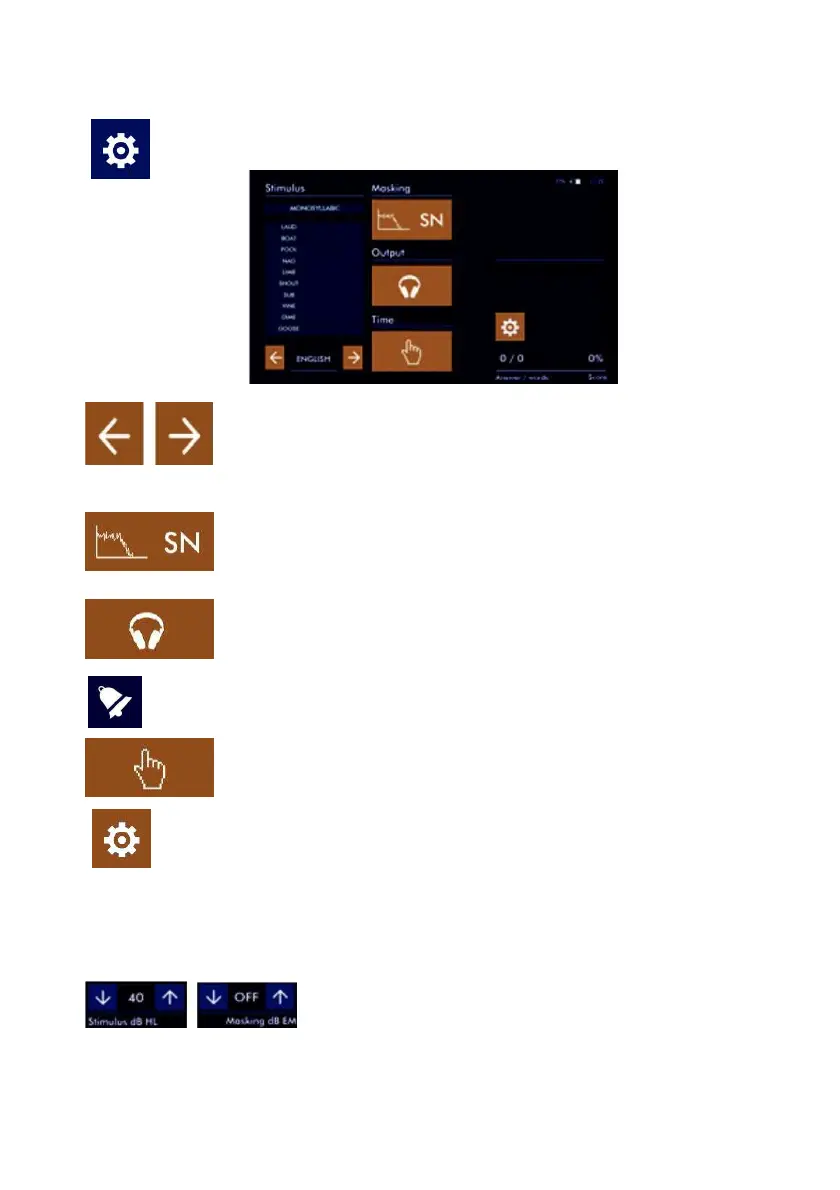
Press the SETUP icon to access the setup page.
Press the ARROWS to change the language of the recorded speech material. The
phonemes list will be showed on the display. By touching this area you can choose
the preferred list used at the start of the test; the subsequent lists will be
automatically selected during the execution of the exam to avoid the use of the
same phonemes.
Press this icon to select the masking type sent to the patient trough channel 2.
Masking options are: White Noise (WN), Speech Noise (SN) or it is possible to send
the same phonemes on masking channel as well (SD card).
By shortly pressing the icon for the output selection (see image on the left) the
output can be selected: AC (phones) or BC (bone vibrator) By keeping it pressed for
a few seconds you can select the free field output.
You can go back to the previous selection by pressing the icon again for a few
seconds.
The same output connectors are used for both headsets and free field.
Before starting the test make sure the appropriate transducer has been connected.
Press this icon to set the time lapse between the reproduction of phonemes from
the same list. The interval can be of 2, 4, 6 seconds or determined manually by the
operator; in this case the reproduction of the single phoneme will be activated by
pressing the PLAY icon.
Press the SETUP icon to exit the setup page.
Output selection
Gently press directly on the audiogram to change the side of the stimulus: right/left. Masking will be
automatically sent to the opposite ear.
Intensity settings
Press the ARROW keys to increase or decrease the intensity of the CH1
signal (stimulus) and CH2 (masking). The level reached is indicated
between the two arrow keys.
 Loading...