R 17A User’s Manual – Page 89
Mode 3: the device emits the stimuli as in “Mode 1” but 20 dB HL higher (70 dB, 50 dB). This training mode
can be adopted to test patient with hearing loss.
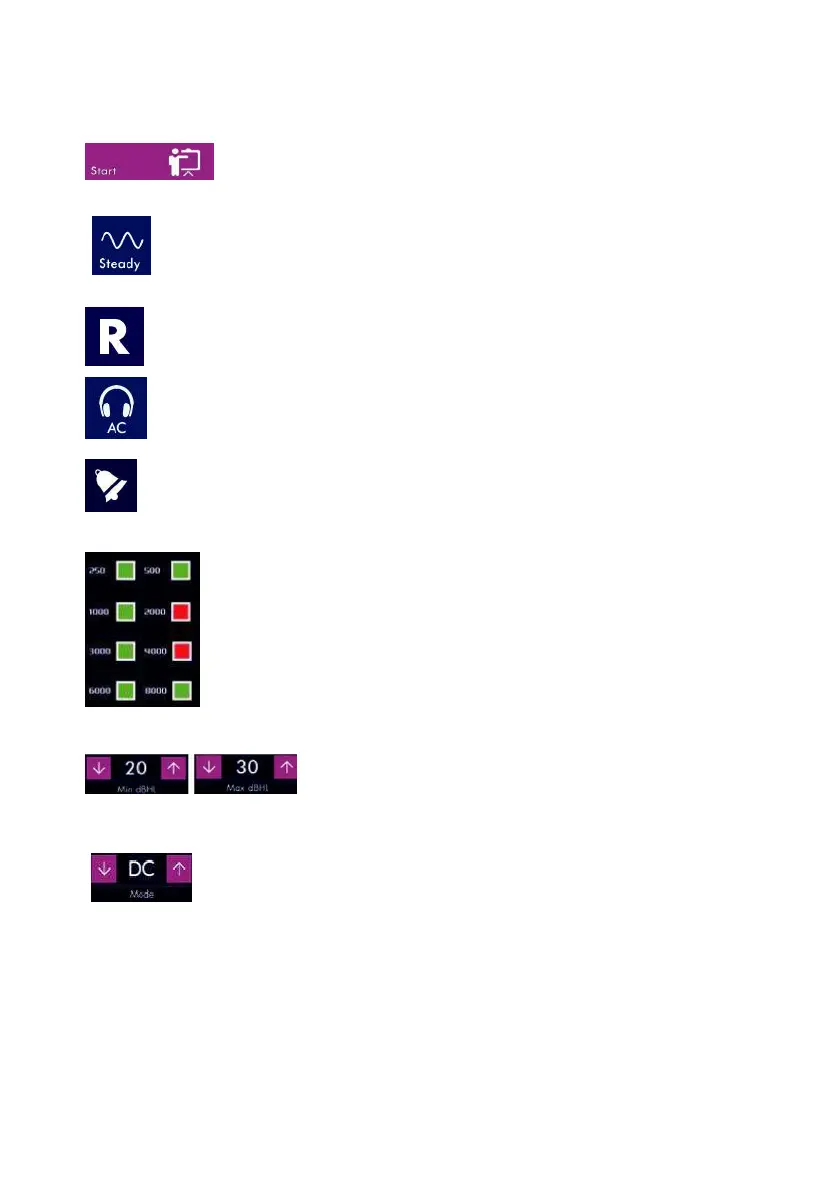
Press the START icon to start the training.
Stimulus configuration
Press the STEADY button to change the type of signal to be emitted: continuous, pulse (2 Hz
rate), warble. At every click on the button, the icon changes identifying the type of signal.
Output configuration
Press the R icon to change the side. Options available are: Right (R), Left (L) or both (R/L).
By shortly pressing the icon for output selection (see image on the left), it is possible to select
AC (phones) for the threshold estimation, AC UCL (phones) for uncomfortable level or BC
(bone vibrator). By keeping it pressed for a few seconds you can select the free field ou-tput.
You can go back to the previous selection by pressing the icon again for a few seconds.
The same output connectors are used for both headsets and free field. Before starting the test
make sure the appropriate transducer has been connected.
Frequencies settings
Select the frequencies to test by pressing the relevant box. Active frequencies are
highlighted with green color, non-active ones are red. 1000 Hz can’t be disabled.
Intensity settings
Press the ARROW keys to increase or decrease the minimum and
maximum level for the test. The level is indicated between the two
arrow keys.
Mode settings
Press the ARROW keys to change the mode settings:
AUTO RE-Play is performed in auto-threshold mode by changing the level according
to patient response; the minimum heard value will be stored as threshold. 5/10/20 RE-
Play is performed in threshold mode by increasing the level of a predefined step from
min to max level. DC (double confirm) RE-Play is performed in auto-threshold mode
starting at 40 dB in a 10 dB decrease and 5 dB increase procedure. A double confirm at
the same level is necessary to store the threshold.
 Loading...