MINI 3D Scanner User Manual
COPYRIGHT ©2022 REVOPOINT 3D ALL RIGHTS RESERVED 10
the main display) visible at all times during the scanning process for best results.
Dark:
Designed to scan dark surfaces, such as black, dark gray, or dark brown objects. However, not all dark objects
can be successfully scanned. One example would be black leather shoes because leather absorbs light (or they
are so shiny that they reflect too much light). The brightness is set accordingly (no Automatic exposure
adjustment).
Texture: No Color and Color
No color: The scanned model has no color information; only the shape information is captured.
Color: The object to be scanned has both color and shape information in the scanned 3D model (Revo Scan can only
export color objects in the .PLY & .OBJ file formats).
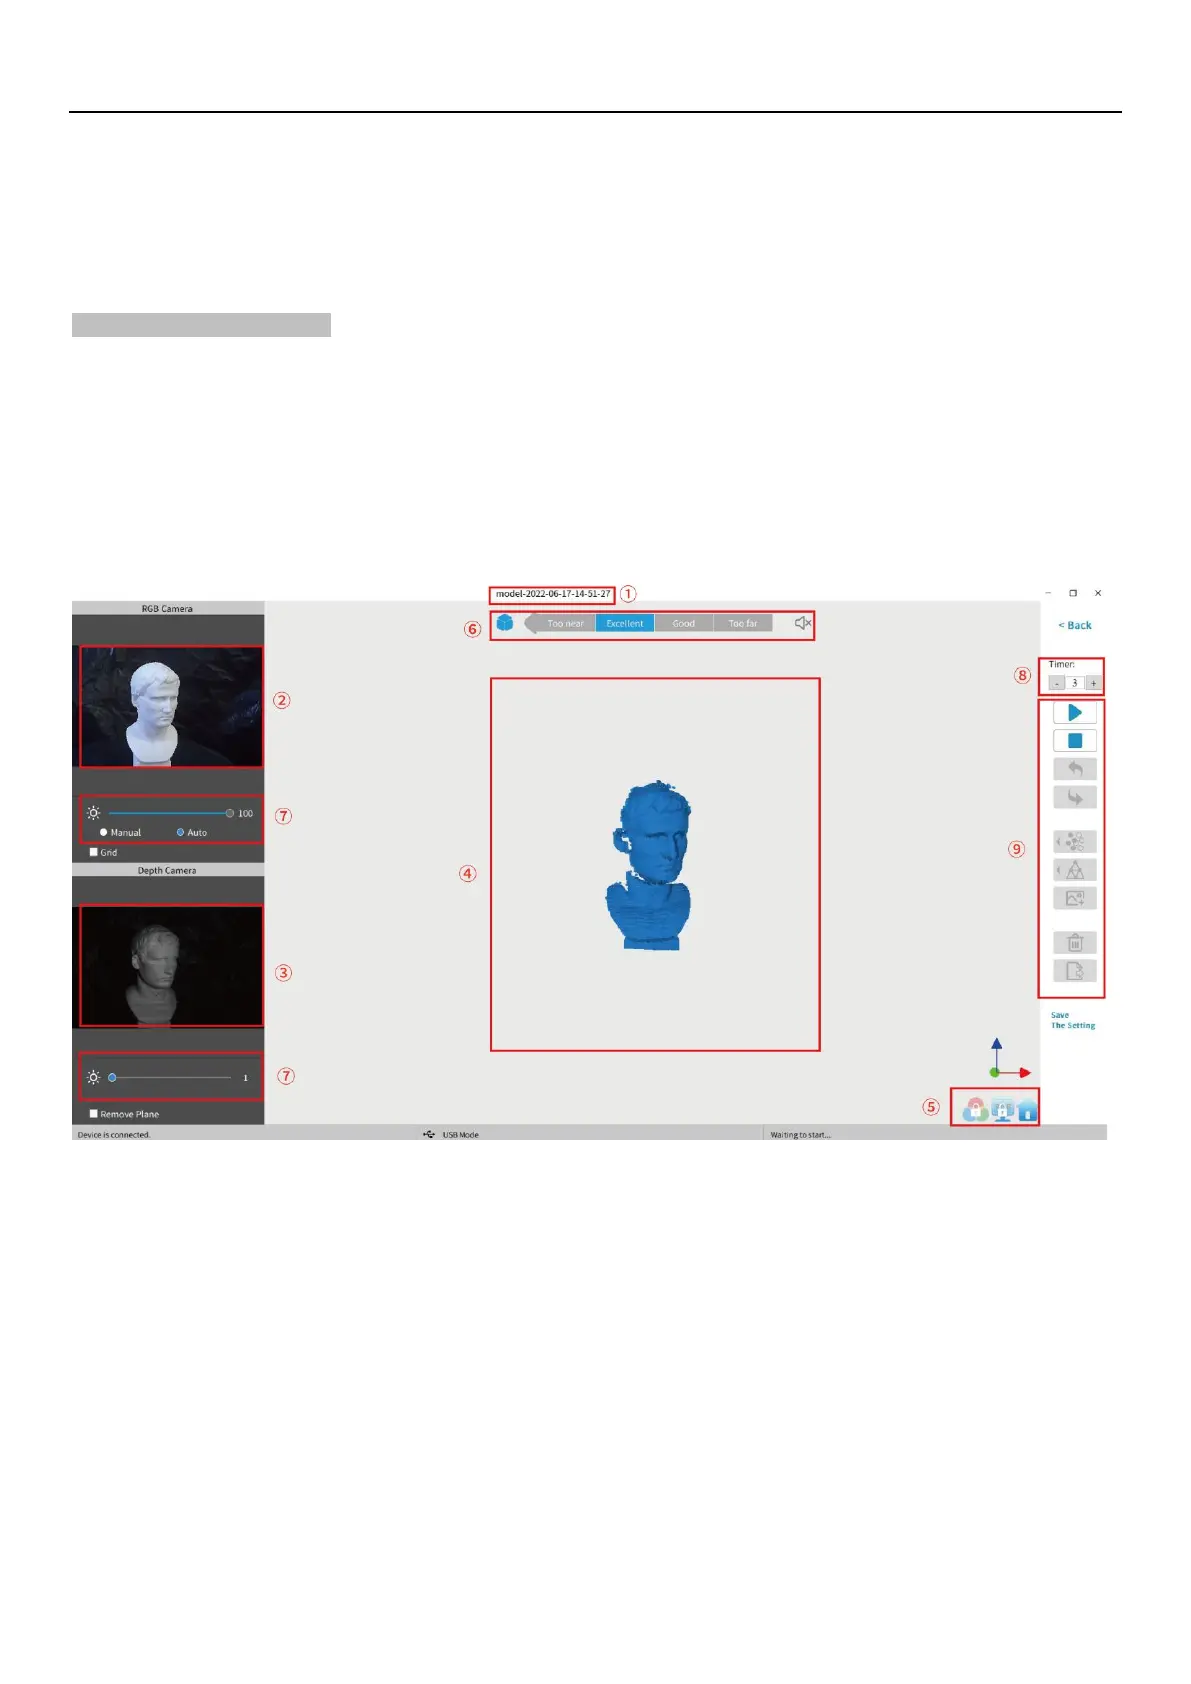
3. Scanning UI
After clicking “OK” on the New Scan popup, the real scan UI shows:
①
Name:
Display the Name specified in the New Scan configuration popup.
②
RGB Camera:
Display the image captured by the RGB Texture camera.
Note: The Grid option aids in positioning the object to be scanned so that the cameras can see it.
③
Depth Camera:
Display the 3D point cloud data that can be captured with the current Exposure setting.
Note: The
Clip Plane
option is designed to remove unwanted planes in the scene such as the turntable, desktop or floor.
Objects with significant flat areas can fool this tool, so it may be necessary to untick this option.
④
3D Model
Preview Window:
Display the 3D model data that will be captured when scanning starts or all of the data that has
been captured after scanning has started. The view of the model may be dragged or zoomed in