Chapter 3: Using Your Product
VENUS X1PRO-E User Manual
->Standard >>
Split >>
Preview >>
Stand Alone Mode >>
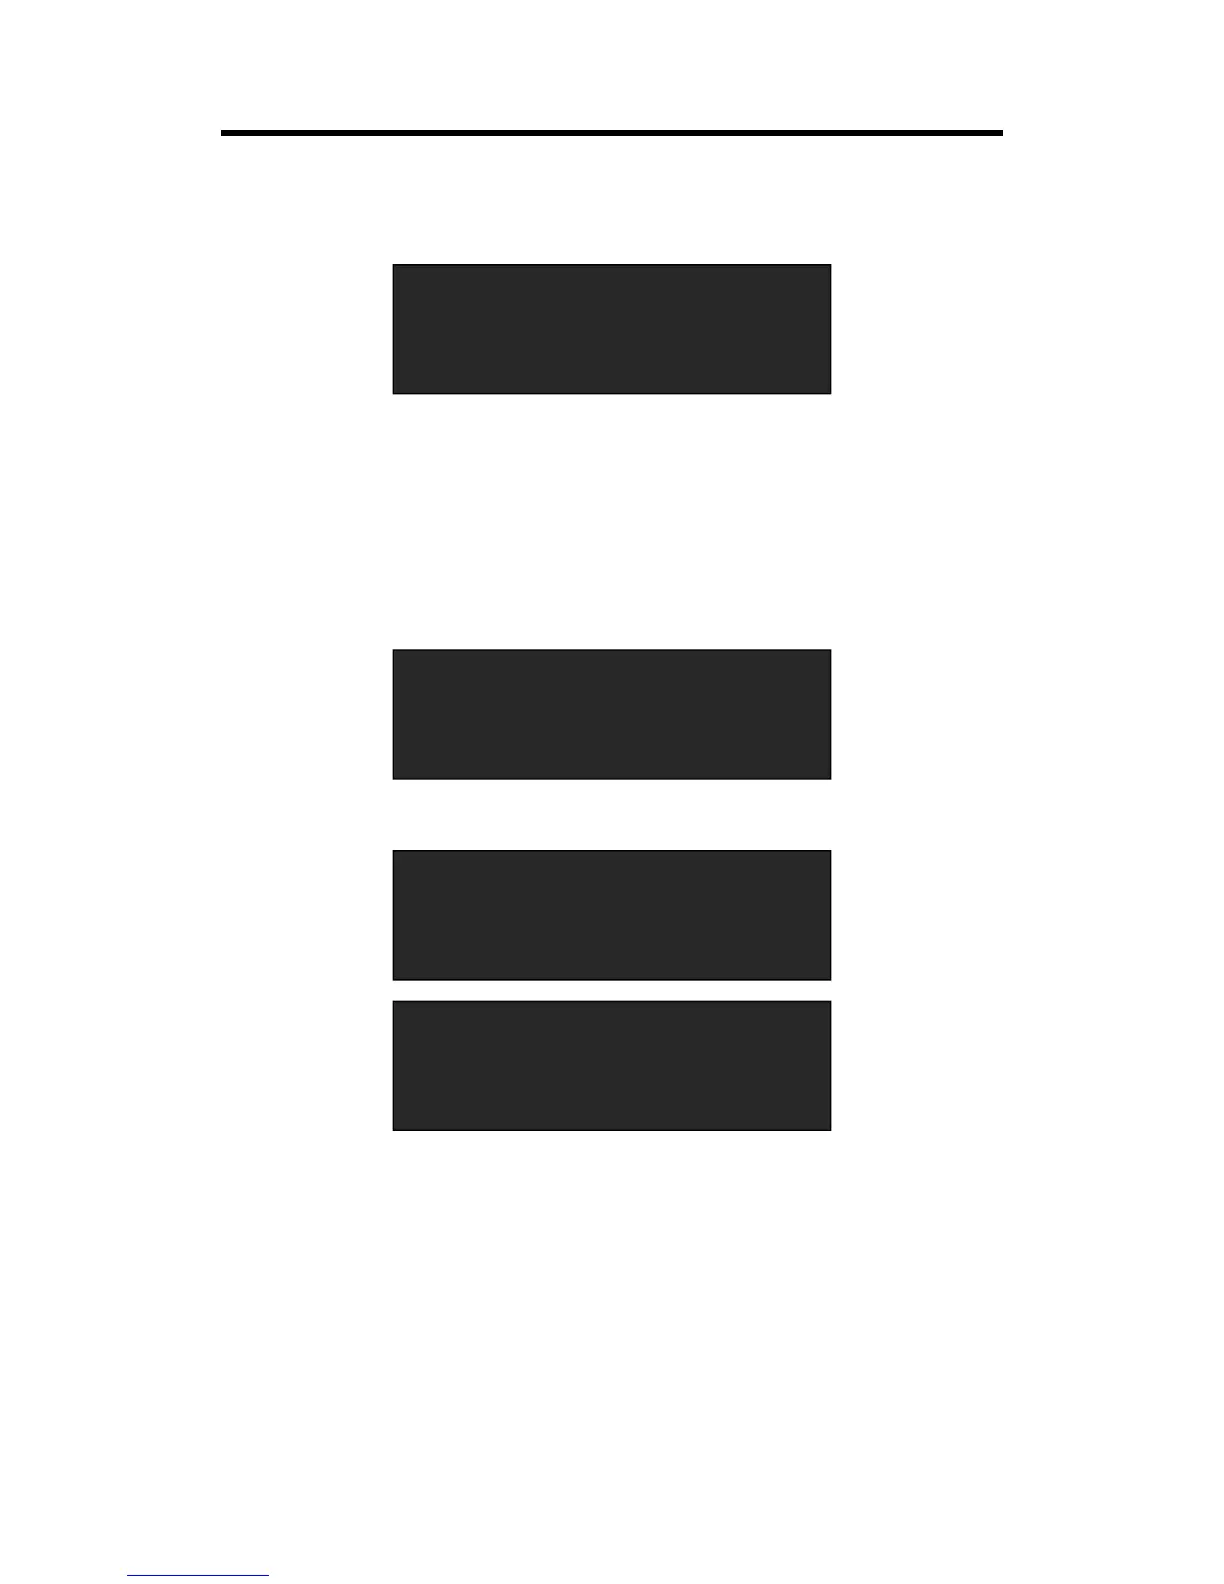
->Image Select Mode 1
Image 1 Source DVI1
Width 1300
Height 1080
->H Pos 0
V Pos 0
EDID >>
Reset Parameters
5. After the digital, push the knob will add @, means before the @ is the vertical size, and after
the @ is the refresh rate. Only digital 50 or digital 60 supports for the refresh rate. Use the digital
buttons to finish the settings, for example, input refresh rate 60:
6. After input all the values, push knob to enable VENUS X1PRO-E to output this resolution.
VENUS X1PRO-E will take 5~10 seconds to enable this output resolution.
3.4.3 Set the Image Select
1. Push the [MENU] button, and enter to menu items, turn the rotary knob, select <Standard>.
2. Push the knob to confirm, select <Image Select>, confirm again, and enter to the menu items
as follows:
Image Select: Total 13 layout Modes, These Modes mean each output port supports:
(1) Single image, PIP, three images or four images and can be quickly layout on 1920*1080 LED
(2) Setting image position and size as needed.
The layout modes and image as follow:
Mode 1 Single Image: Each Output has same single image.