L
larry29Sep 3, 2025
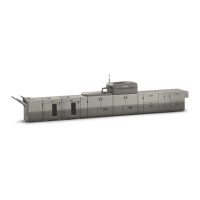
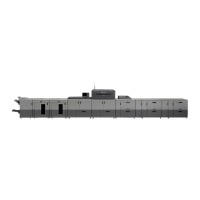
Why does my Ricoh Pro C9210 Printer turn off automatically?
- JJoel BensonSep 3, 2025
If your Ricoh Printer turns off automatically, the Weekly Timer setting may be set to [Main Power Off]. Change the Weekly Timer setting.
Why does my Ricoh Pro C9210 Printer turn off automatically?
If your Ricoh Printer turns off automatically, the Weekly Timer setting may be set to [Main Power Off]. Change the Weekly Timer setting.
What to do if Ricoh Pro C9210 error message persists after closing the cover?
If an error message persists on your Ricoh Printer even after closing the indicated cover, one or more covers that are not indicated may still be open. Close all the covers of the machine.
What to do if Ricoh Printer error message persists after removing jammed paper?
If an error message remains on your Ricoh Printer even after removing misfed paper, it's possible that paper is still jammed in the tray. Remove the jammed paper by following the procedures displayed on the control panel.
What to do if an error has occurred on Ricoh Pro C9210 Printer?
If an error has occurred on your Ricoh Printer, and an item with the status "Error Occurred" is displayed on the [Check Status] screen, press [Check], read the displayed message, and then take the appropriate action.
How to address the [Possible False Detection] icon on Ricoh Printer's Image Quality Monitor console?
If the [Possible False Detection] icon appears on the Image Quality Monitor console of your Ricoh printer, add inspection patterns and print a copy.
What to do if my Ricoh Printer prompts to clean the line sensor?
If your Ricoh printer prompts you to clean the line sensor, perform the cleaning. Then, print a copy. If the problem persists after cleaning the line sensor, clean the contact glass and print a copy again.
How to fix Ricoh Pro C9210 Printer Image Quality Monitor Console when it does not appear?
If the Image Quality Monitor Console does not appear for your Ricoh printer, check if the printer is switched on. If the printer is on, the IP address entered in the browser may be incorrect. If you have forgotten the IP address, contact your service representative.
What to do if Ricoh Pro C9210 Printer detects print defects erroneously with decurled paper?
If your Ricoh printer erroneously detects print defects when using decurled paper, try the following: * Decrease the values in [Adjust Paper Curl] in the advanced settings for custom paper adjustment and [Correct Output Paper Curl] in Adjustment Settings for Operators. * Load paper on the paper tray faced up and set [Adjust Paper Curl (Fusing)] in the advanced settings for custom paper adjustment to off. * Change the orientation of the printed copies from faced down to faced up. * Set [Threshold Settings] [Non-detection range] for the trailing edge of the paper (B) to 60.0 mm (2.4 inches).
How to turn on Ricoh Pro C9210 Printer?
If your Ricoh Printer does not turn on, the AC power switch may not be turned on. Turn on the AC power switch.
How to prevent misfeeds when printing envelopes on Ricoh Pro C9210?
To prevent misfeeds when printing envelopes on your Ricoh Printer, make sure you fully flatten curled envelopes before you load them. Do not stack envelopes over the specified limit for the paper tray. If misfeeds still occur after the envelopes have been flattened, load envelopes on the tray one at a time and print them individually.
| Print Technology | Laser |
|---|---|
| Maximum Print Resolution | 1200 x 4800 dpi |
| Monthly Duty Cycle | 1, 500, 000 pages |
| Dimensions (W x D x H) | 1, 020 x 1, 024 x 1, 195 mm |
| Weight | 1, 050 kg |
| Print Resolution | 1200 x 4800 dpi |
| Operating System Compatibility | Windows, macOS, Linux |
| Network Connectivity | Ethernet, Wi-Fi |
| Connectivity | USB, Ethernet |
| Paper Weight | 52-300 gsm |
| Maximum Paper Size | 330 x 487.7 mm |
| Duplex Printing | Standard |
| Supported Media Sizes | A3, A4, A5, B4, B5, Legal, Letter, Executive |
| Supported Media Types | Plain, Coated |
| Warm-up Time | Less than 15 seconds |
| First Print Out Time | Less than 5.5 seconds |
| Print Speed (A4) | Simplex: 115 ppm (colour), 135 ppm (black & white) Duplex: 115 ppm (colour), 135 ppm (black & white) |
| Print Speed | Simplex: 115 ppm (colour), 135 ppm (black & white) Duplex: 115 ppm (colour), 135 ppm (black & white) |
| Paper Capacity | Standard: 3, 300 sheets Maximum: 16, 200 sheets |
Explains how to specify and register custom paper settings for printing.
Outlines the steps for registering custom paper, with or without the master library.
Details the operations within the Custom Paper Management screen.
Describes adding a new custom paper type to the list.
Explains importing custom paper data from the master library or SD card.
Provides instructions for registering custom paper from master library or SD card.
Details the steps to select paper for import from external sources.
Explains manual registration when paper is not in the master library.
Guides selection of paper type from the master library for custom registration.
Details manual input of paper properties for custom registration.
Explains using the Media ID Unit for paper scanning and registration.
Guides paper import from master library using the Media ID Unit.
Details creating new custom papers using the Media ID Unit.
Explains importing master library data via Media ID Unit.
Explains how to change settings of existing custom papers.
Details various parameters for custom paper configuration.
Covers specifying the paper type for custom papers.
Explains automatic adjustment of print position for custom paper.
Guides manual adjustment of print position on custom paper.
Explains how to adjust image position for consistent results on both sides.
Guides connecting to a remote computer using RDP.
Details connecting to a DFE remotely from the control panel.
Describes procedures for remote connection via control panel.
Step-by-step for remote PC connection from the control panel.
Guides connecting to a DFE remotely from the control panel.
Explains setting up remote desktop connection destinations.
Details how to configure the remote desktop and DFE connection apps.
Explains enabling remote control via PC or tablet.
Details how to respond to remote operation requests from administrators.
Explains the procedure to end an active remote operation session.
Guides enabling remote panel operation and setting passwords.
Identifies and explains the functions of the machine's control panel elements.
Details the procedures for powering the machine on and off.
Explains the steps to turn on the main power switch.
Provides instructions for safely turning off the main power.
Displays connection status for remote operation.
Explains the Tray Paper Settings screen for configuring paper settings.
Explains the login process when authentication screens are displayed.
Details login procedures for various authentication methods.
Explains logging in using a user code via the control panel.
Guides logging in via the control panel using user name and password.
Explains how to log out of the machine from the control panel.
Details logging in by waving an IC card for Quick Card Authentication.
Describes logging in with a pre-registered IC card.
Explains registering and logging in with a new IC card.
Explains logging out using an IC card.
Guides logging into the MFP using a smart device via NFC/Bluetooth.
Explains logging out of the MFP using a smart device.
Guides logging into the machine via Web Image Monitor.
Explains how to log out from the machine via Web Image Monitor.
Provides guidelines for changing login passwords.
Details the criteria for creating strong passwords.
Guides changing the login password via the machine's control panel.
Explains changing login passwords via Web Image Monitor.
Provides general instructions and precautions for loading paper.
Lists important safety and handling precautions for loading paper.
Details how to load paper into standard and wide capacity trays.
Explains how to load paper into the multi bypass tray.
Explains how to change paper size settings for trays.
Lists important precautions before changing paper size settings.
Details the process of changing paper size in trays.
Explains manually setting paper size when auto-detection fails.
Guides specifying custom paper dimensions for trays.
Lists types of paper that should not be used to prevent damage or faults.
Lists carbon paper as unusable due to potential machine issues.
Warns against using conductive paper to avoid risks.
Lists paper with perforations as unusable.
Lists hemmed-edge paper as unusable.
Lists window envelopes as unusable.
Lists paper types that can cause misfeeds.
Explains how to set paper size and type for specific trays.
Guides setting custom paper parameters like size, type, and weight.
Details manual input for paper size and type settings.
Explains paper tray settings for trays 1-8, bypass tray, and interposers.
Lists available paper weight settings for Trays 3-8.
Explains the duplex setting for Trays 3-8.
Details paper sizes for the multi bypass tray, including custom size.
Introduces the Adjustment Settings for Operators screen and its layout.
Guides how to access the adjustment settings menu.
Explains common operations like value setting and item selection.
Details how to adjust values using buttons or keypad.
Lists and describes functions related to Image Position, Image Quality, and Paper Feed/Output.
Details settings for adjusting the image position.
Covers settings for executing image quality adjustments.
Adjusts paper curl for 1-sided face-up output.
Adjusts paper curl for 1-sided face-down output.
Adjusts paper curl for 2-sided output.
Corrects image position and skew across the feeding direction.
Refers to settings for finisher operations like stapling.
Adjusts vertical staple position on the edge of the sheet.
Adjusts vertical staple position for dual stapling.
Adjusts horizontal staple position.
Adjusts width of the Staple Jogger for alignment.
Adjusts Tip Stopper movement for stapling applied at an angle.
Adjusts horizontal position of booklet staples.
Adjusts horizontal position of folding for booklets.
Adjusts Staple Jogger width for booklet alignment.
Specifies the number of booklet folds to perform.
Adjusts Tip Stopper movement for booklet binding.
Refers to settings for fold unit operations.
Adjusts the fold position of the end segment in Z-folding.
Adjusts the overall fold size of Z-foldout sheets.
Adjusts fold position for 1-sheet half folds.
Adjusts fold position for multi-sheet half folds.
Adjusts fold position of bottom segment for letter fold-out (1 sheet).
Adjusts fold position of bottom segment for letter fold-out (multi-sheet).
Adjusts overall fold size for letter fold-out (1 sheet).
Adjusts overall fold size for letter fold-out (multi-sheet).
Adjusts fold position of bottom segment for letter fold-in (1 sheet).
Adjusts fold position of bottom segment for letter fold-in (multi-sheet).
Adjusts inner fold size for letter fold-in (1 sheet).
Adjusts inner fold size for letter fold-in (multi-sheet).
Adjusts fold position of bottom segment 1 for double parallel folds.
Adjusts fold position of bottom segment 2 for double parallel folds.
Adjusts fold position of bottom segment 1 for gatefold sheets.
Adjusts fold position of bottom segment 2 for gatefold sheets.
Adjusts fold position of bottom segment 3 for gatefold sheets.
Refers to settings for perfect binder operations.
Adjusts vertical alignment of cover sheets during perfect binding.
Adjusts horizontal alignment of cover sheets during perfect binding.
Squares edges of paper decks after cutting for perfect binding.
Adjusts the amount of binding glue used for perfect binding.
Refers to settings for stacker operations.
Adjusts alignment width in Main Jogger for stacked output.
Adjusts alignment width in Sub Jogger for stacked output.
Adjusts alignment position of Tip Stopper when sheets are ejected on Stacker.
Adjusts alignment width in Main Jogger for 2nd stacker.
Adjusts alignment width in Sub Jogger for 2nd stacker.
Introduces the troubleshooting section for machine problems.
Explains different beep patterns and their causes/meanings.
Explains how to interpret control panel indicators, icons, and messages.
Details the meaning of the Check Status key's indicator lamp.
Explains the meaning of status icons appearing on the control panel.
Guides on understanding and acting on machine messages.
Lists specific status icons and their meanings.
Explains various status icons and their associated procedures.
Explains actions when the Check Status key lamp indicates an issue.
Addresses common issues like the machine not turning on or display issues.
Explains user code restriction issues.
Addresses issues with authentication screens.
Explains persistent error messages after paper removal.
Addresses issues with incorrect paper loading causing reverse side printing.